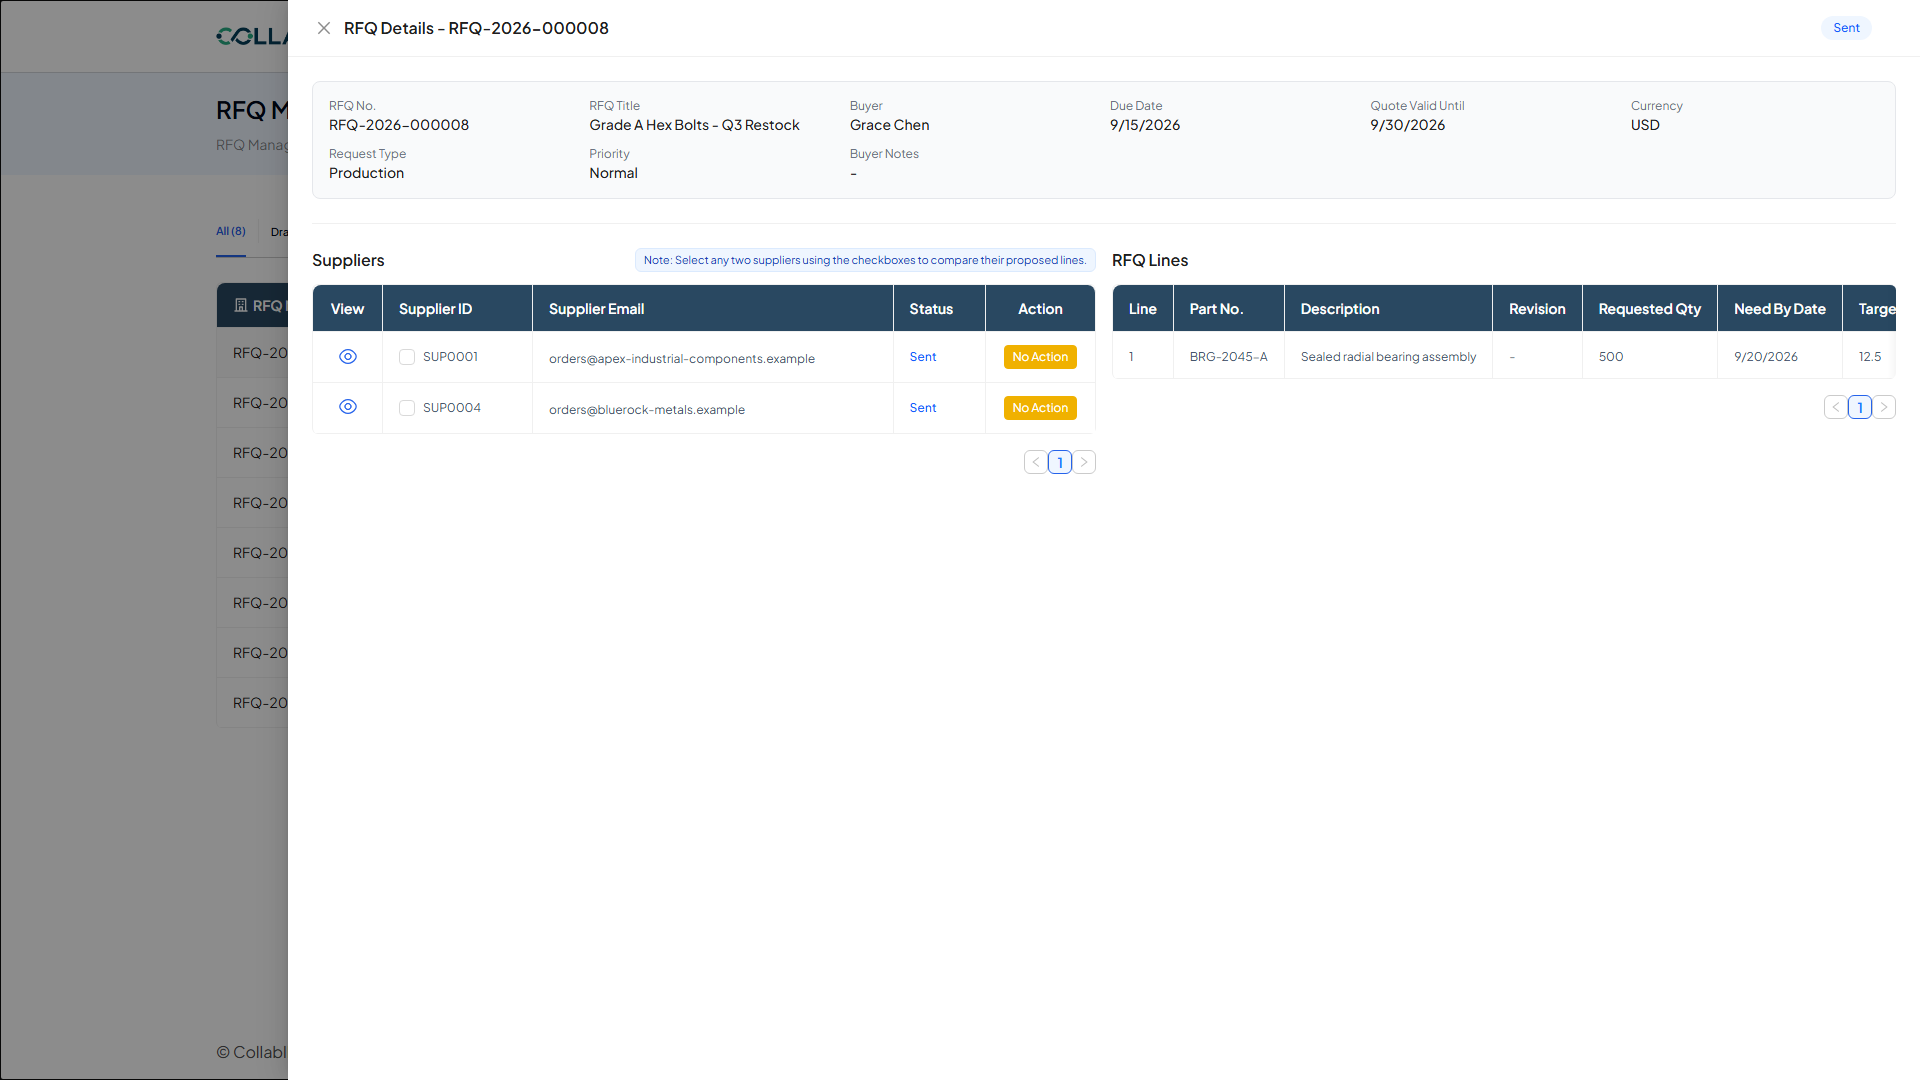
- Step 1 of 30
Open RFQ Management
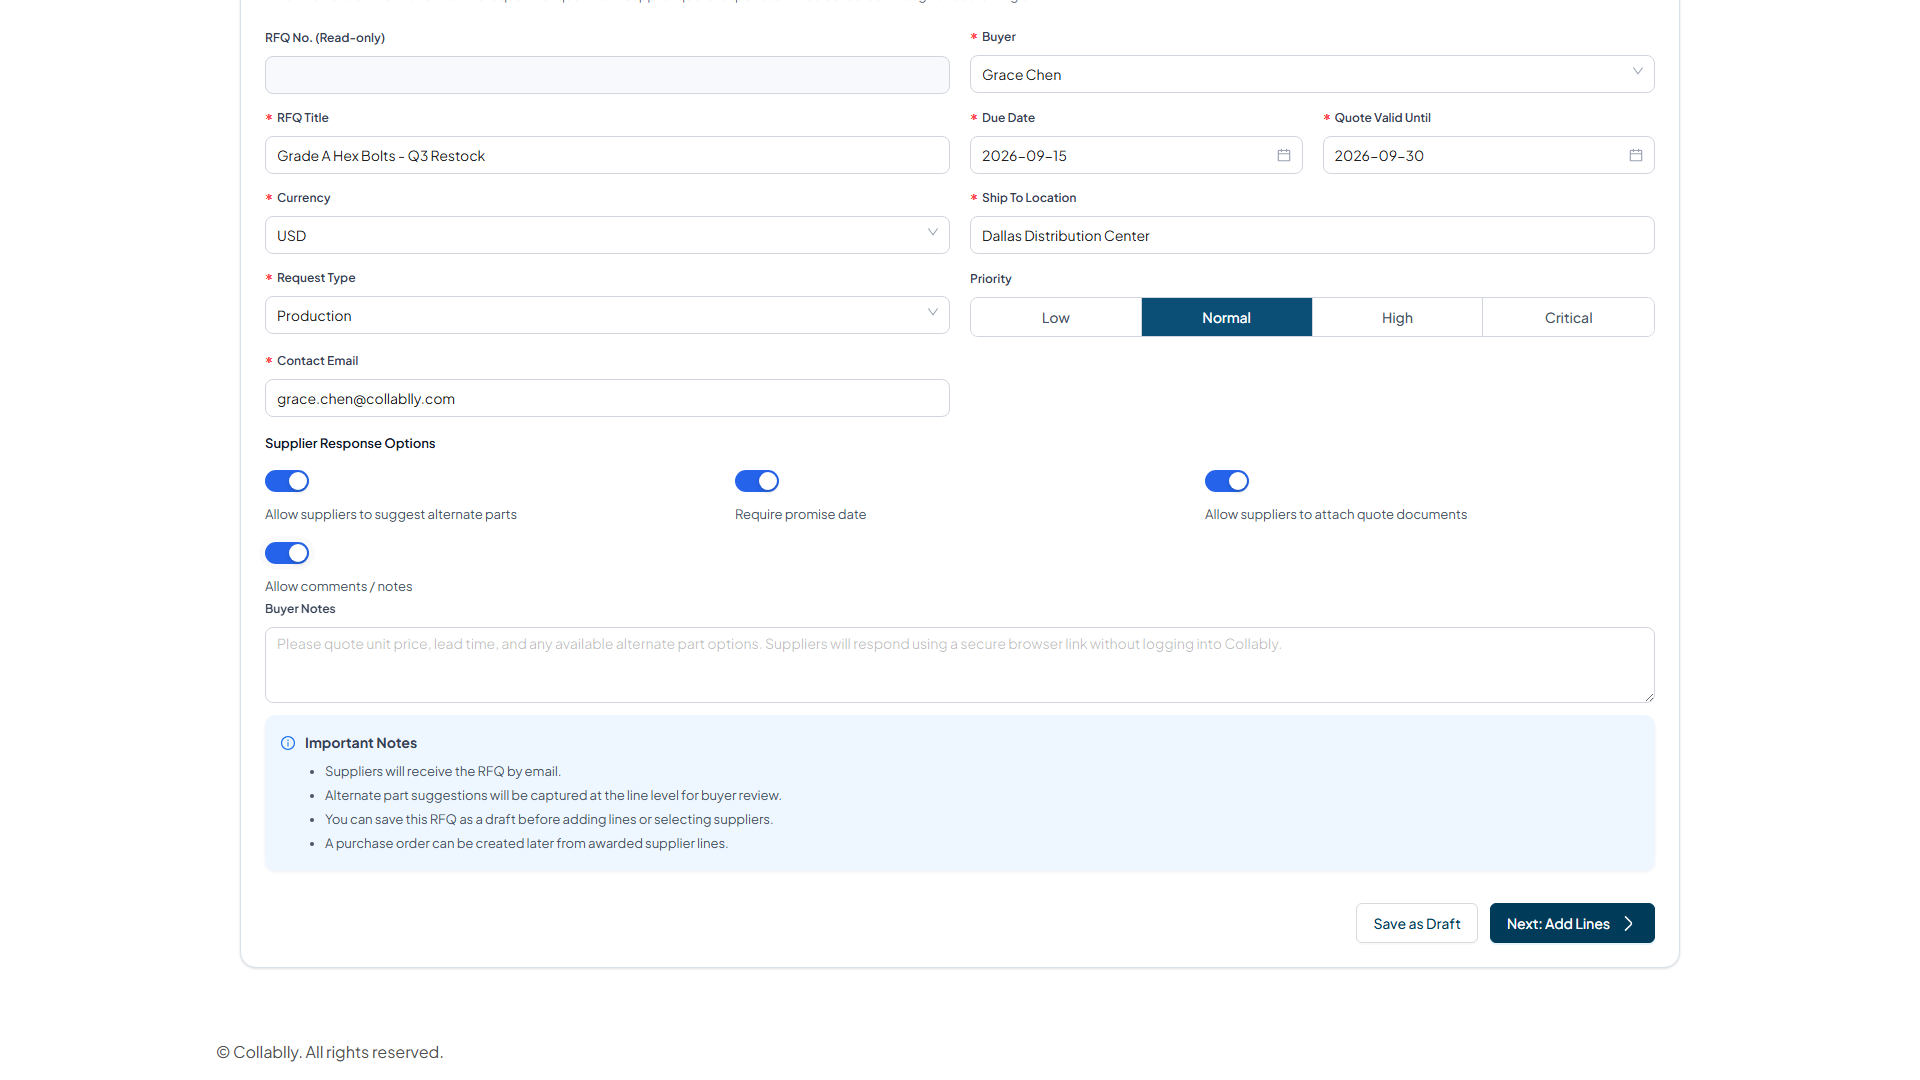
From any screen, open the Procurement menu in the top navigation and select RFQ Management.
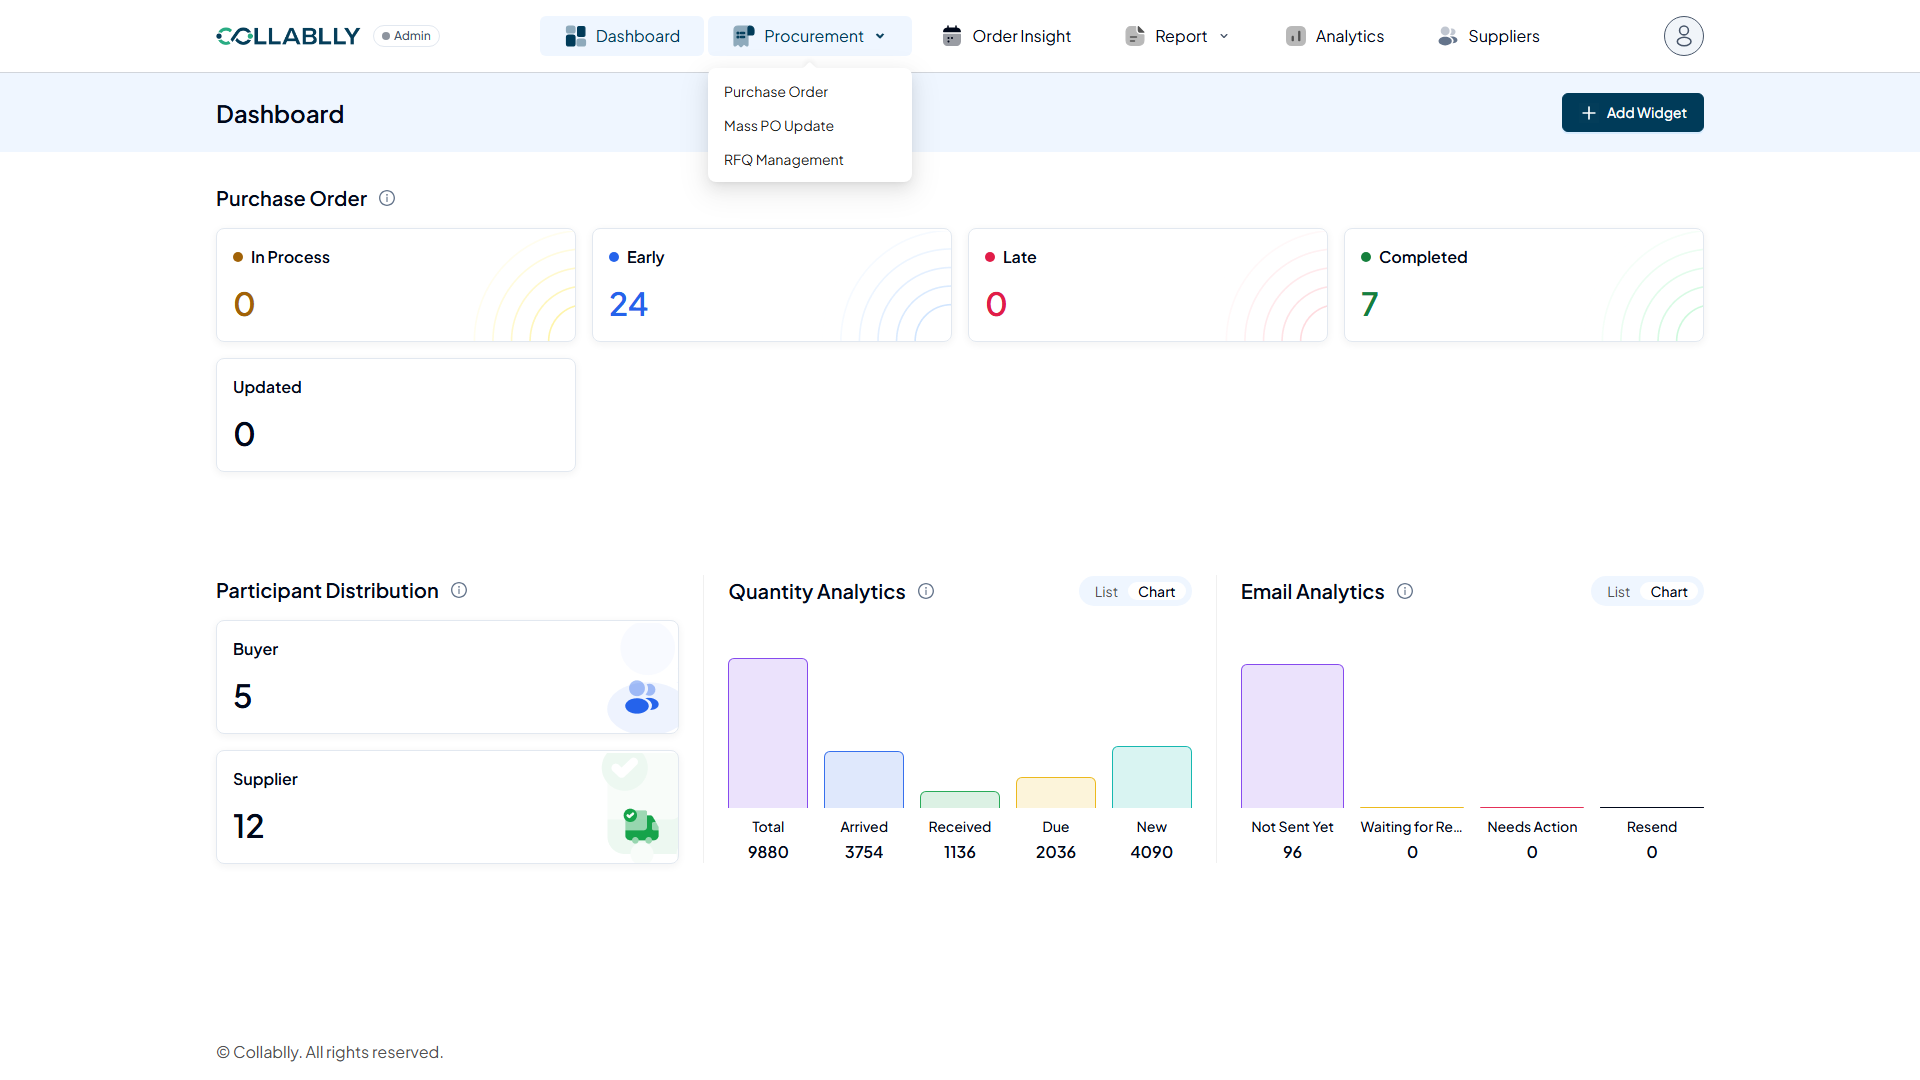
- Step 2 of 30
Start a new RFQ
The RFQ Management screen lists every request for quotation, grouped by status (Draft, Sent, Responses Received, Award Pending, Awarded). Click Create RFQ to start a new one.
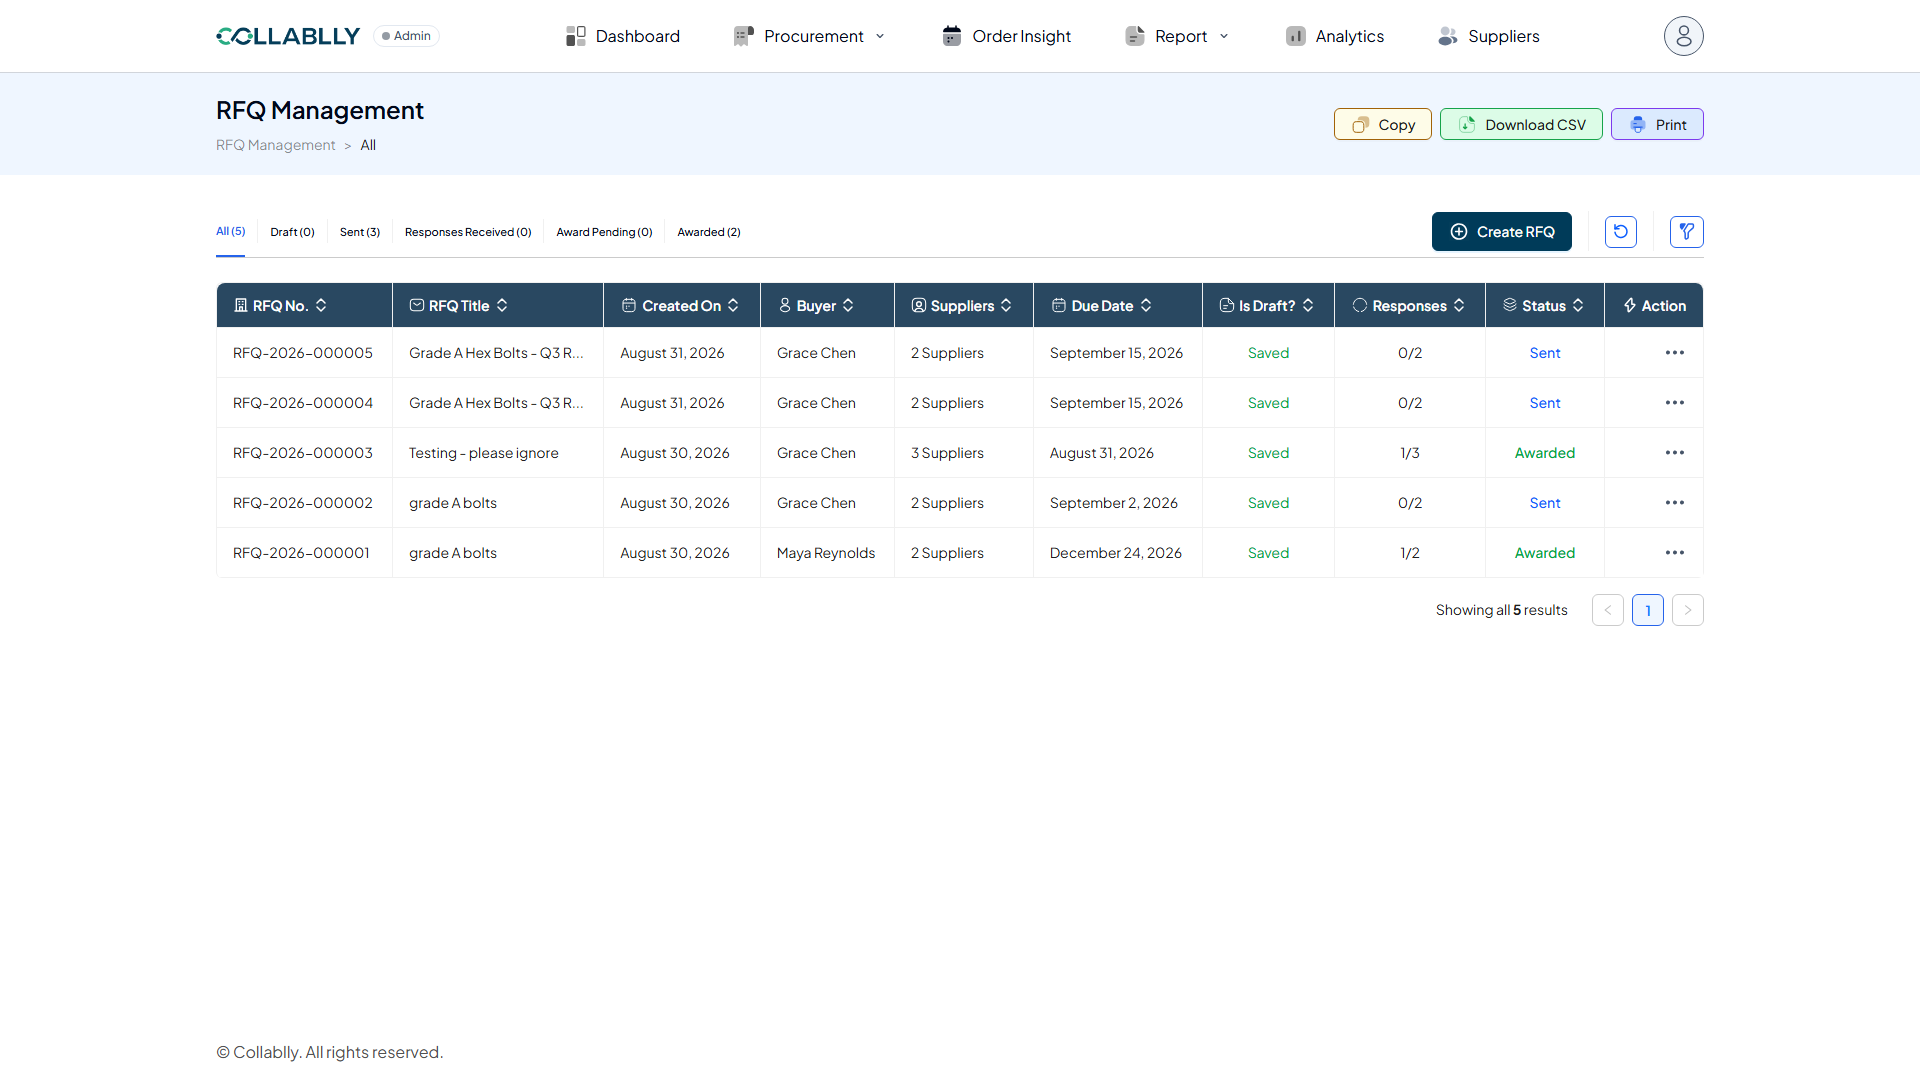
- Step 3 of 30
Select the Buyer
Choose which buyer this RFQ is issued under. This determines who shows as the point of contact internally, and pre-fills the contact email later in this form.
- Step 4 of 30
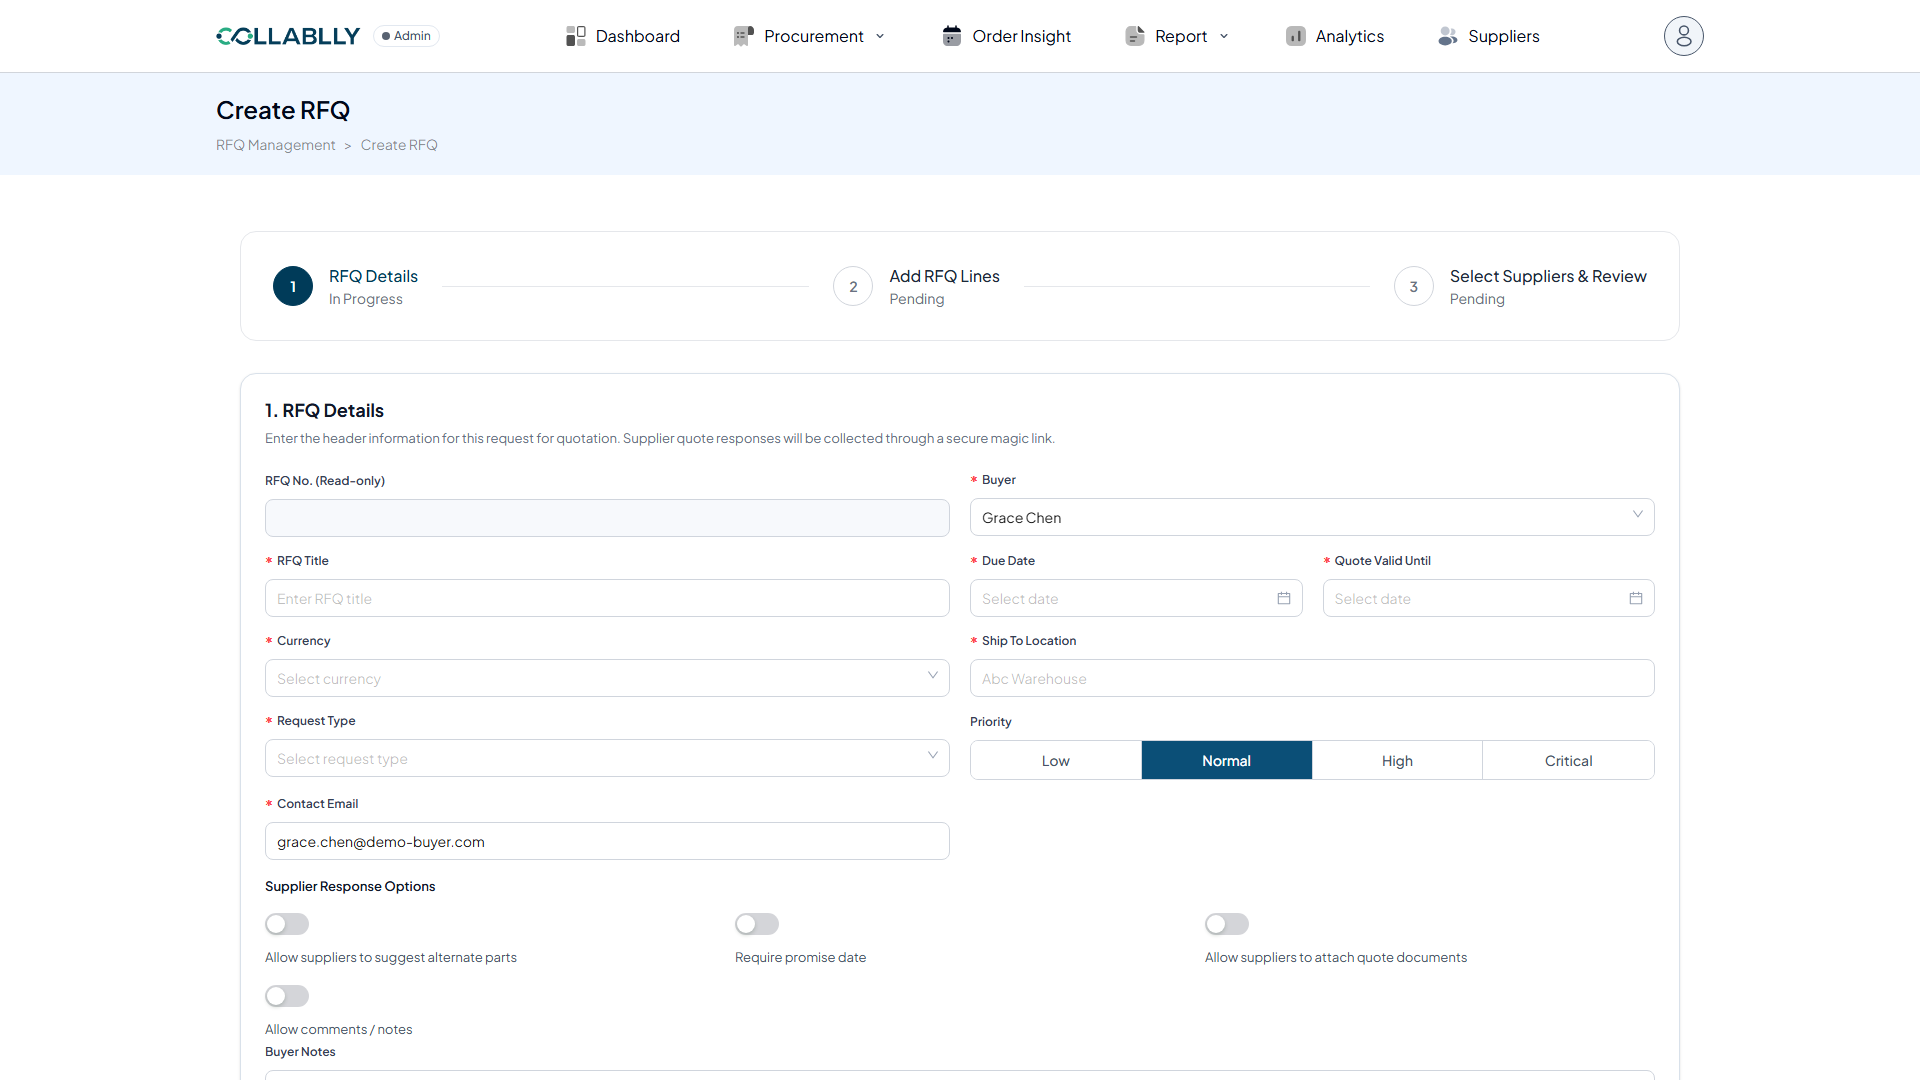
Name the RFQ
Give the RFQ a clear, descriptive title. This is what buyers and suppliers will see in every list and email.
- Step 5 of 30
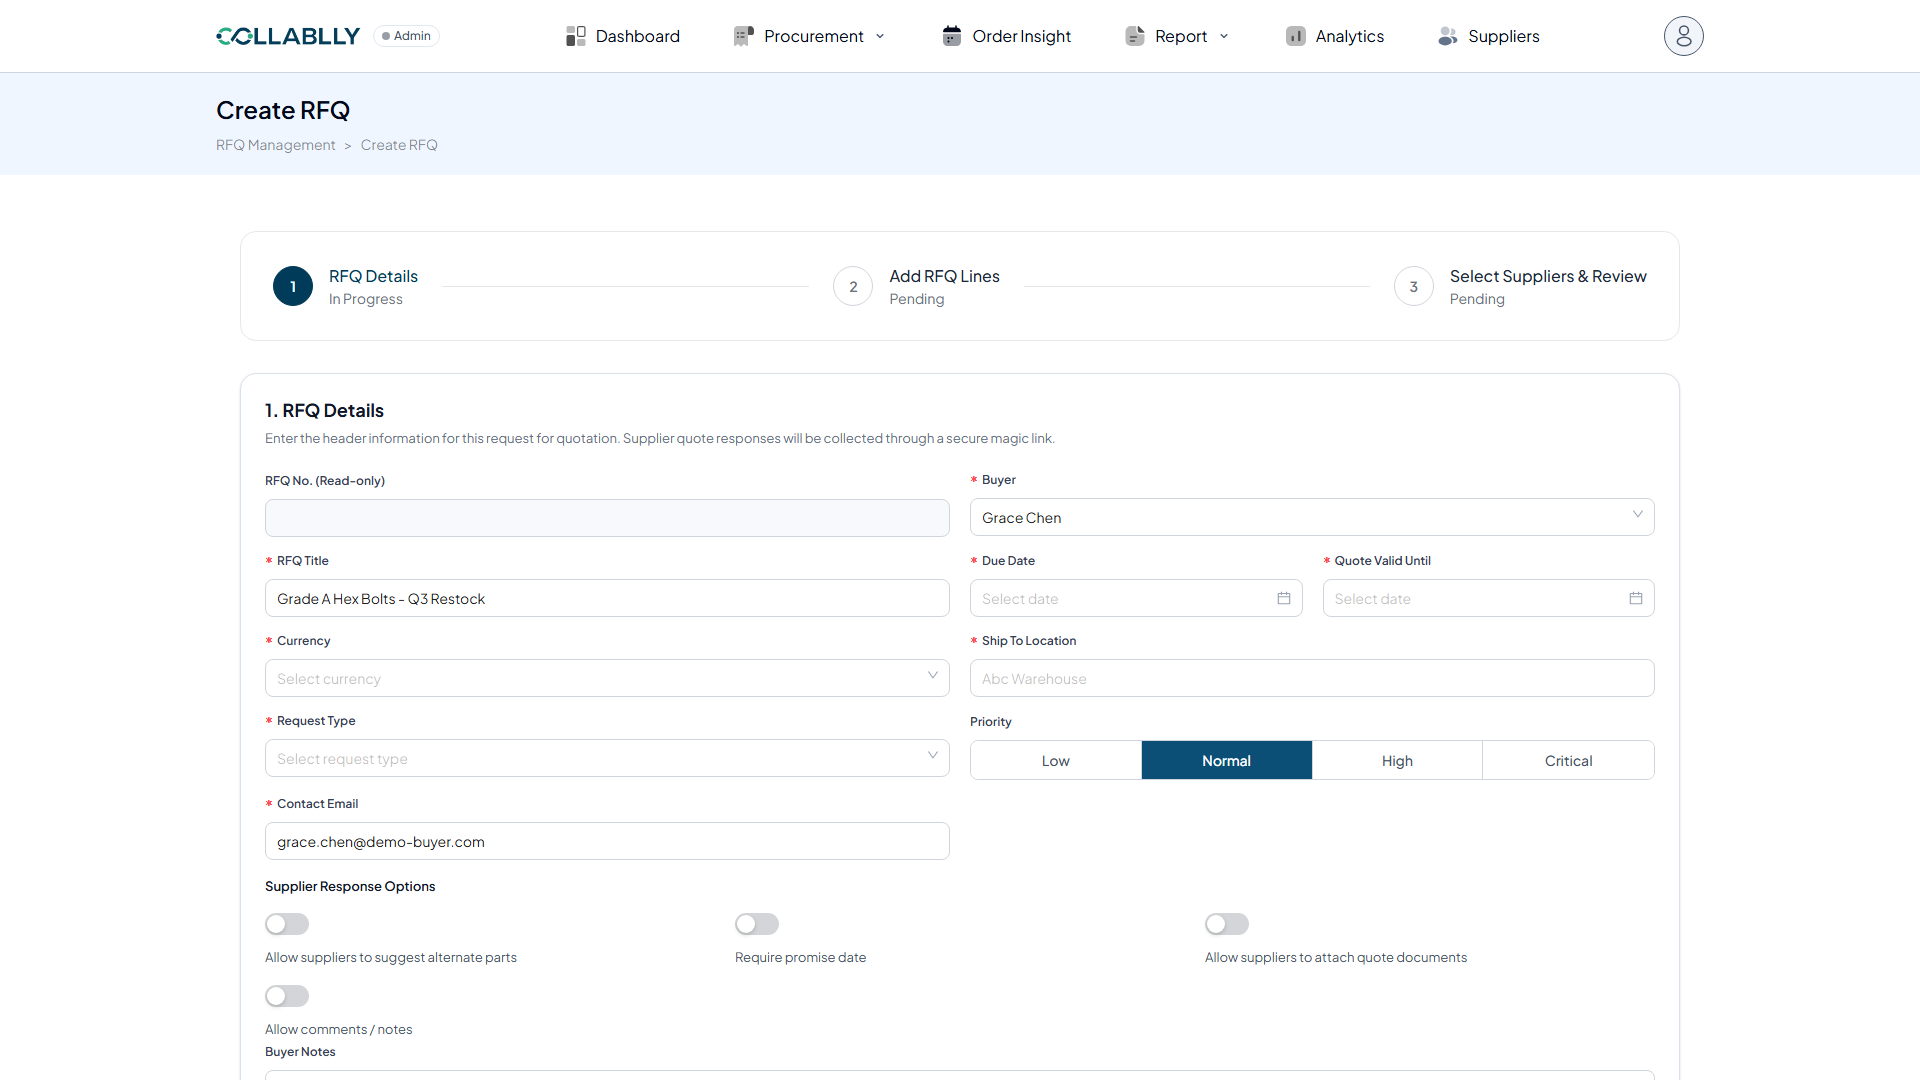
Set the quote Due Date
Pick the date by which suppliers must submit their quotes.
- Step 6 of 30
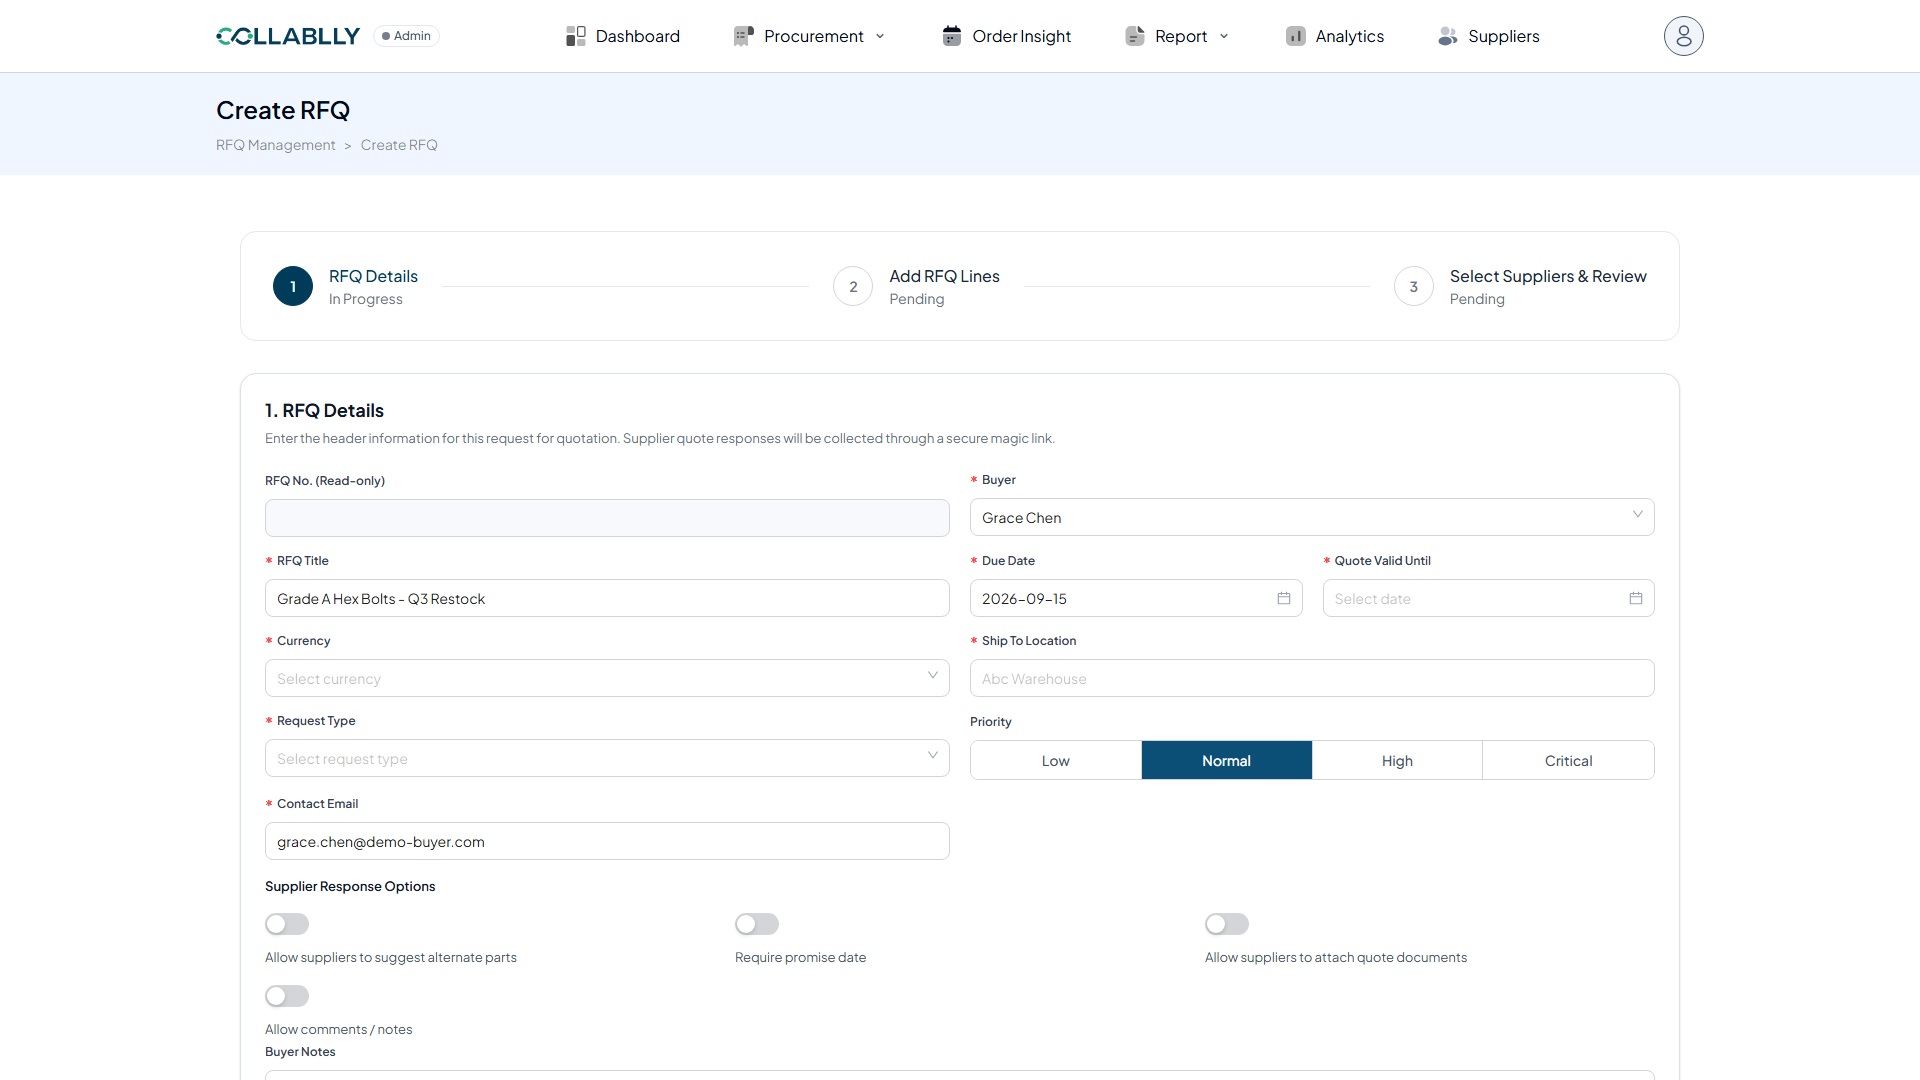
Set Quote Valid Until
Set how long a supplier’s quoted price should remain honored after they respond.
- Step 7 of 30
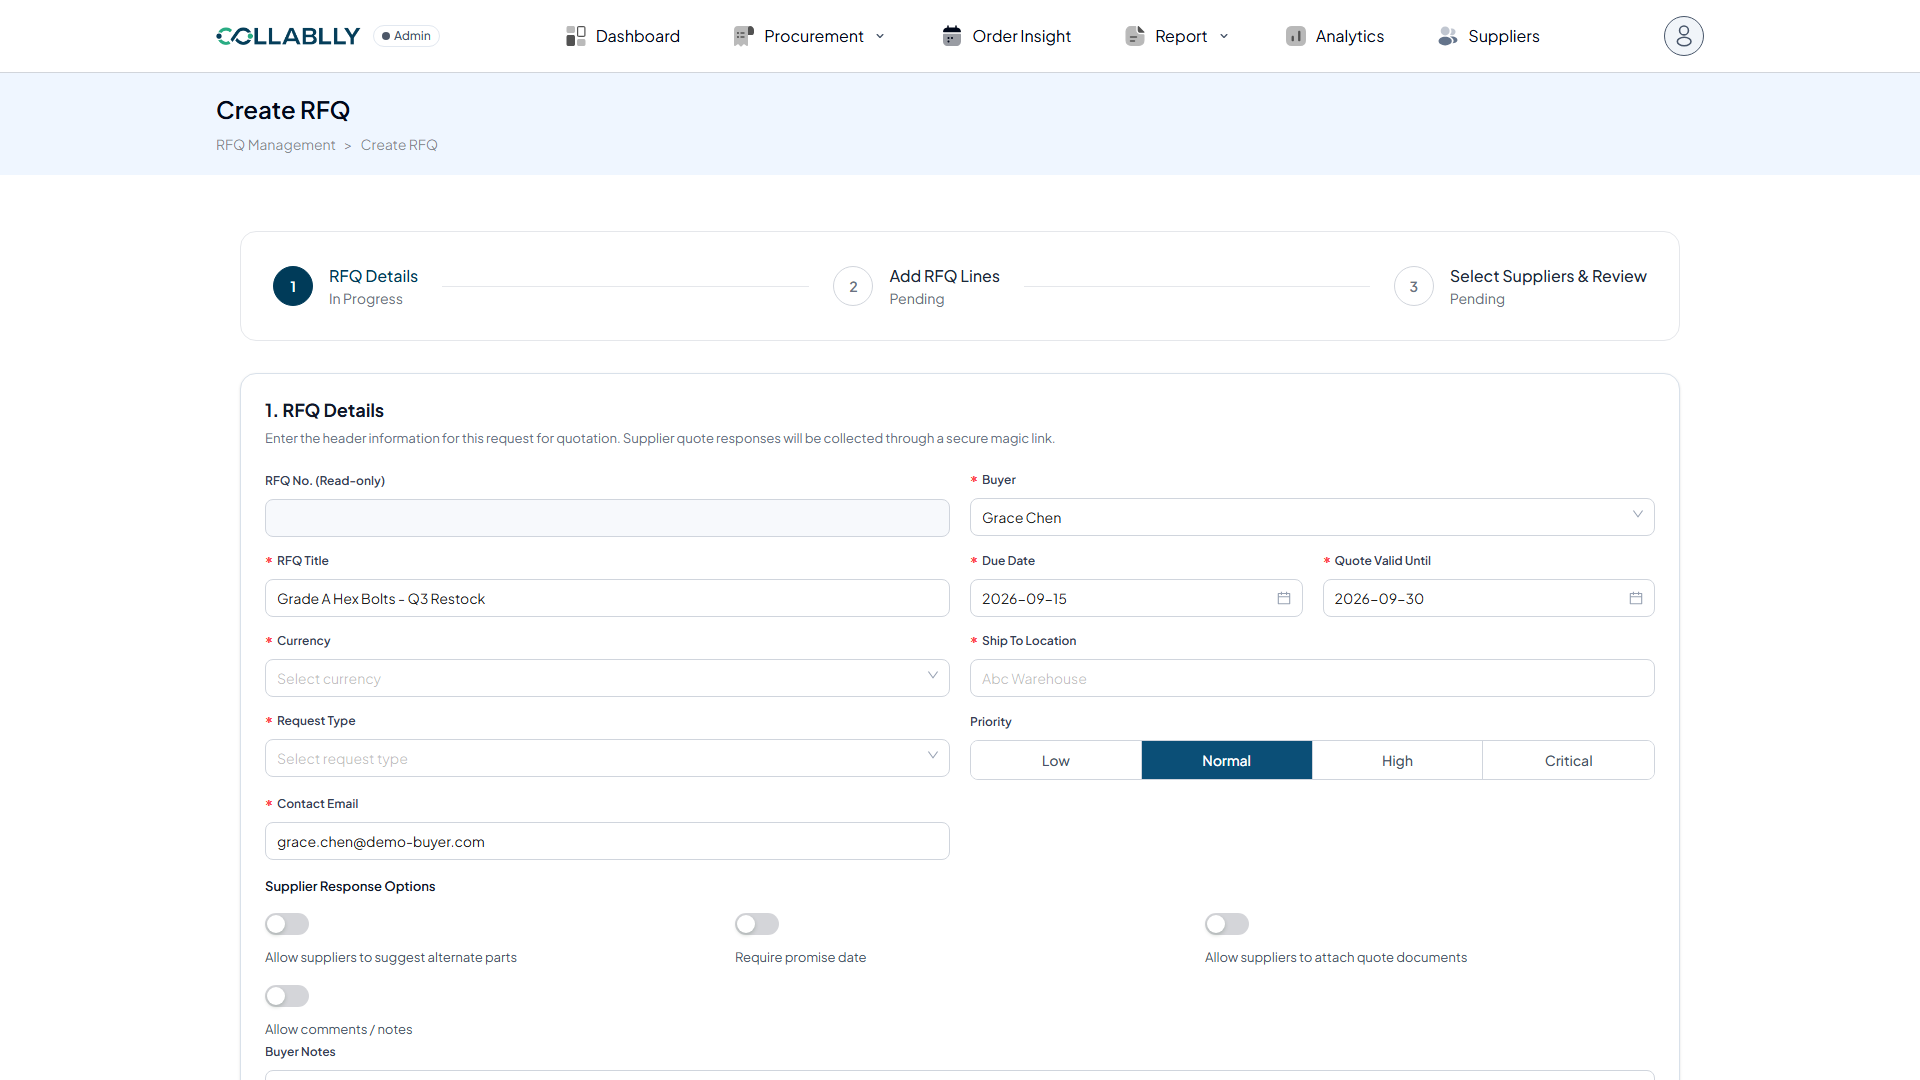
Choose the Currency
Select the currency suppliers should quote in.
- Step 8 of 30
Enter the Ship To Location
Tell suppliers where the material should ultimately be delivered.
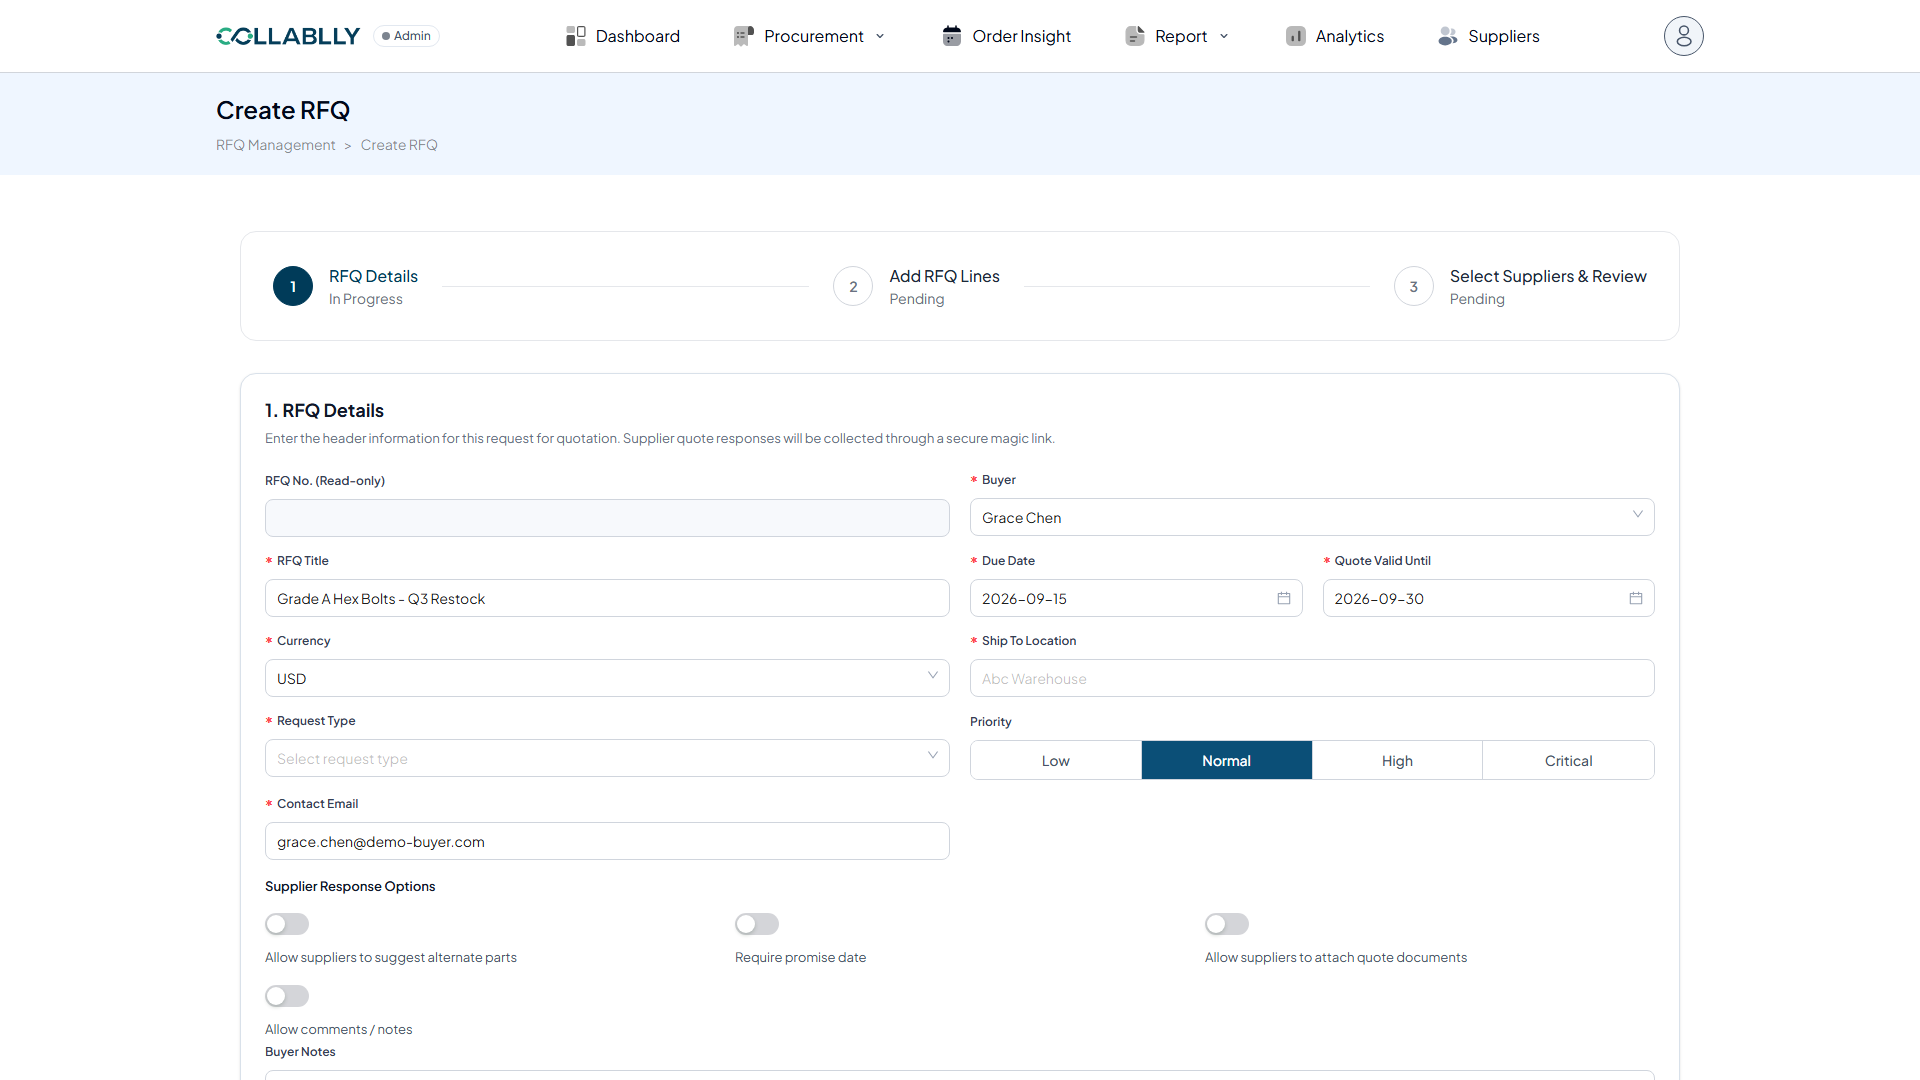
- Step 9 of 30
Select the Request Type
Classify the RFQ (e.g. Production) so it can be filtered and reported on later.
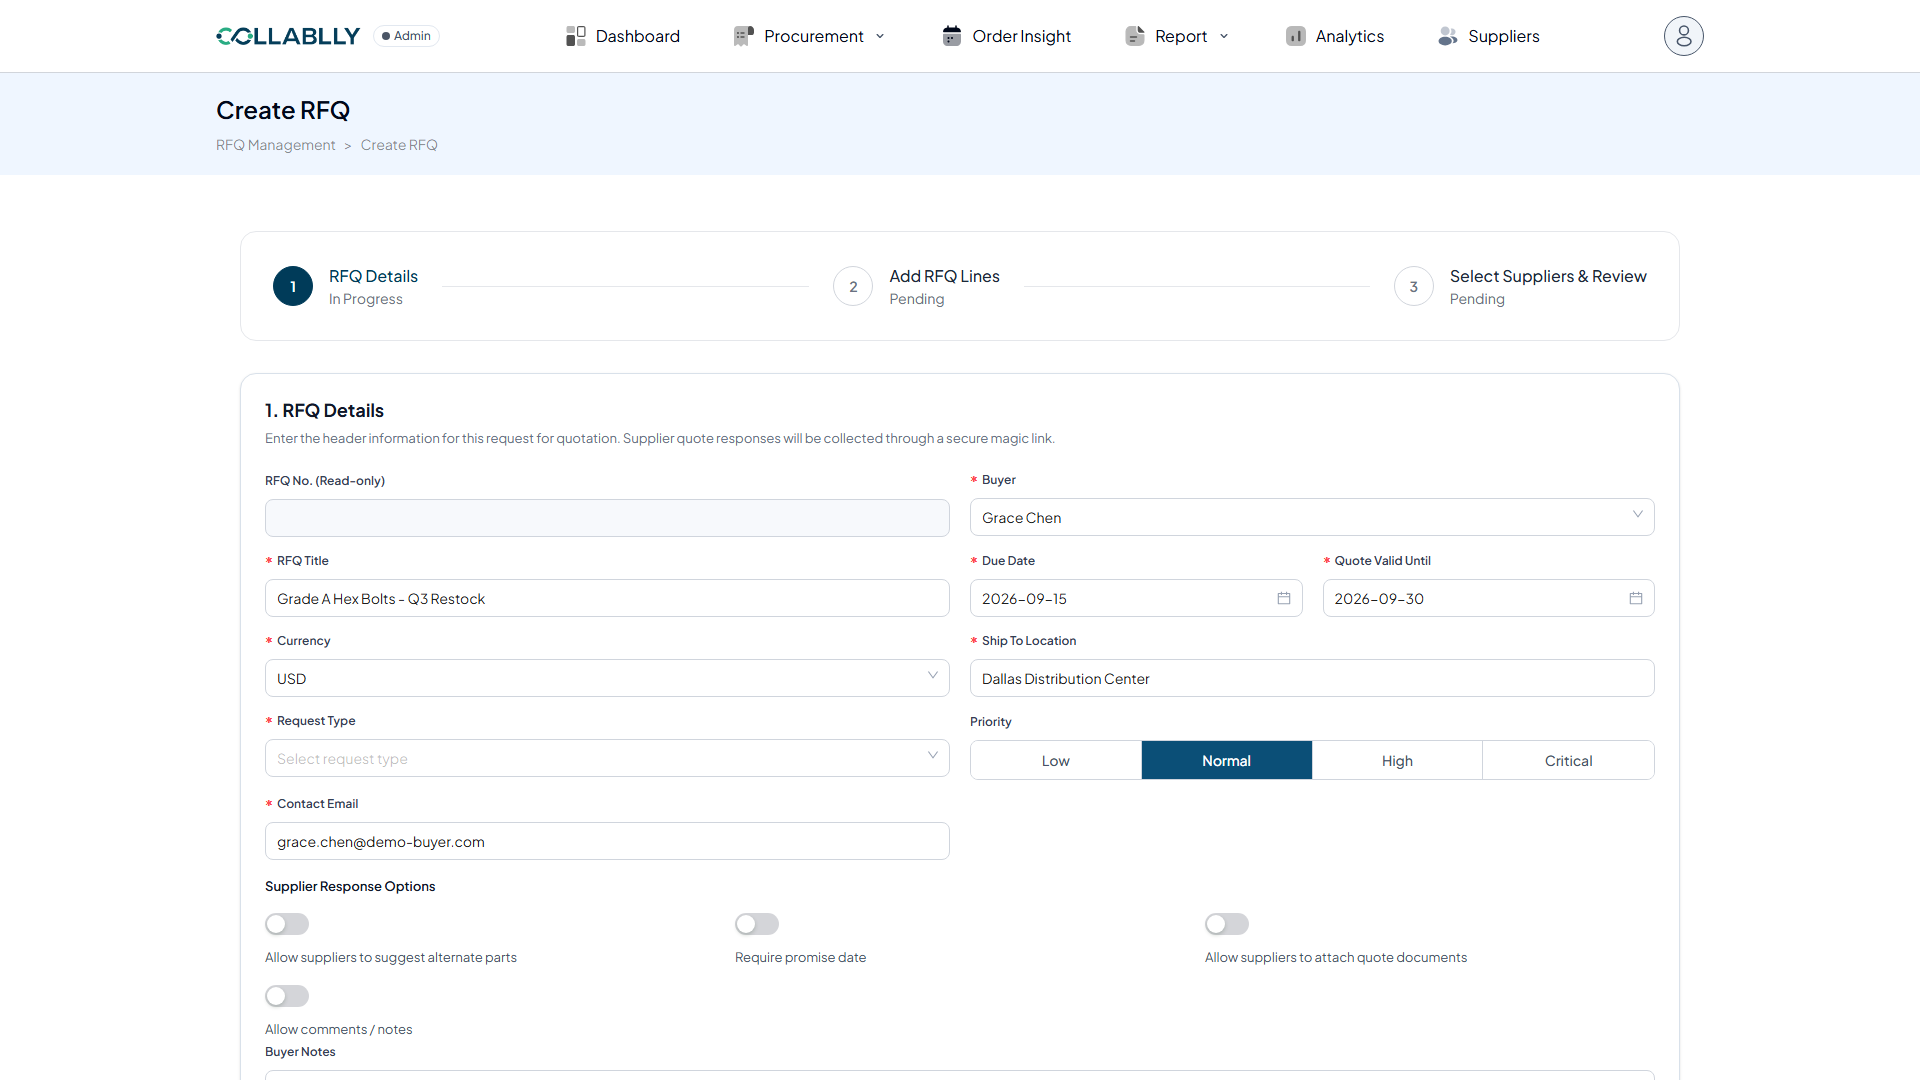
- Step 10 of 30
Confirm the Contact Email
This defaulted from the selected buyer’s record: it’s the reply-to address suppliers see and can reach out to with questions. Edit it if this RFQ needs a different contact.
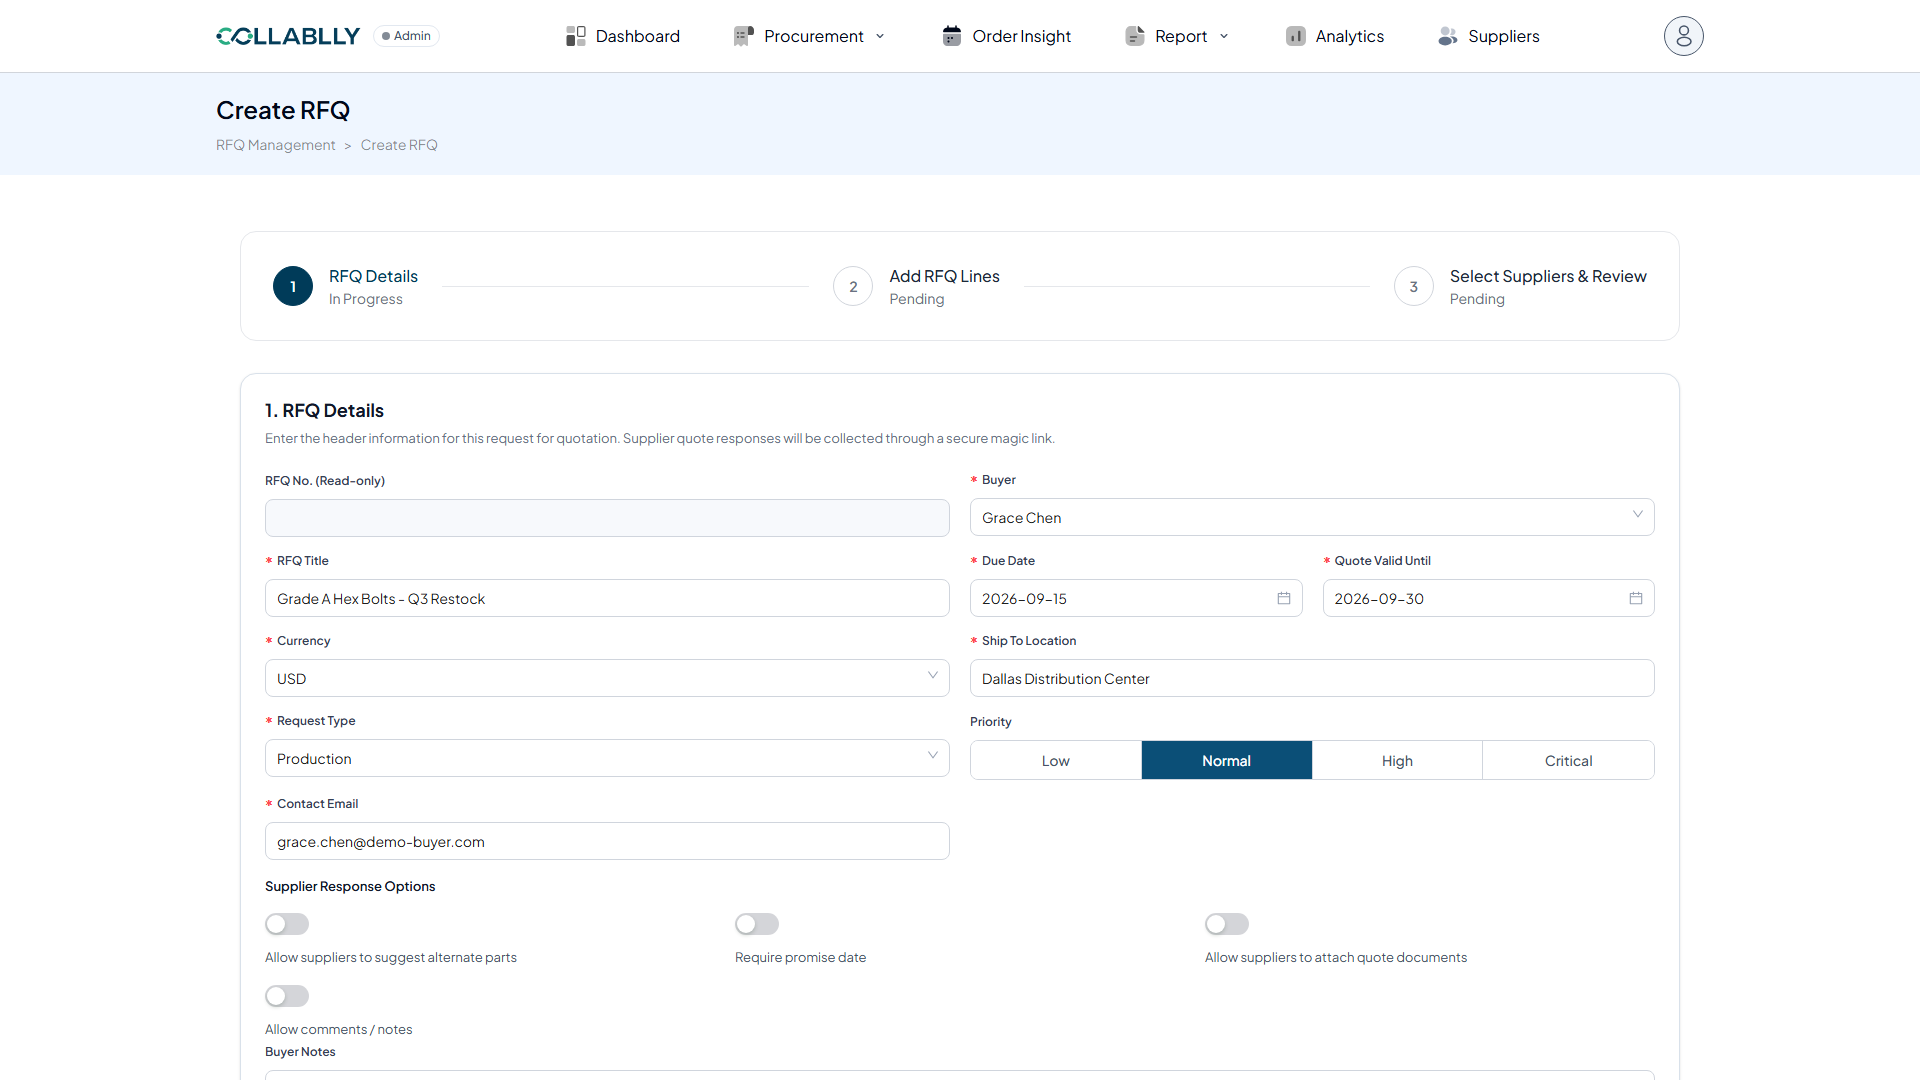
- Step 11 of 30
Set the Priority
Flag how urgent this request is: Low, Normal, High, or Critical. Normal is the default. Reserve High and Critical for shortages that need a supplier’s immediate attention.
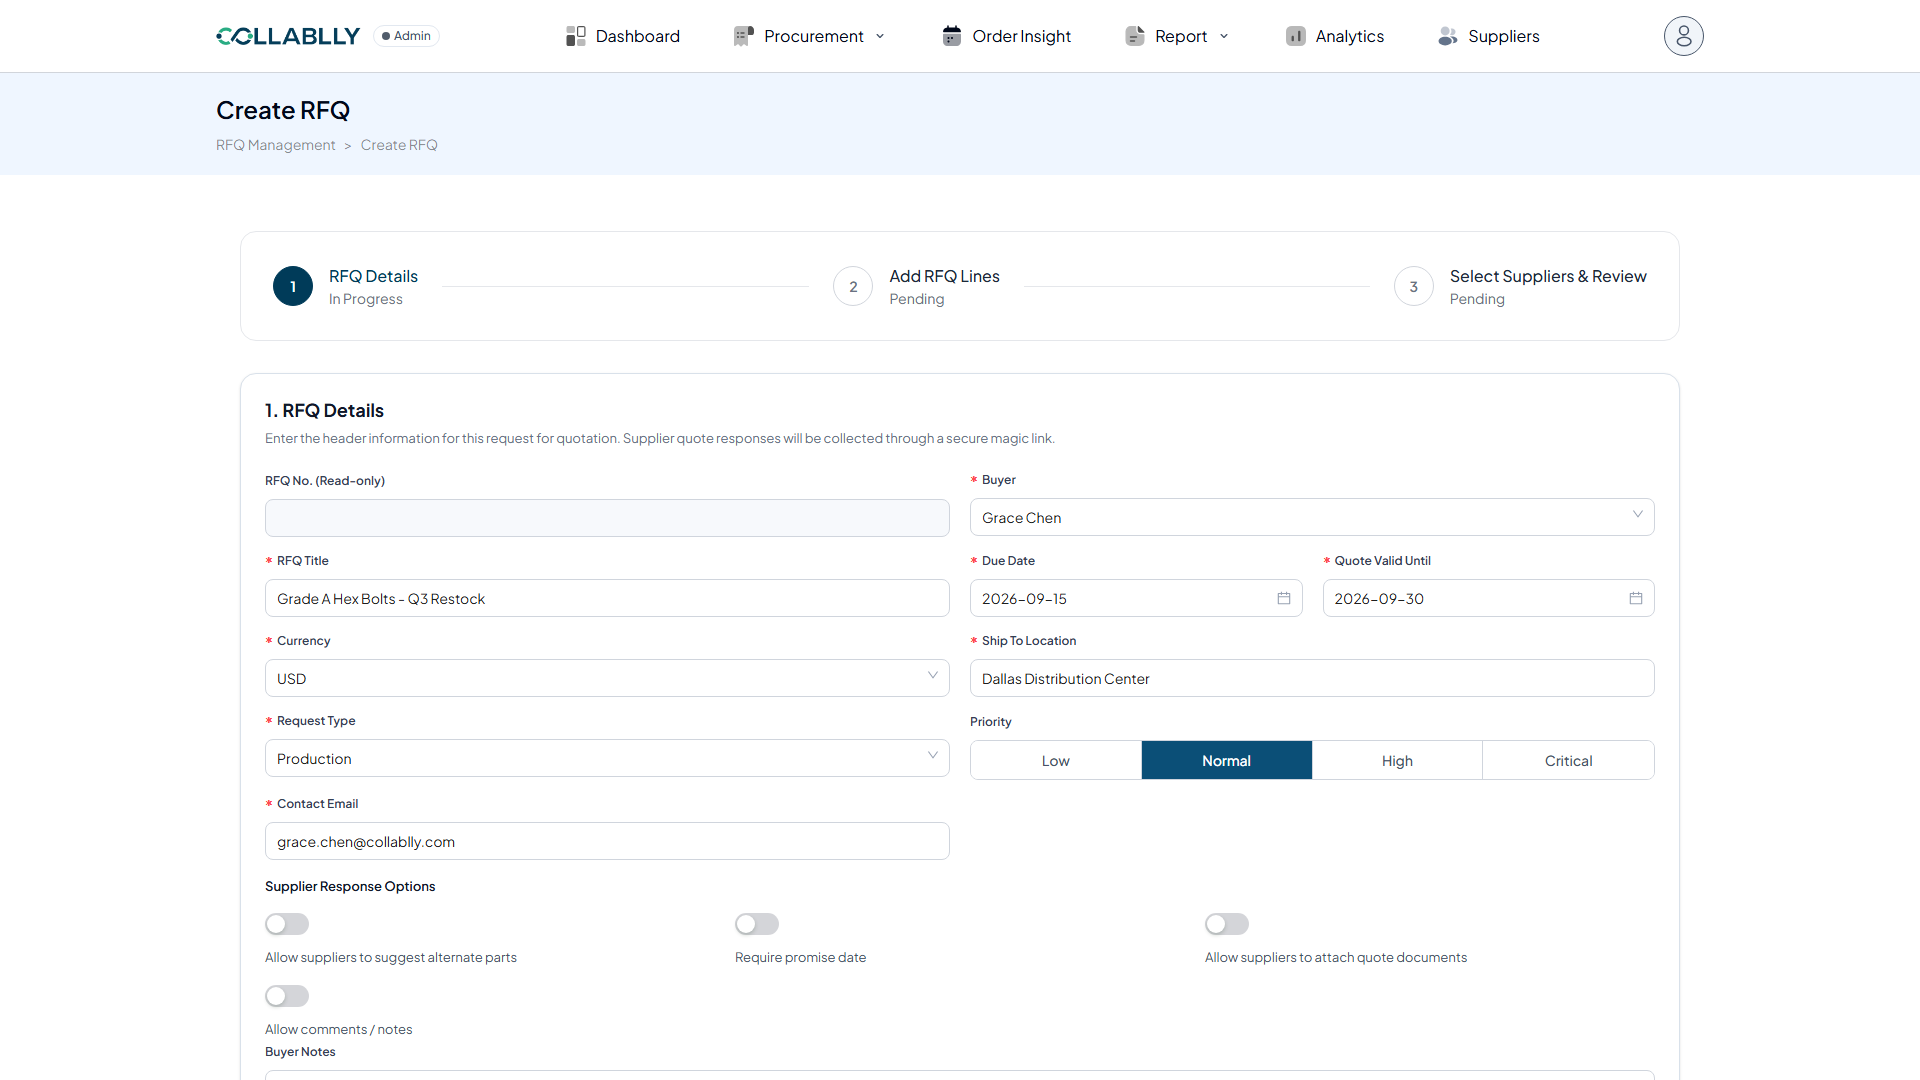
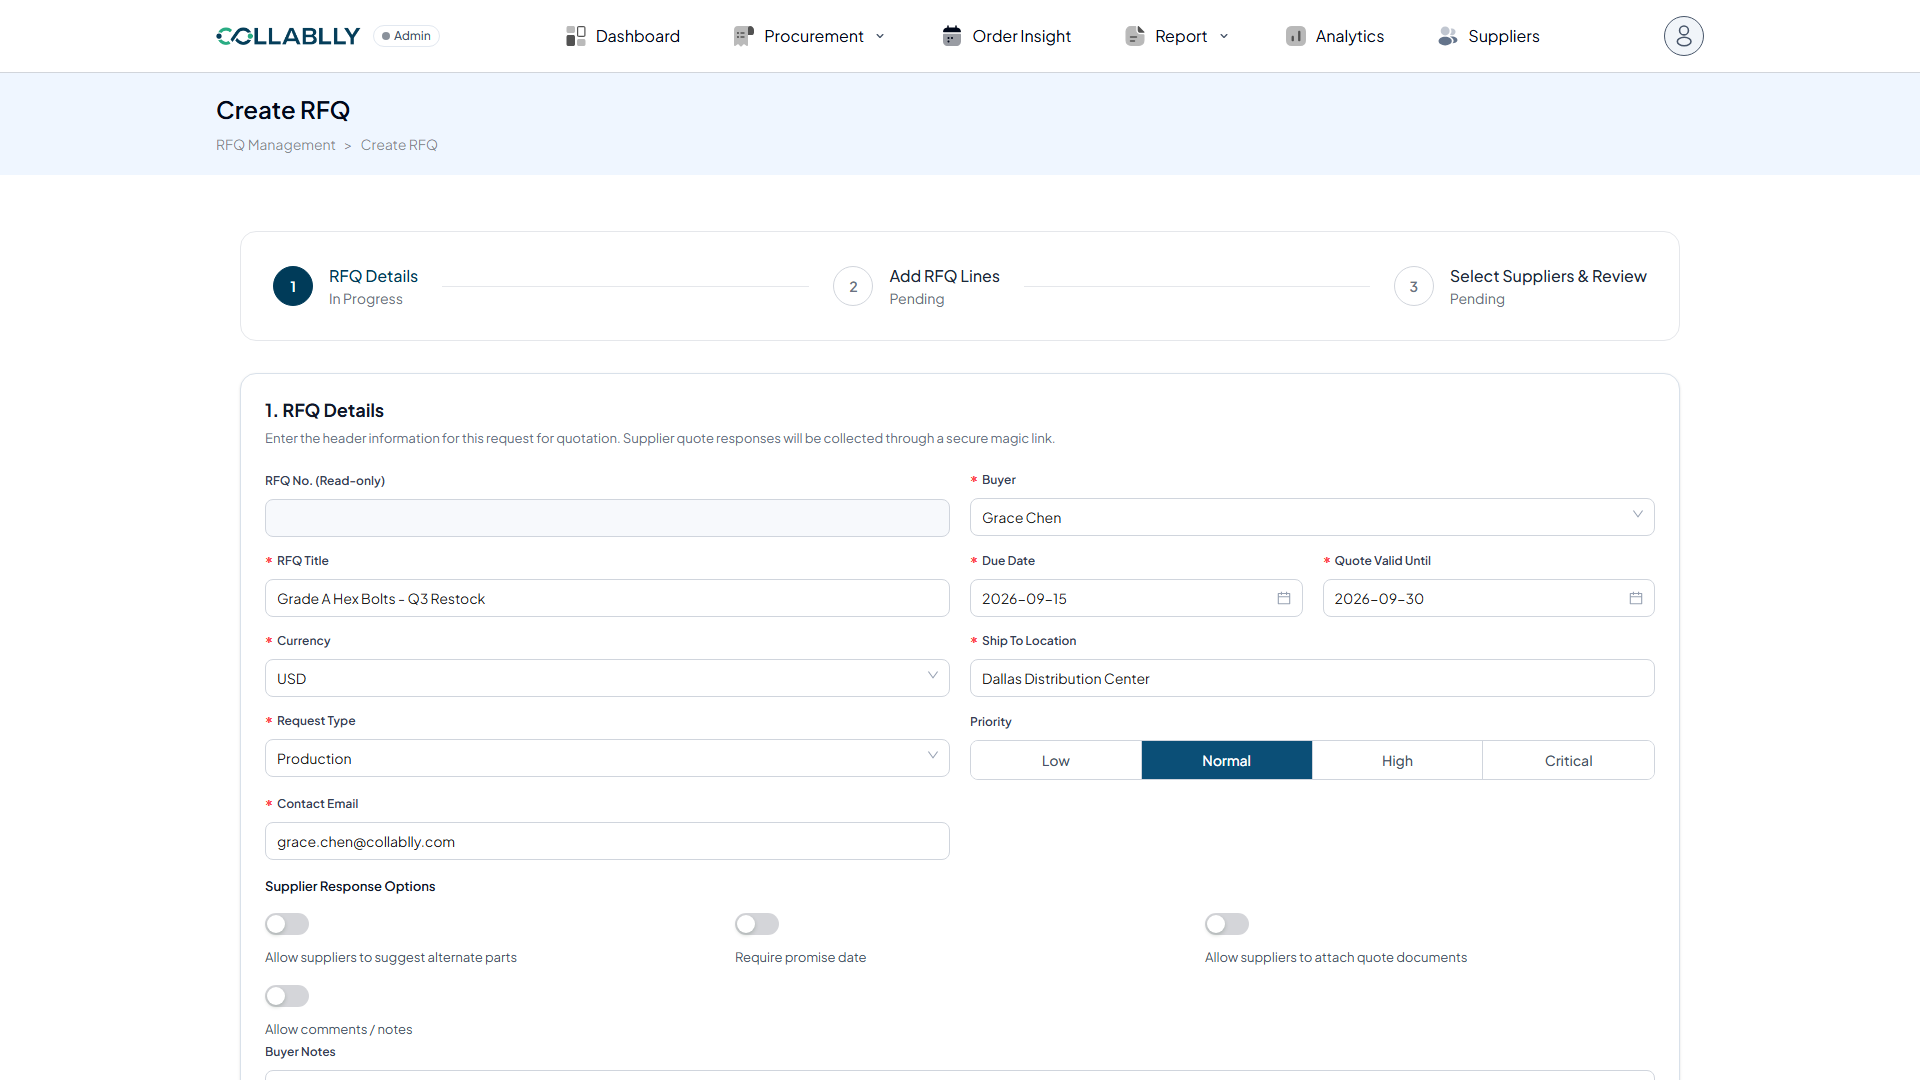
- Step 12 of 30
Allow suppliers to suggest alternate parts
Turn this on to let a supplier propose a substitute part on a line item. Useful when the exact part number is scarce. Their suggestion is captured for your review, not auto-accepted.
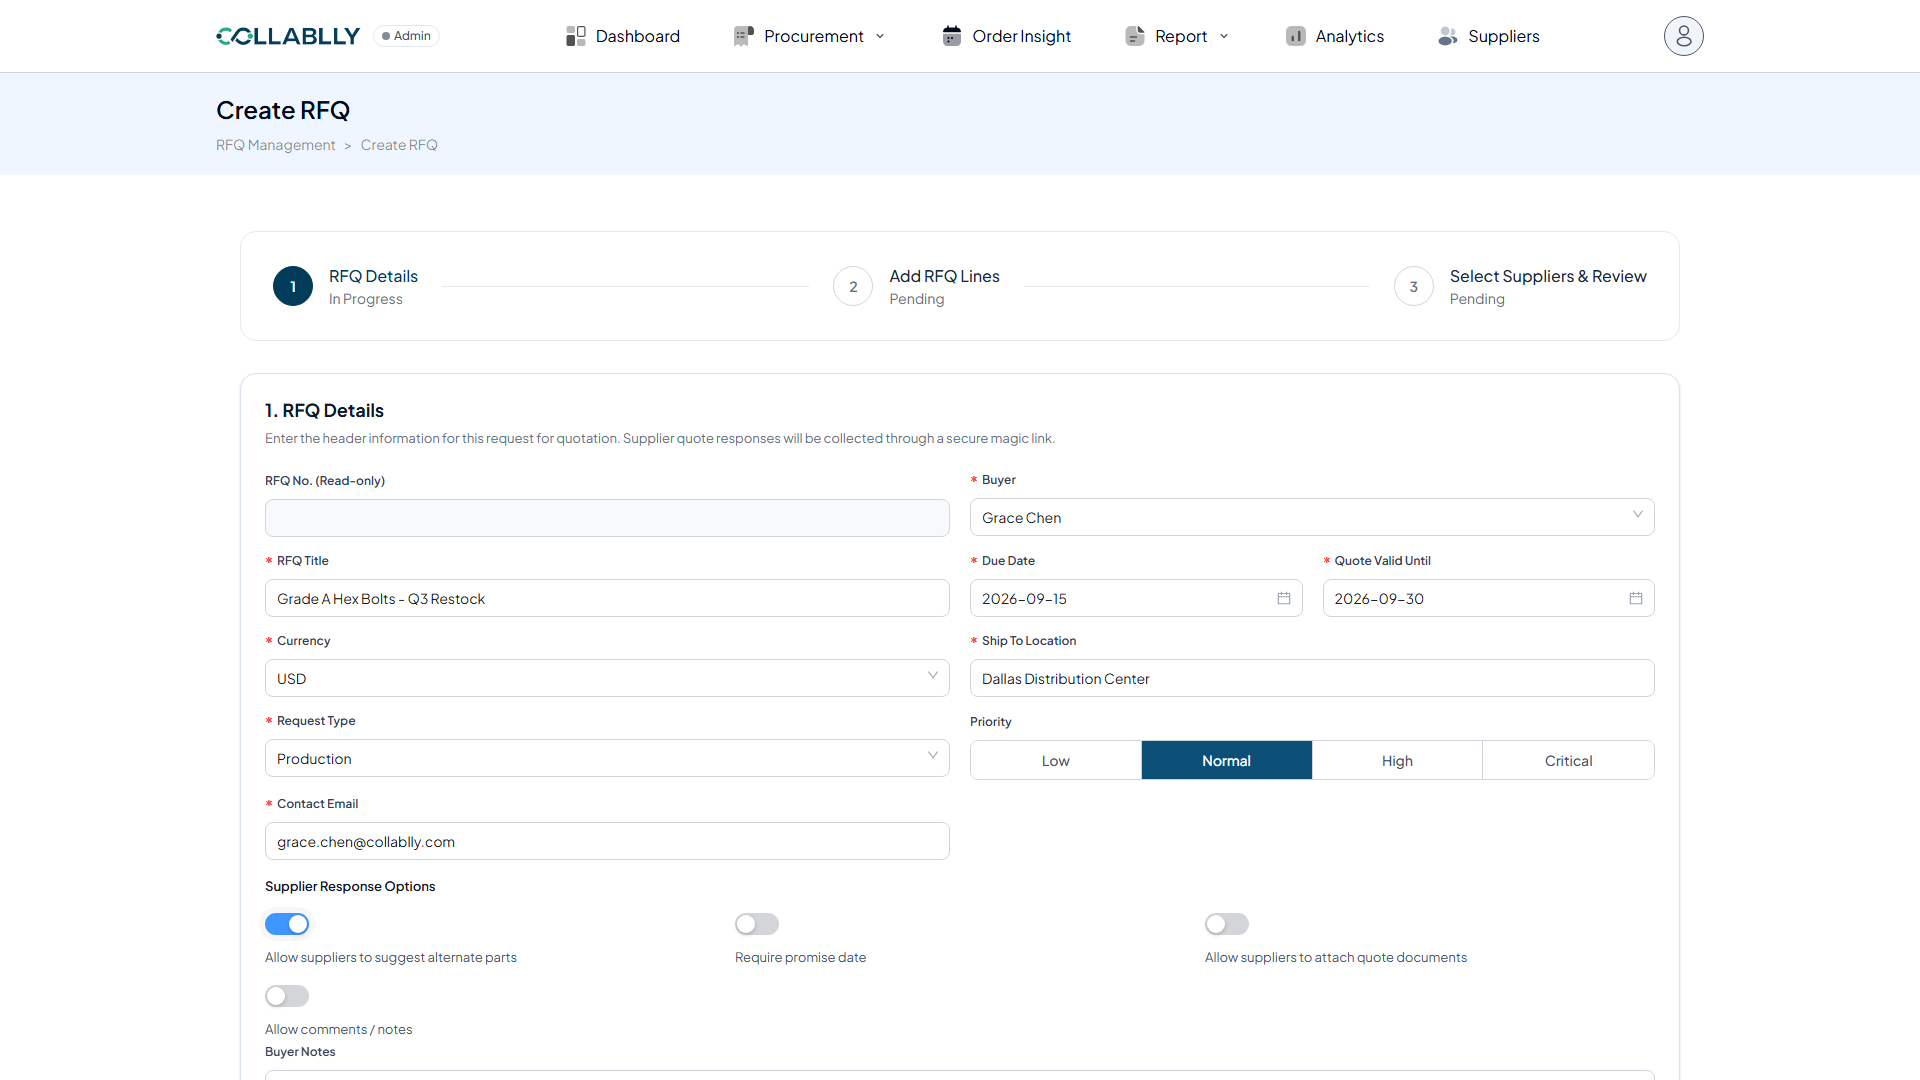
- Step 13 of 30
Require a promise date
Turn this on to make a promised delivery date mandatory on every supplier quote, not just optional. Useful when the Need By Date is firm.
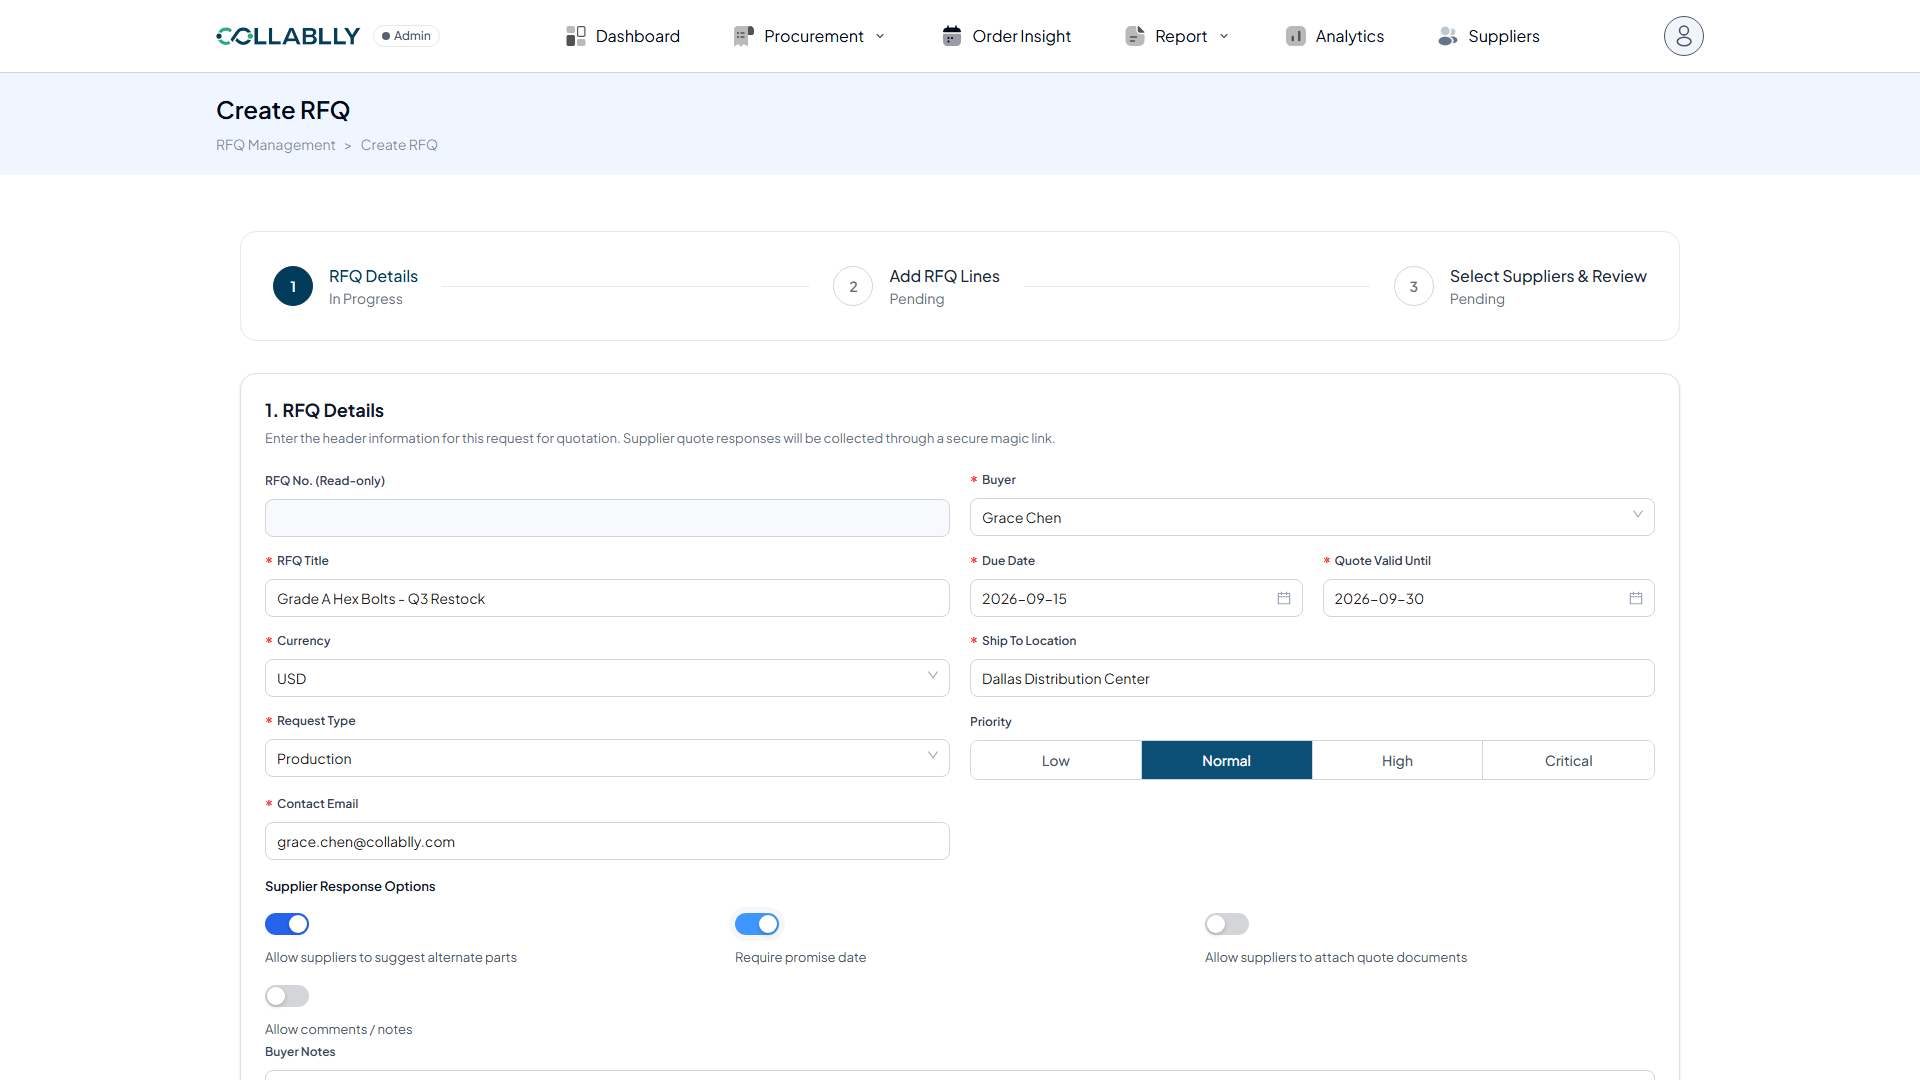
- Step 14 of 30
Allow suppliers to attach quote documents
Turn this on to let suppliers upload supporting files with their response: formal written quotes, spec sheets, or certifications.
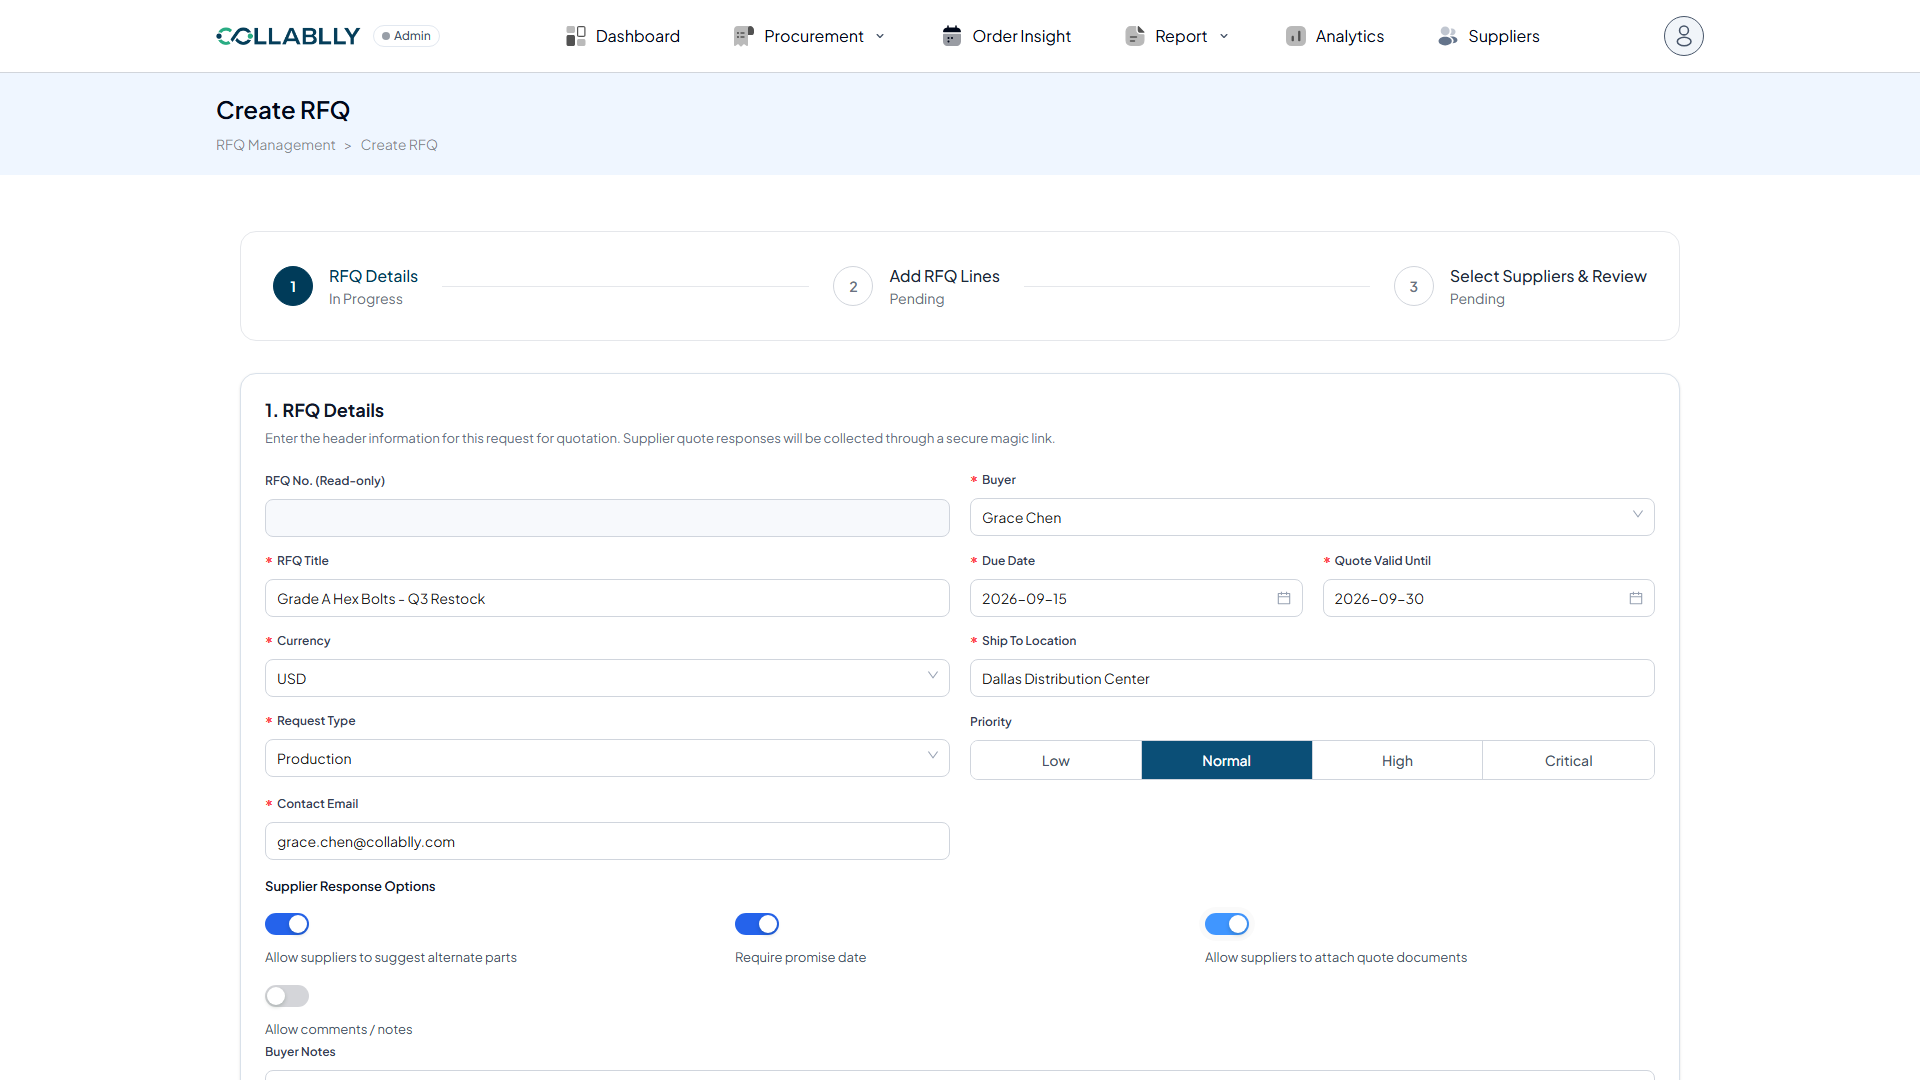
- Step 15 of 30
Allow comments / notes
Turn this on to give suppliers a free-text field to add context to their quote: lead time caveats, minimum order quantities, and similar notes.
- Step 16 of 30
Continue to line items
Once the header details are complete, move to step 2 to add the parts you want quoted.
- Step 17 of 30
Add a line item
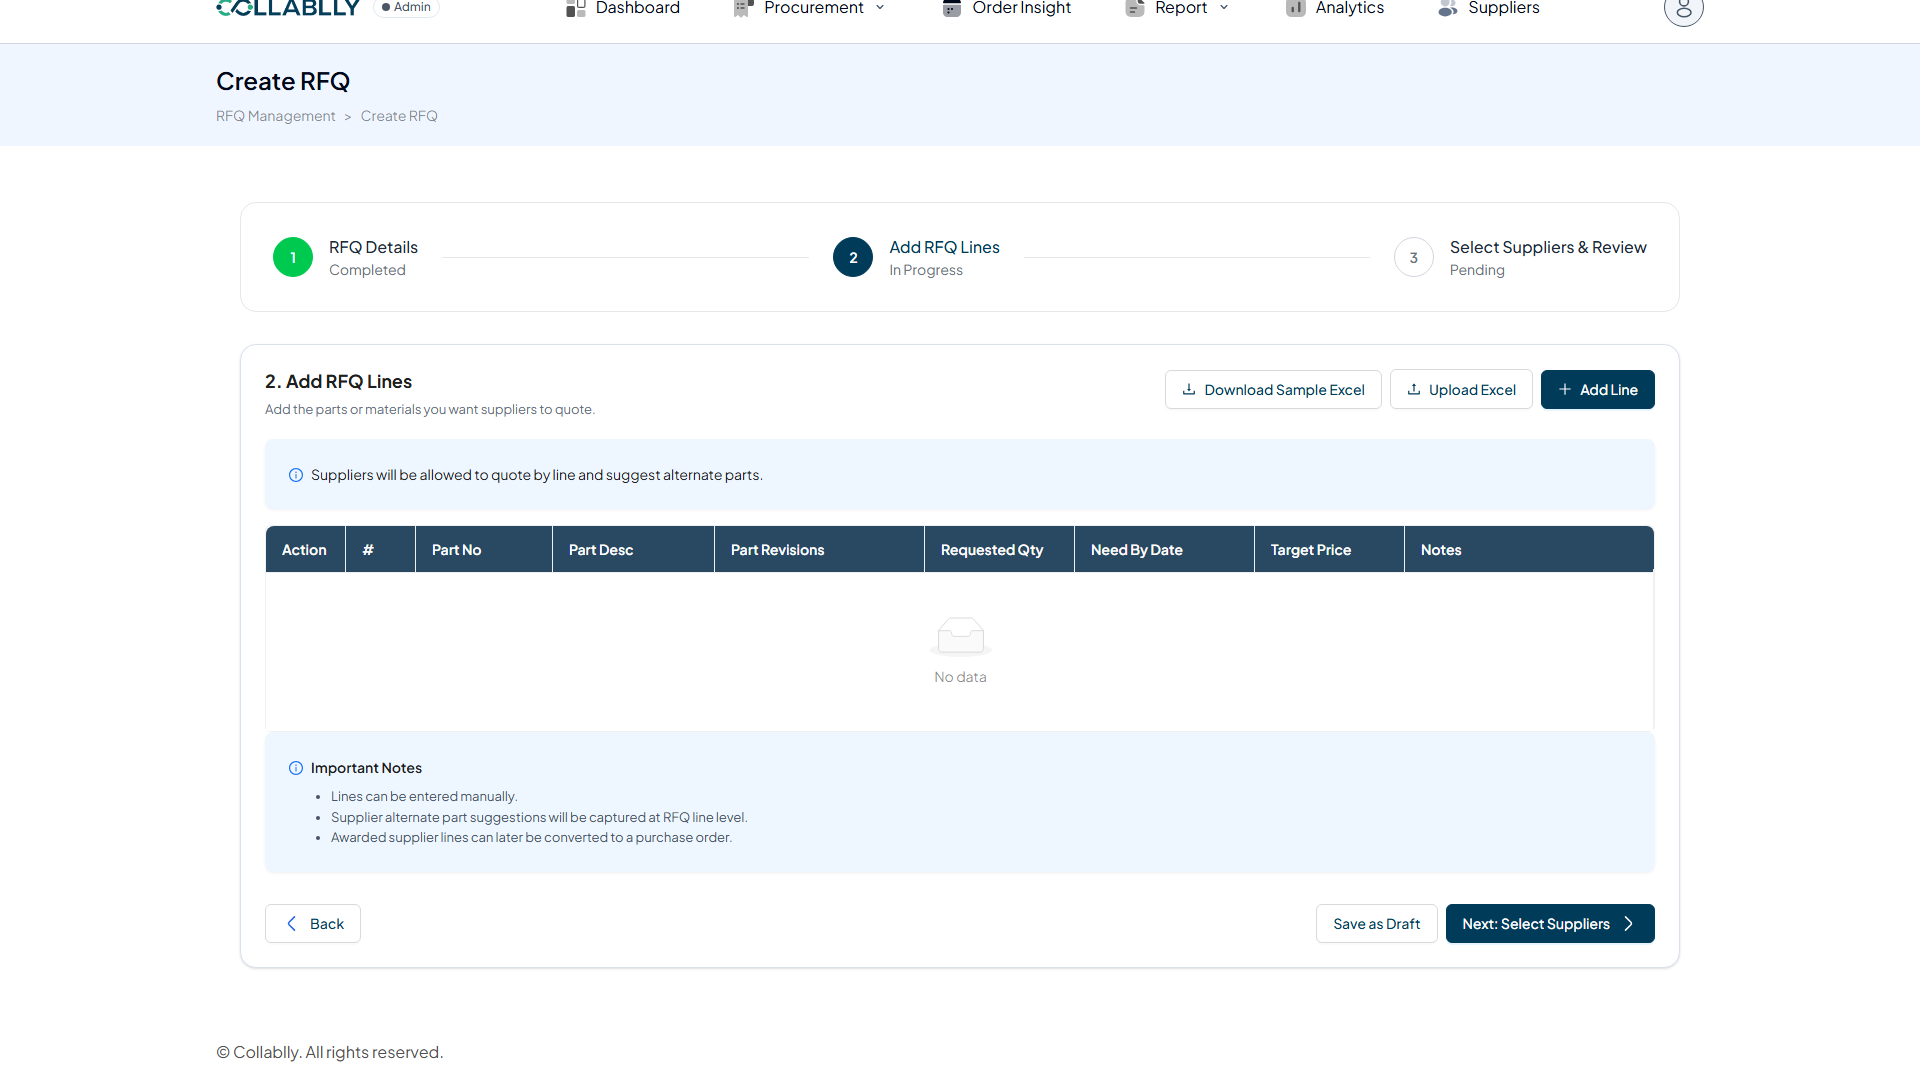
Click Add Line to create a blank row for the first part you want quoted. Use Upload Excel instead if you’re requesting quotes on many parts at once.
- Step 18 of 30
Choose the Part Number
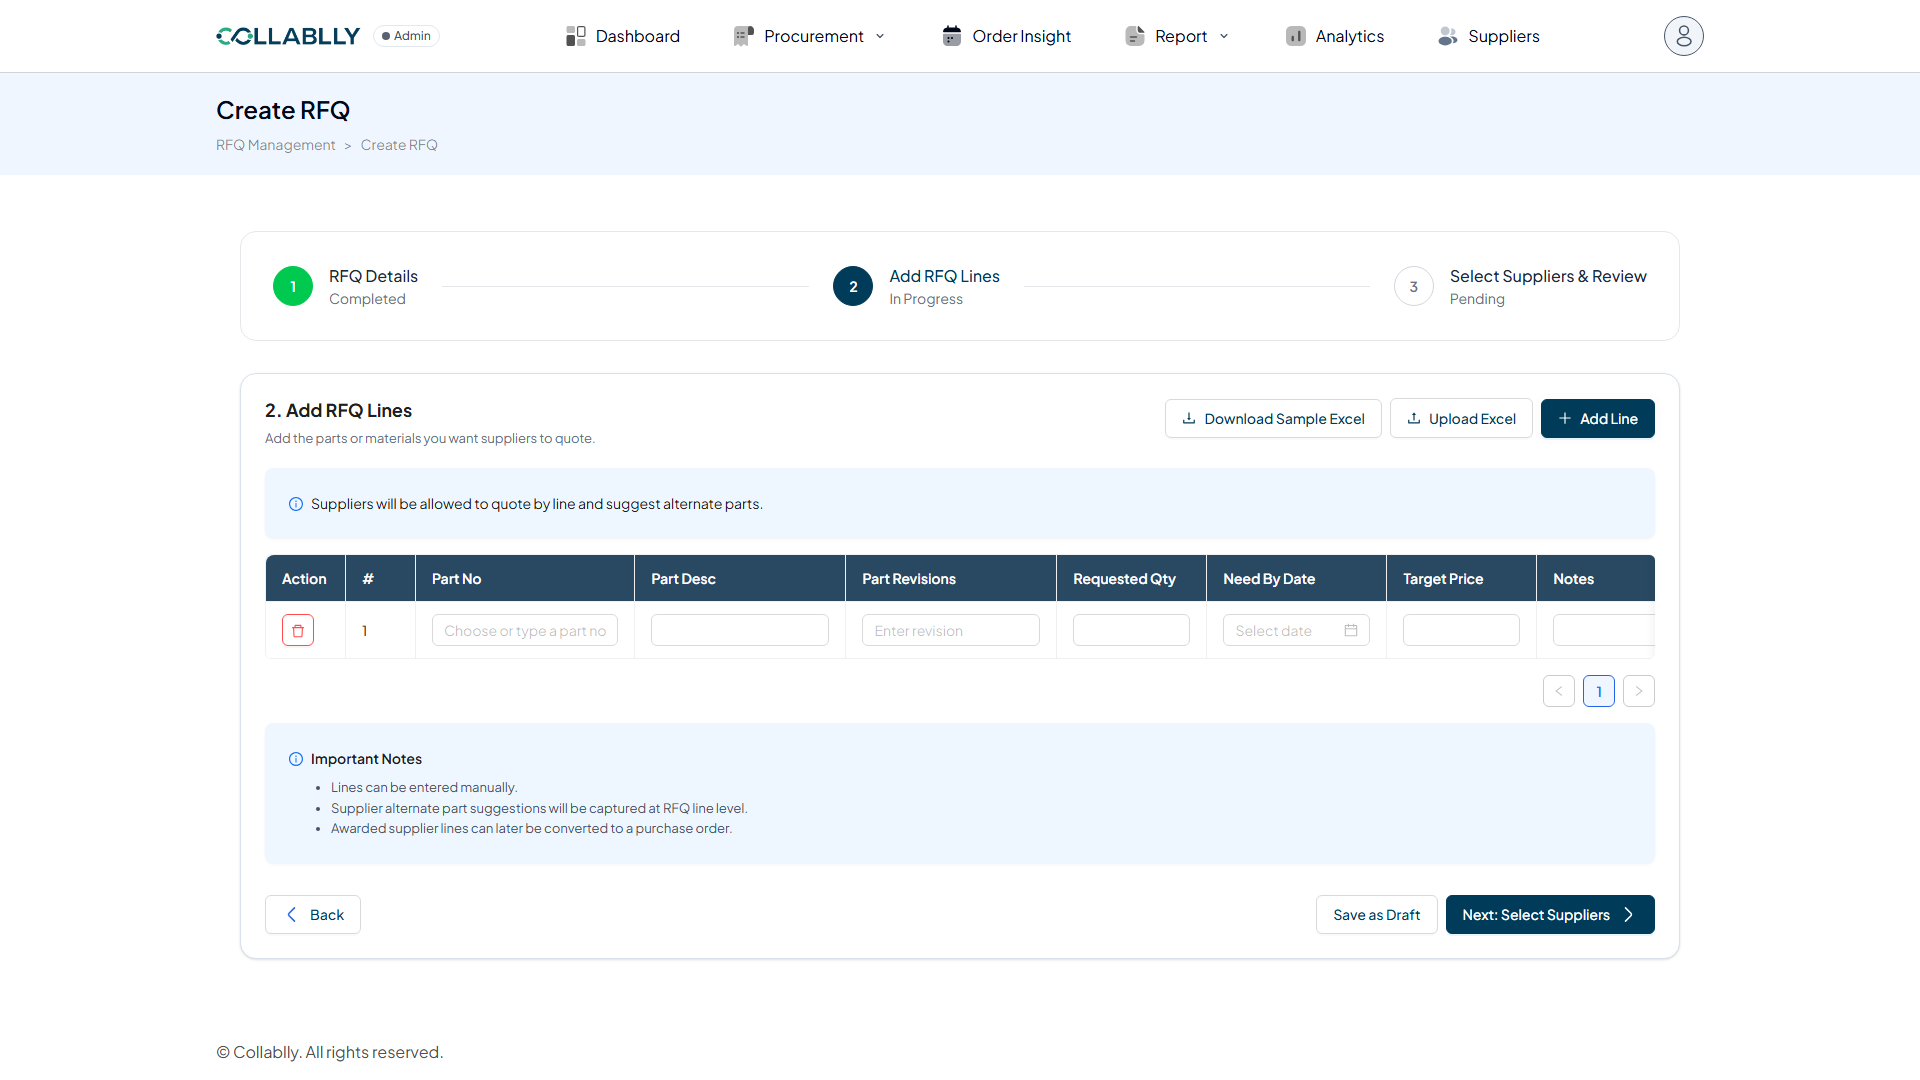
Start typing or pick from the catalog. The Description auto-fills from the part record once selected.
- Step 19 of 30
Enter the Requested Qty
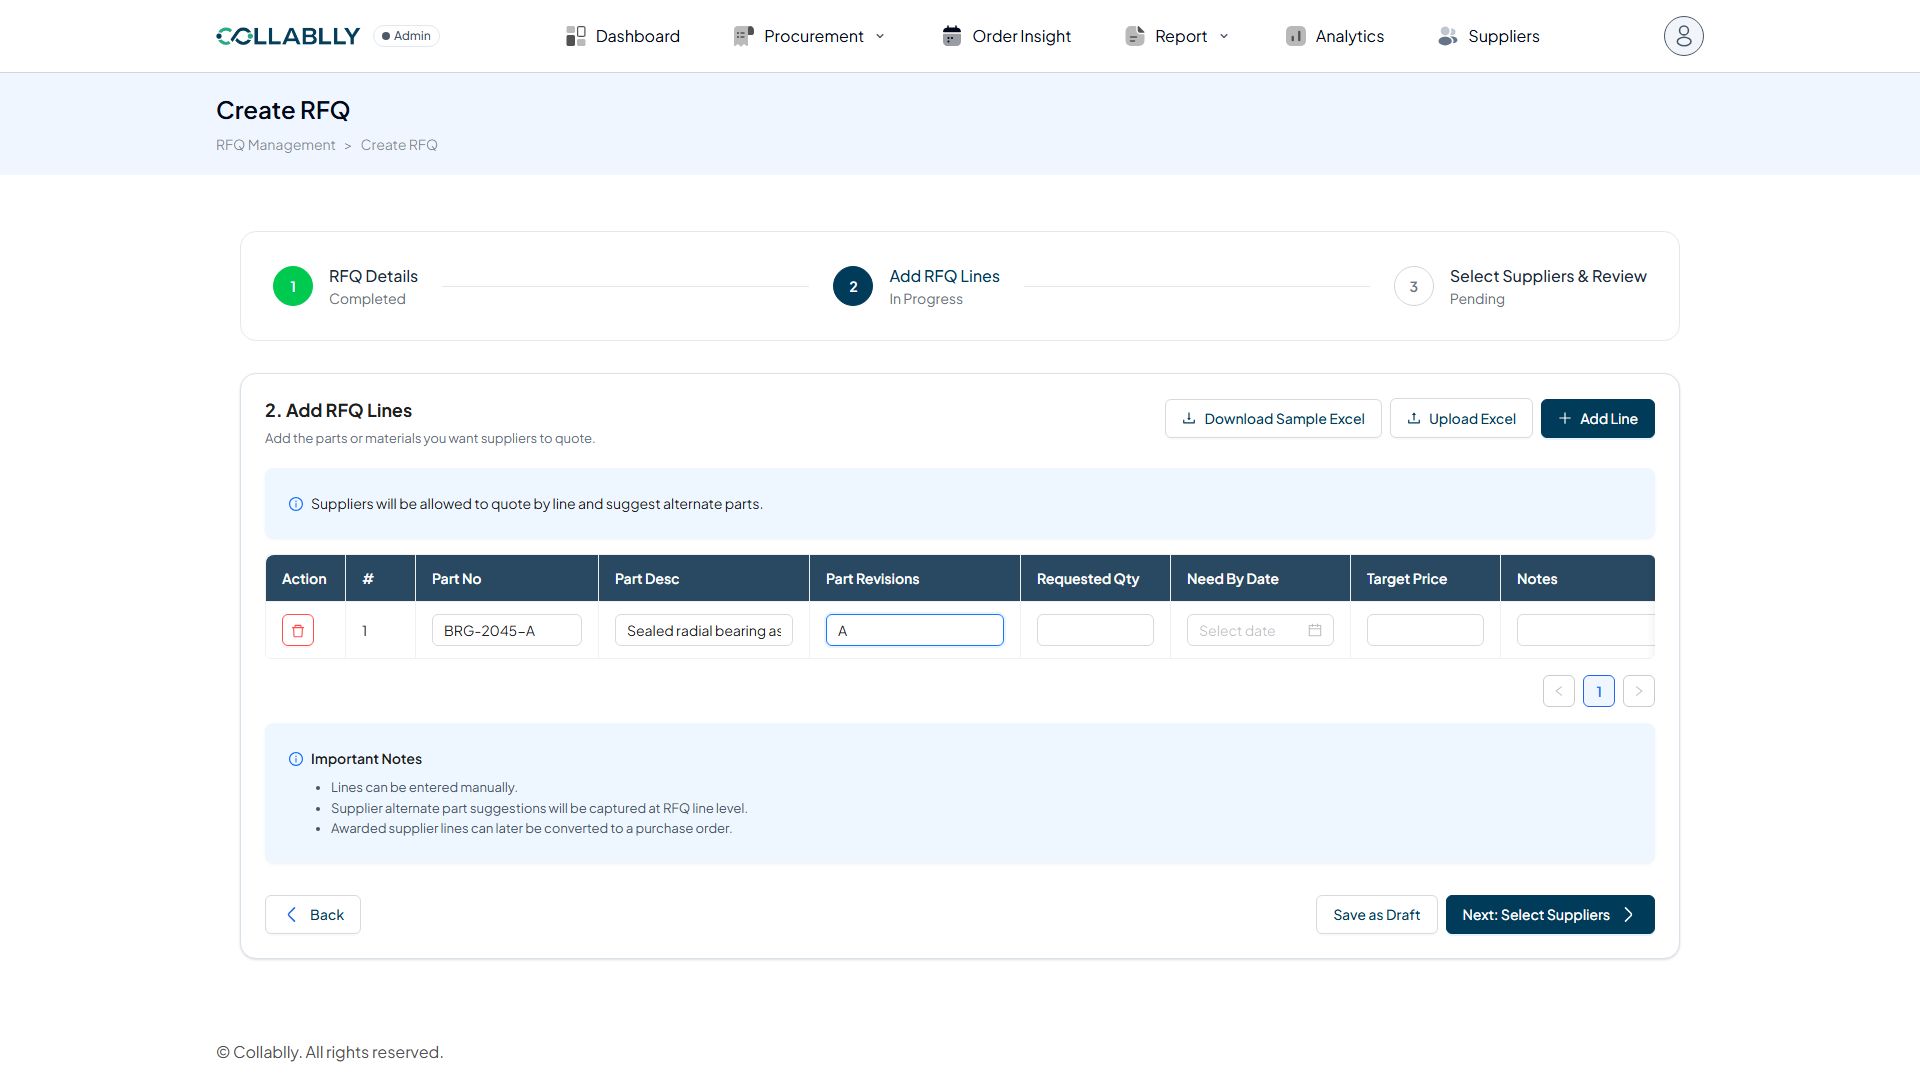
Specify how many units you need suppliers to quote.
- Step 20 of 30
Set the Need By Date
This is the date you need the material on-site, separate from the quote response due date.
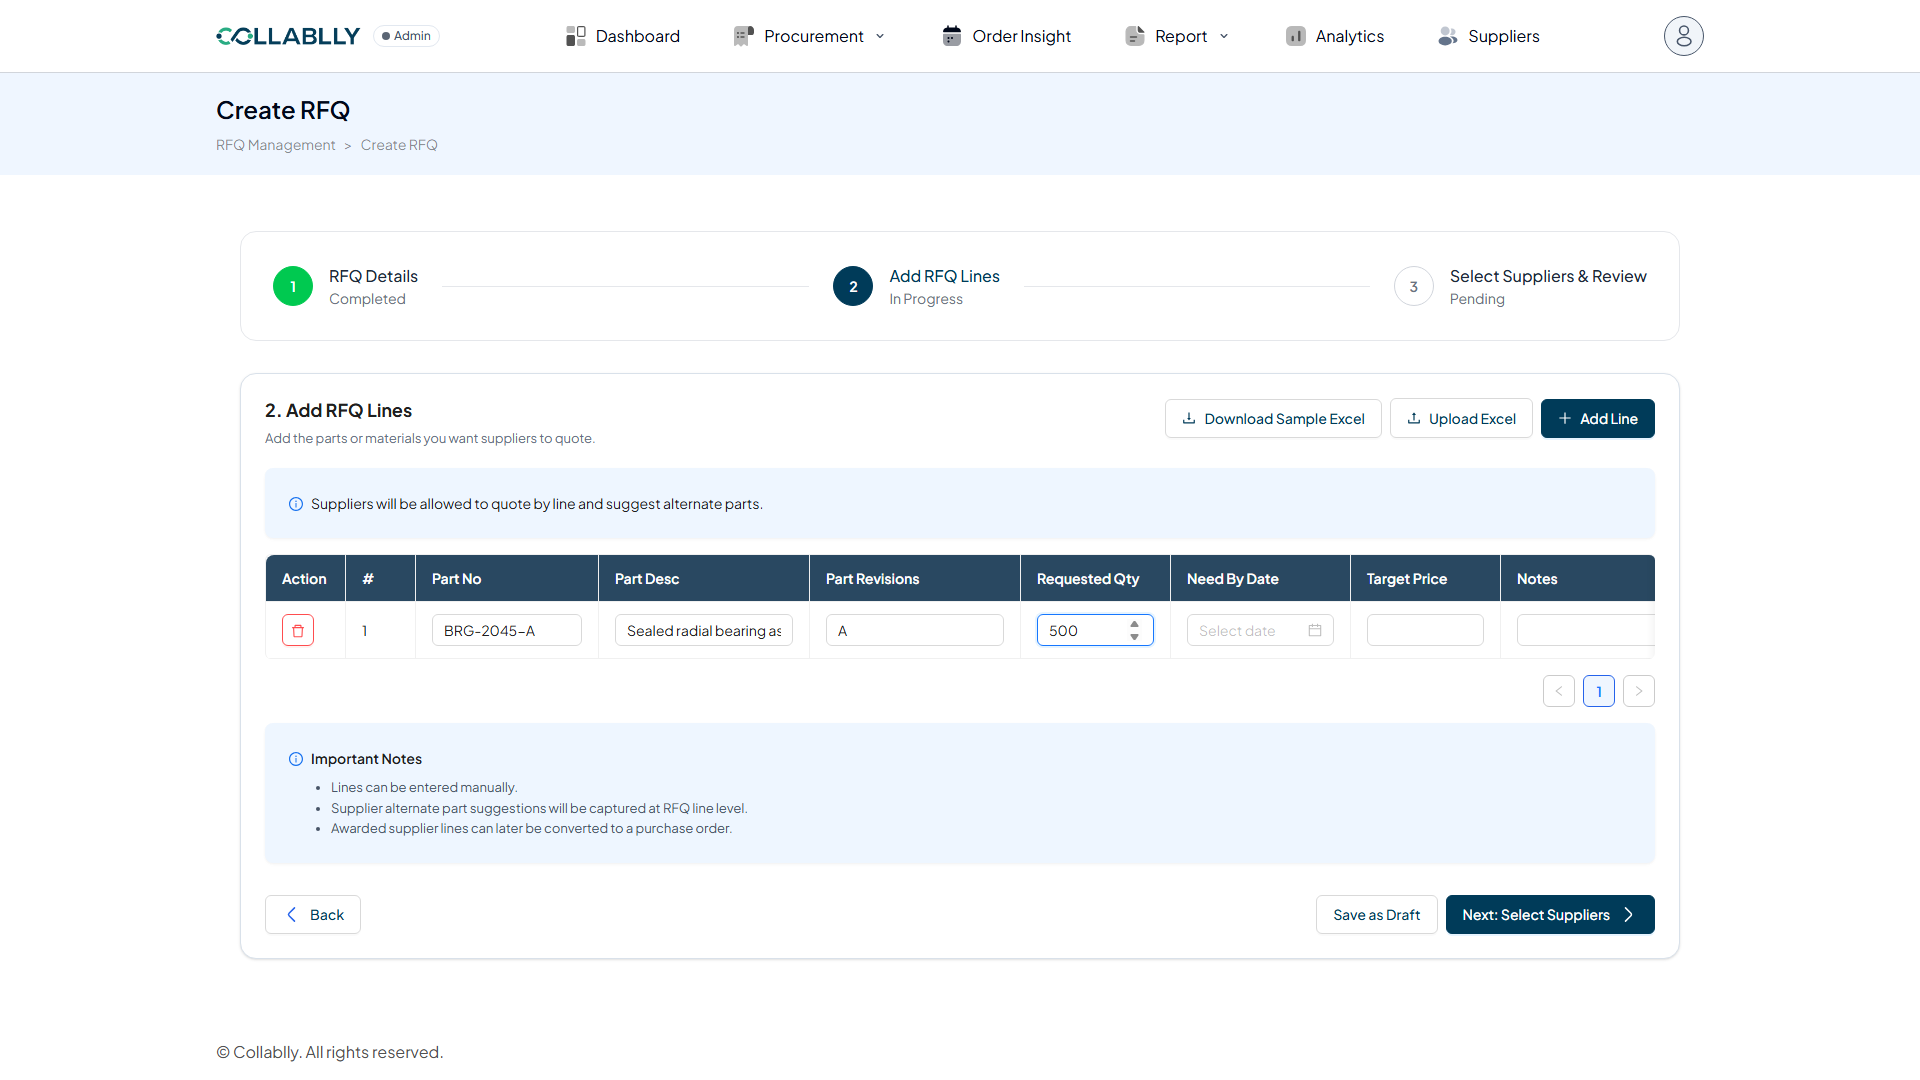
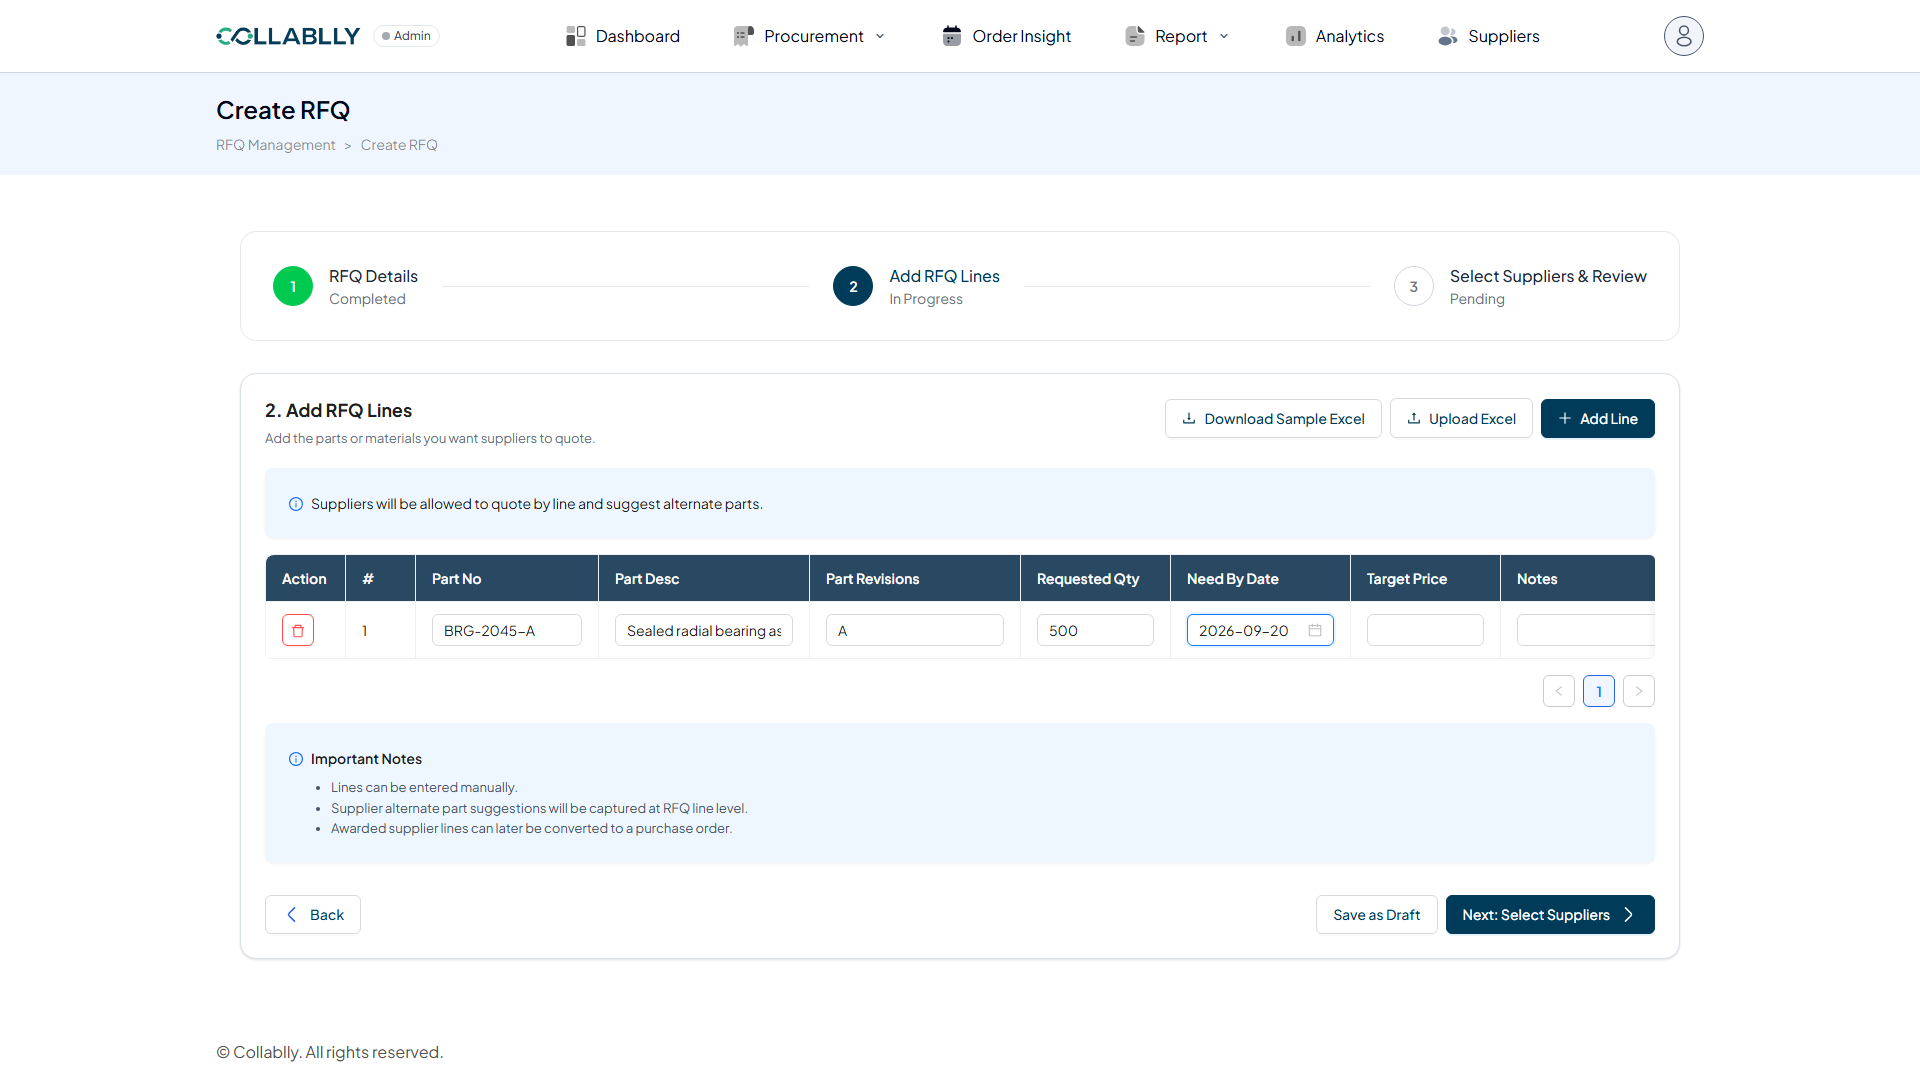
- Step 21 of 30
Enter a Target Price (optional)
Give suppliers a benchmark unit price. This is for reference only. It doesn’t restrict what they can quote.
- Step 22 of 30
Continue to suppliers
With at least one line added, move to the final step to choose who receives this RFQ.
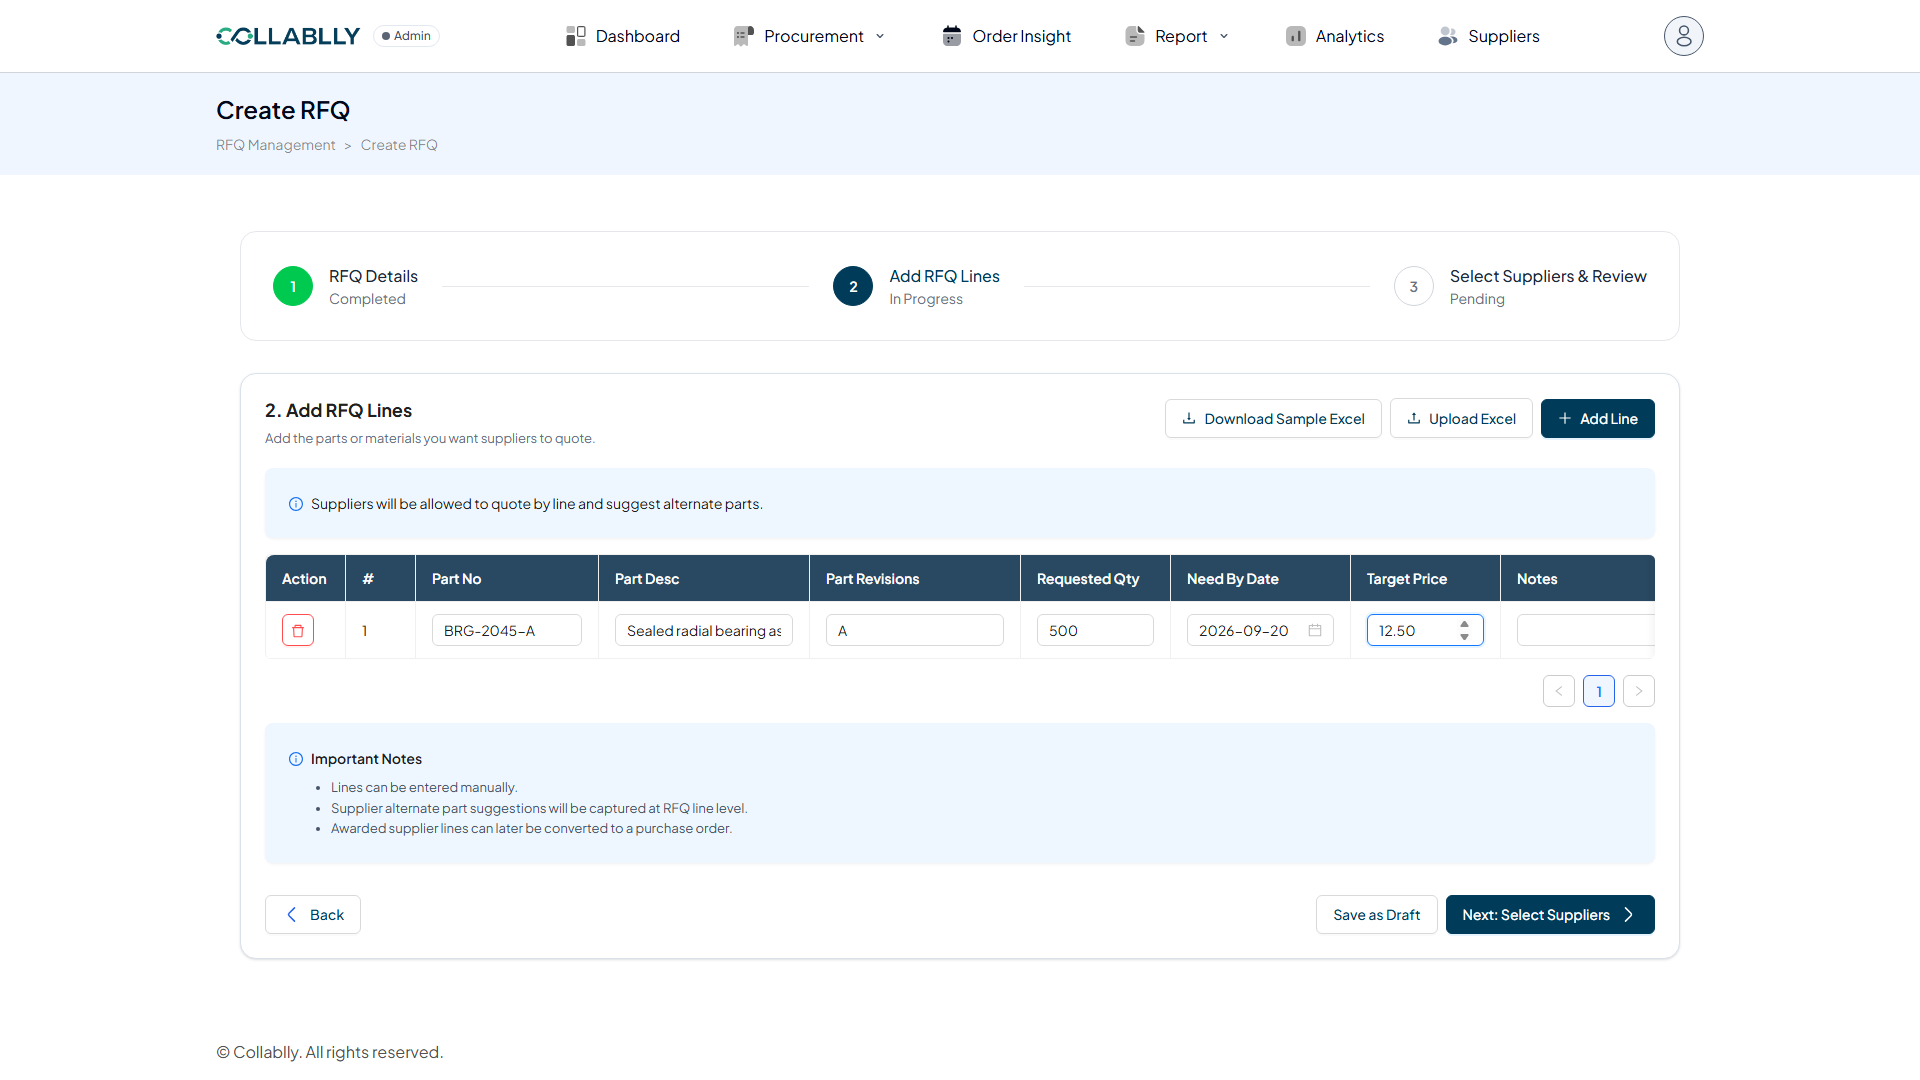
- Step 23 of 30
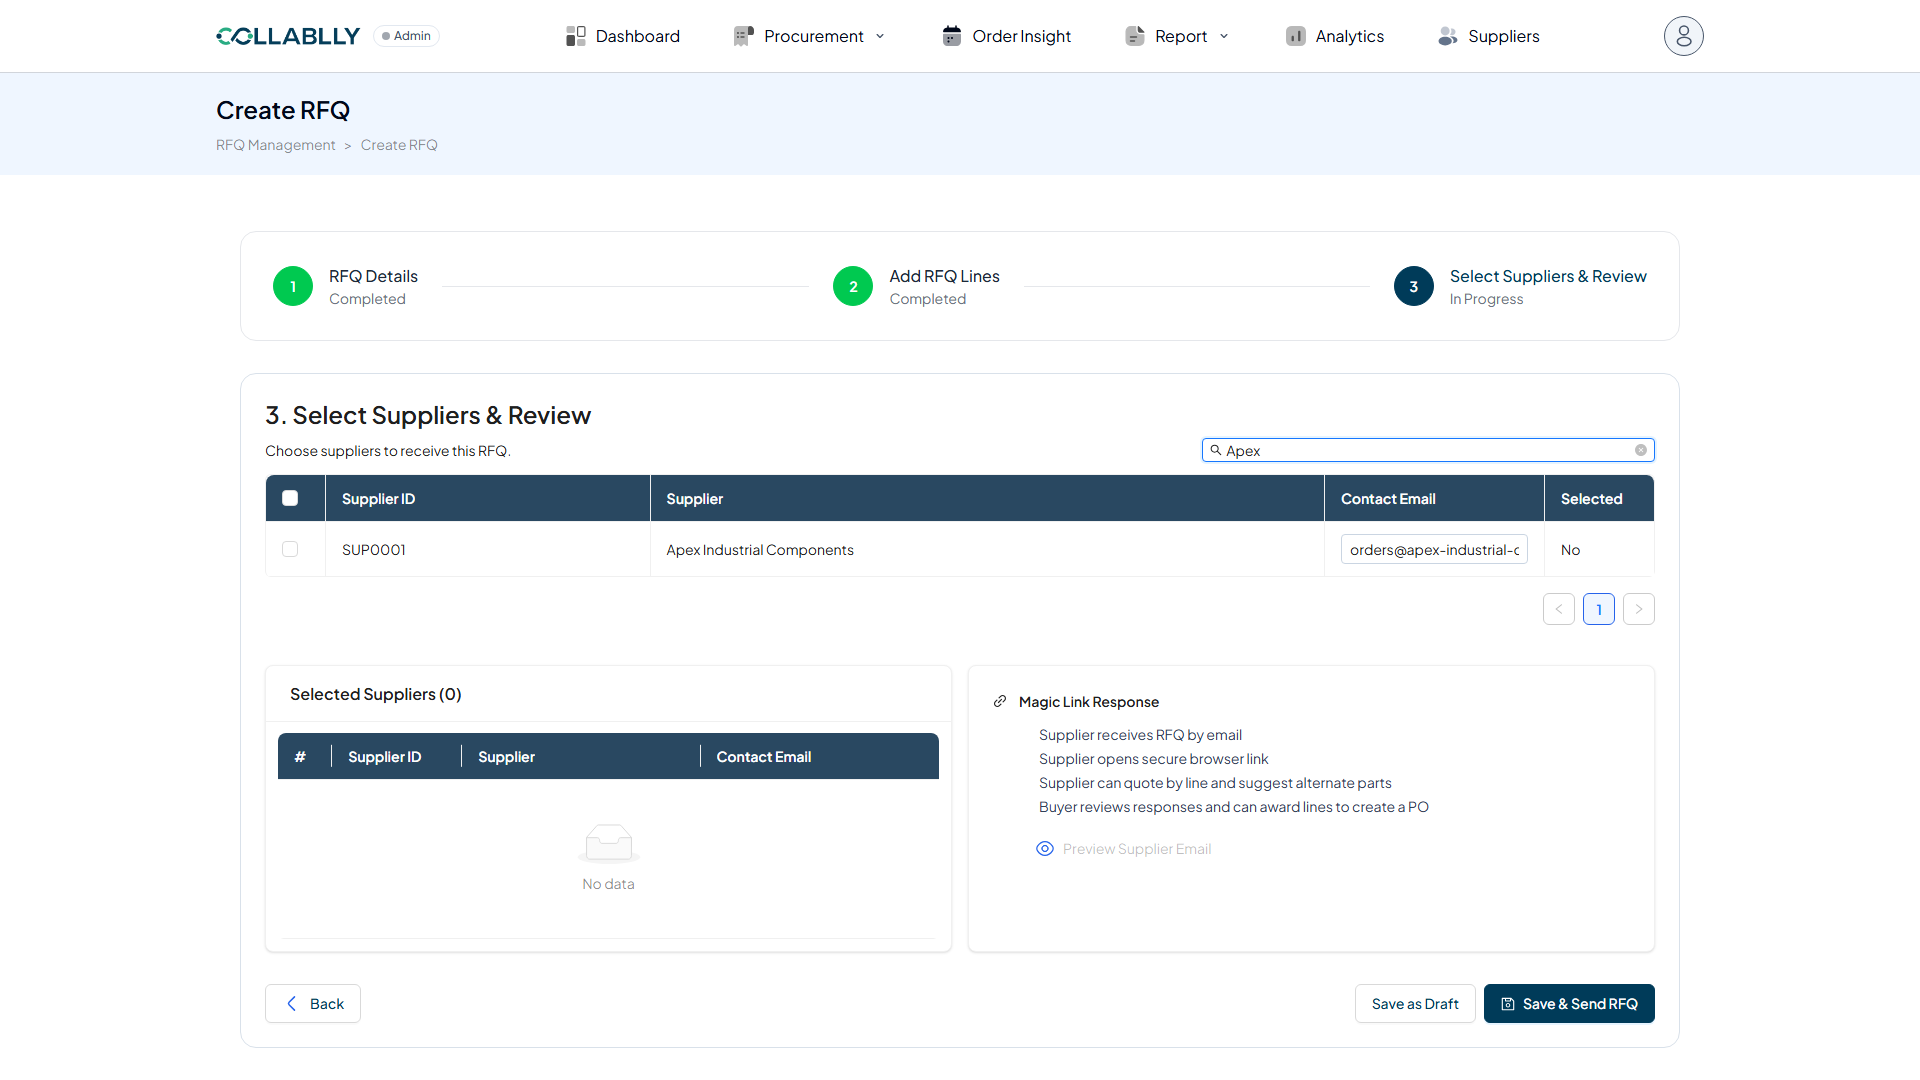
Search for a supplier
With a long supplier list, use Search suppliers instead of paging through results. It matches on name as you type.
- Step 24 of 30
Review the results
Matching suppliers appear in the table below the search box, narrowed down here to Apex Industrial Components.
- Step 25 of 30
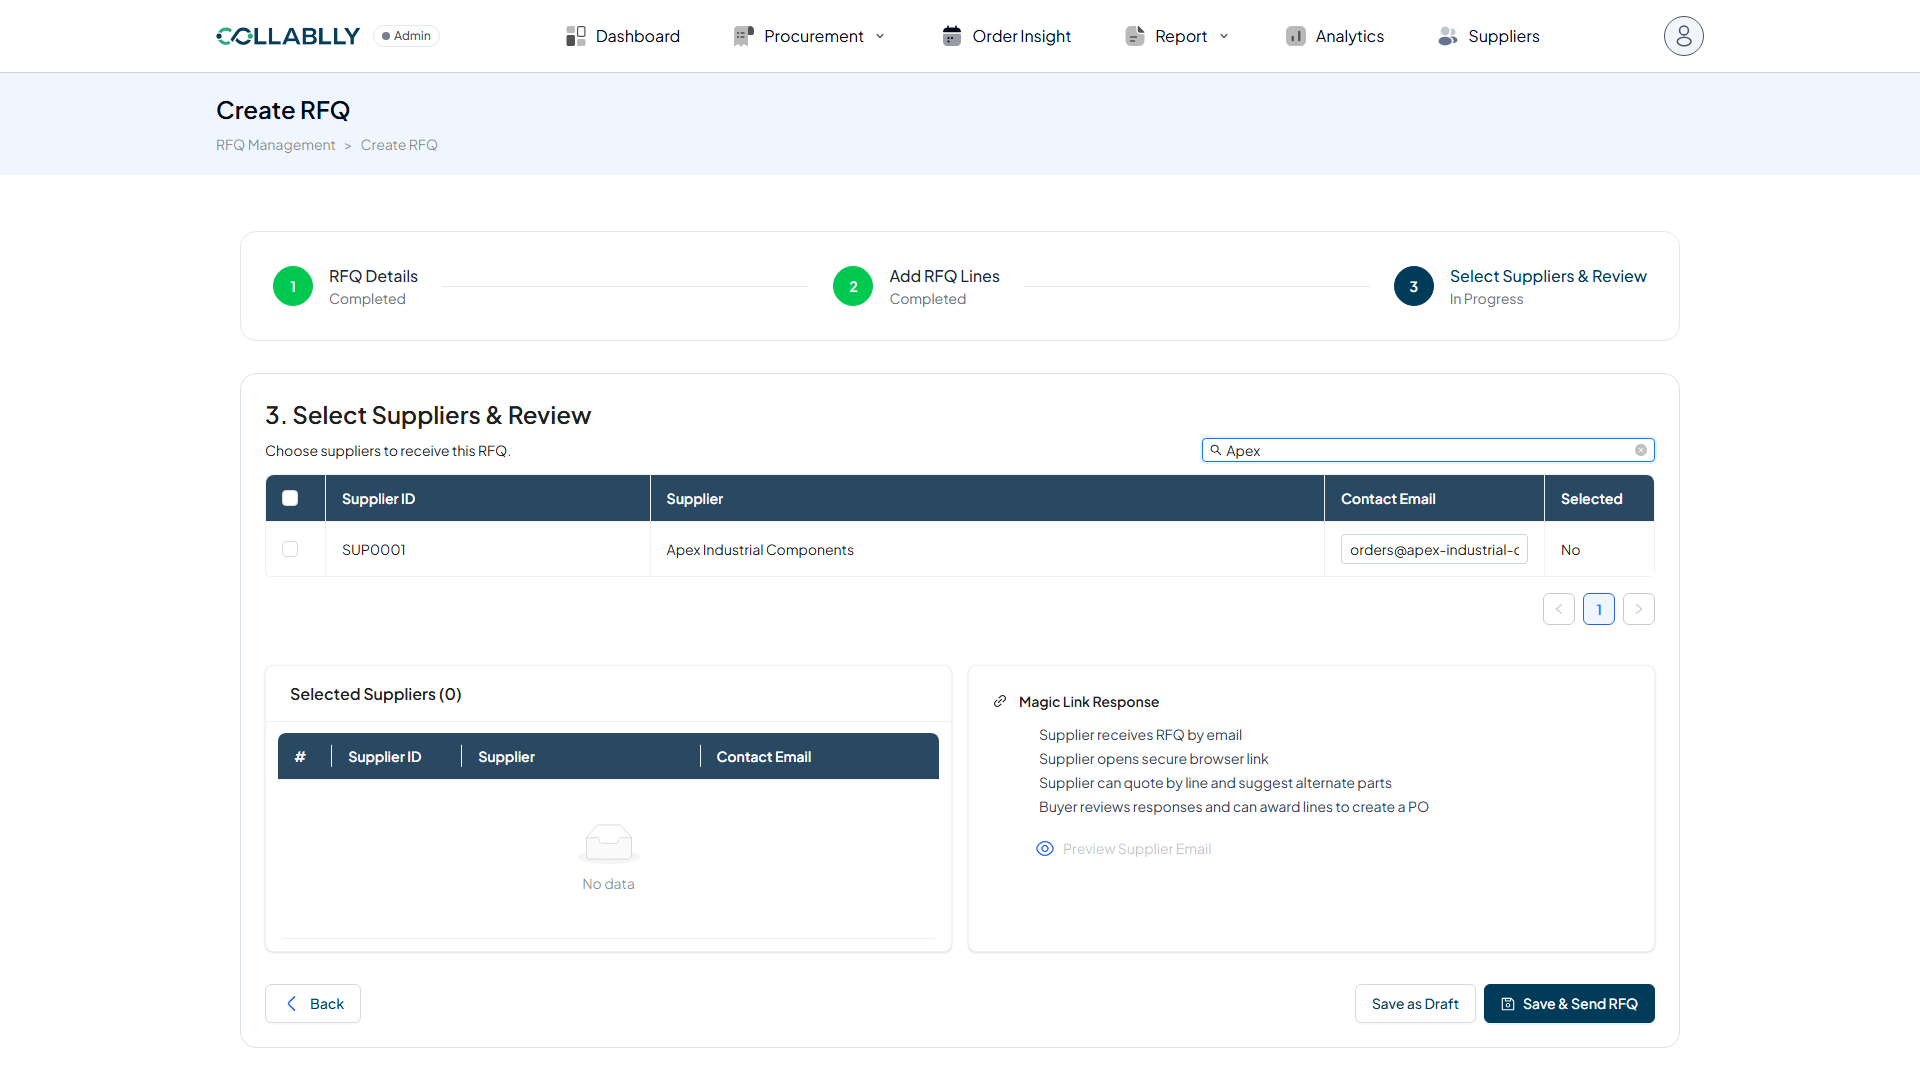
Select suppliers to quote
Check the box next to each supplier you want to send this RFQ to. They’ll appear in the Selected Suppliers list below as you go.
- Step 26 of 30
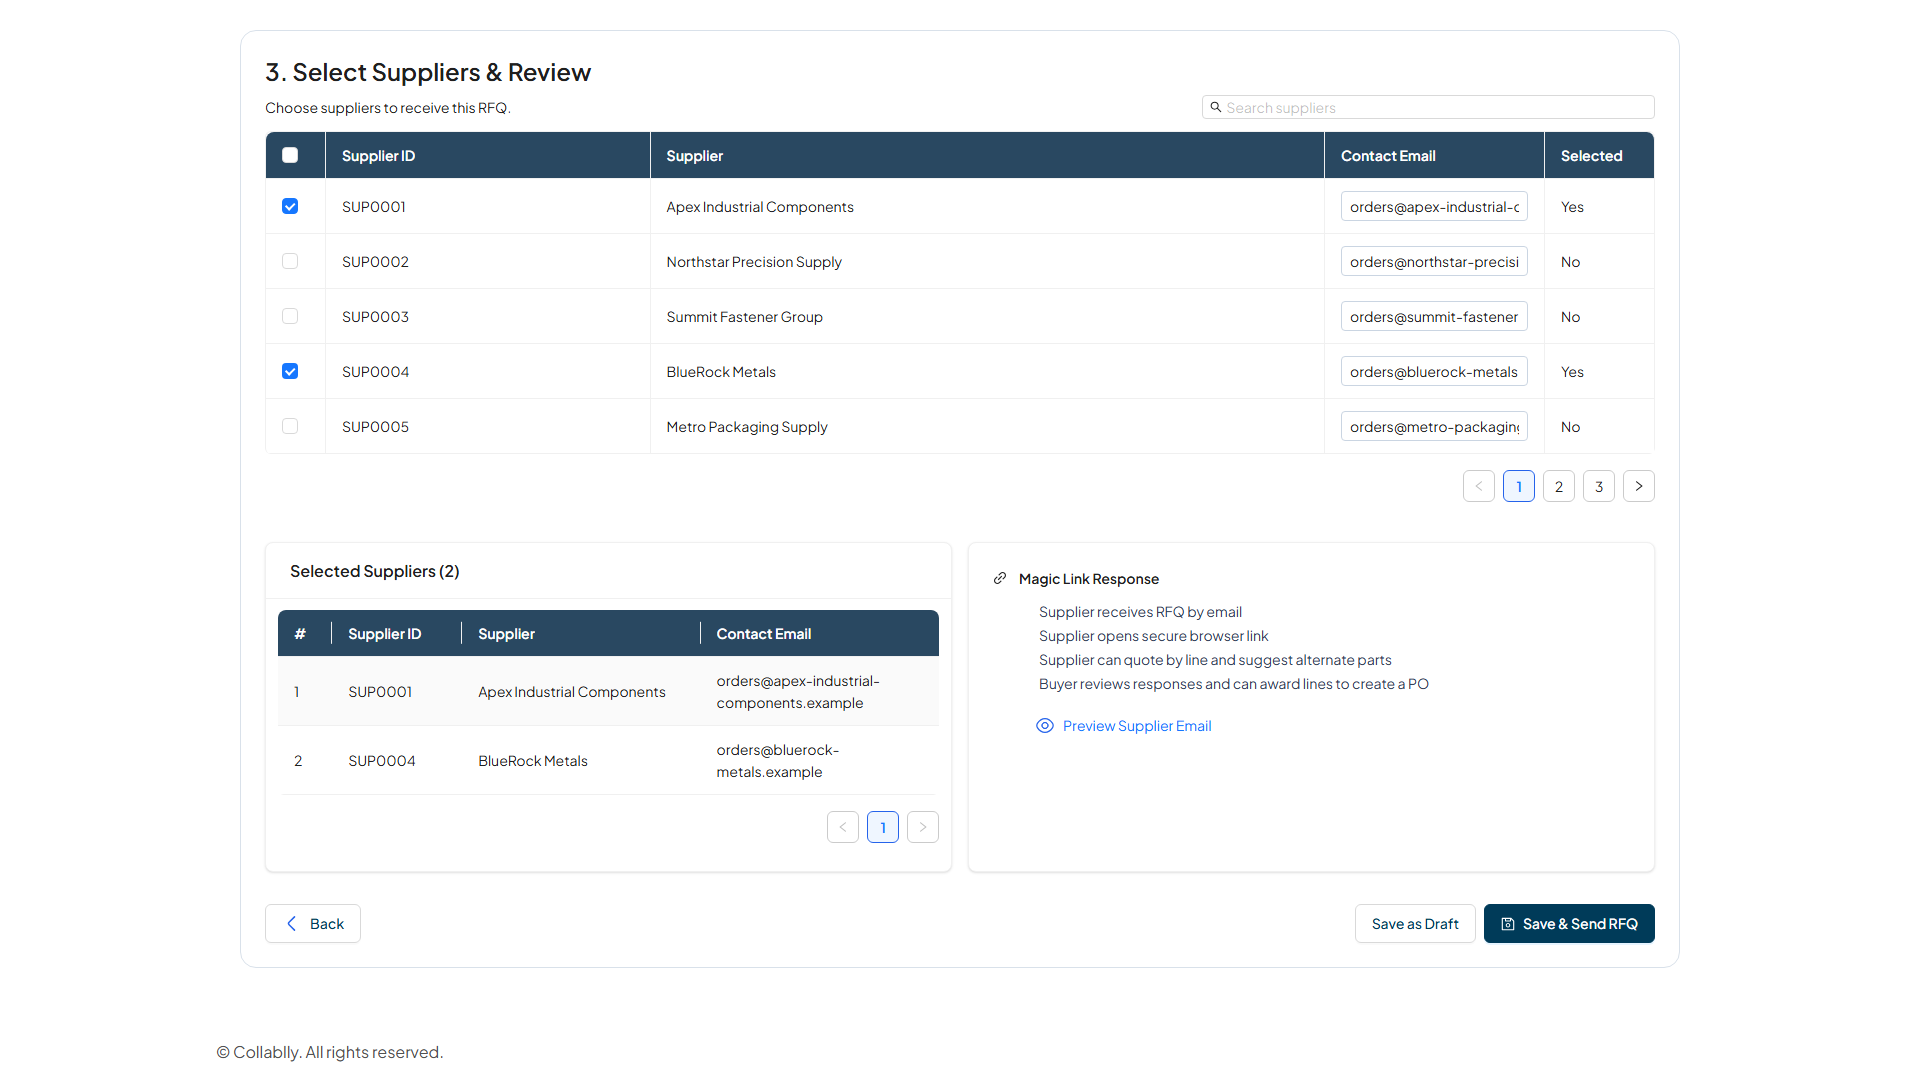
Send the RFQ
This saves the RFQ and immediately emails every selected supplier their secure quote link.
- Step 27 of 30
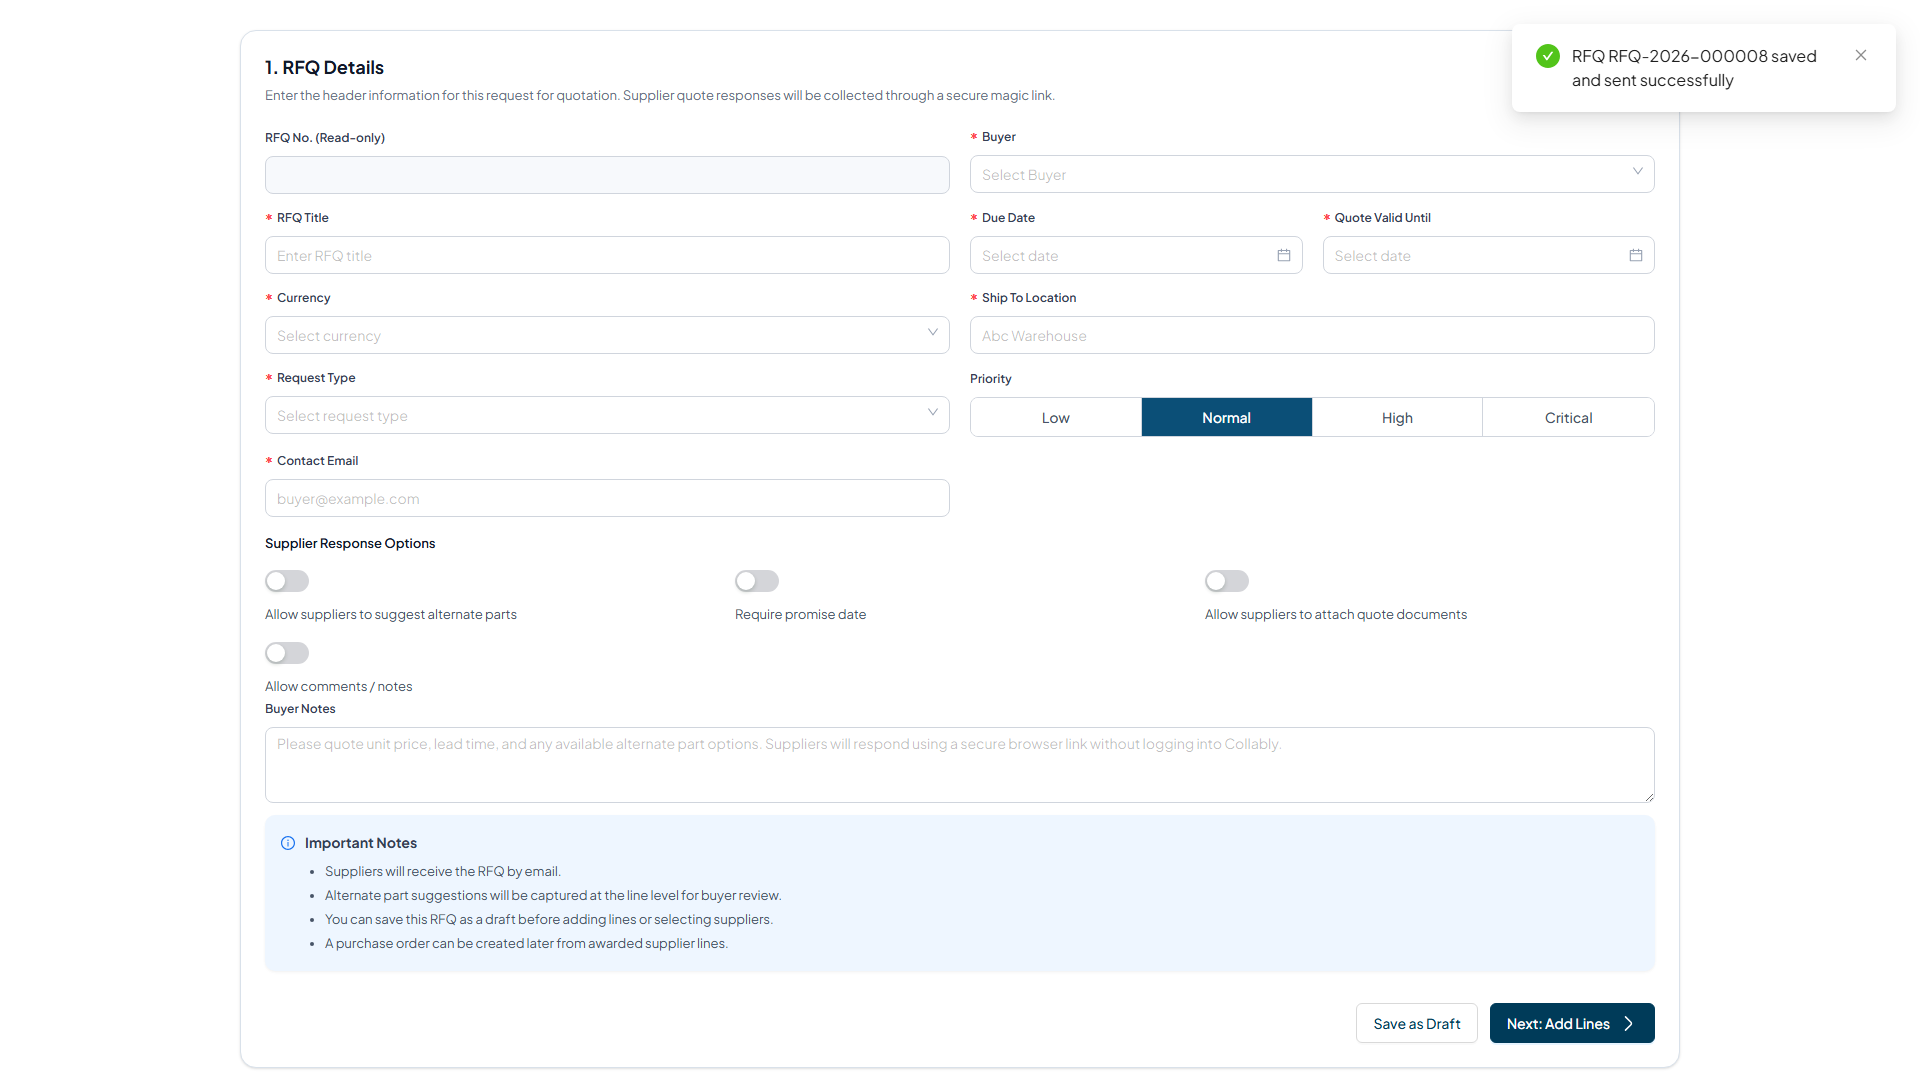
RFQ sent successfully
A confirmation banner names the new RFQ number, RFQ-2026-000008, and confirms it was saved and sent successfully. The wizard then clears itself, ready to create another RFQ.
- Step 28 of 30
Find it in the list
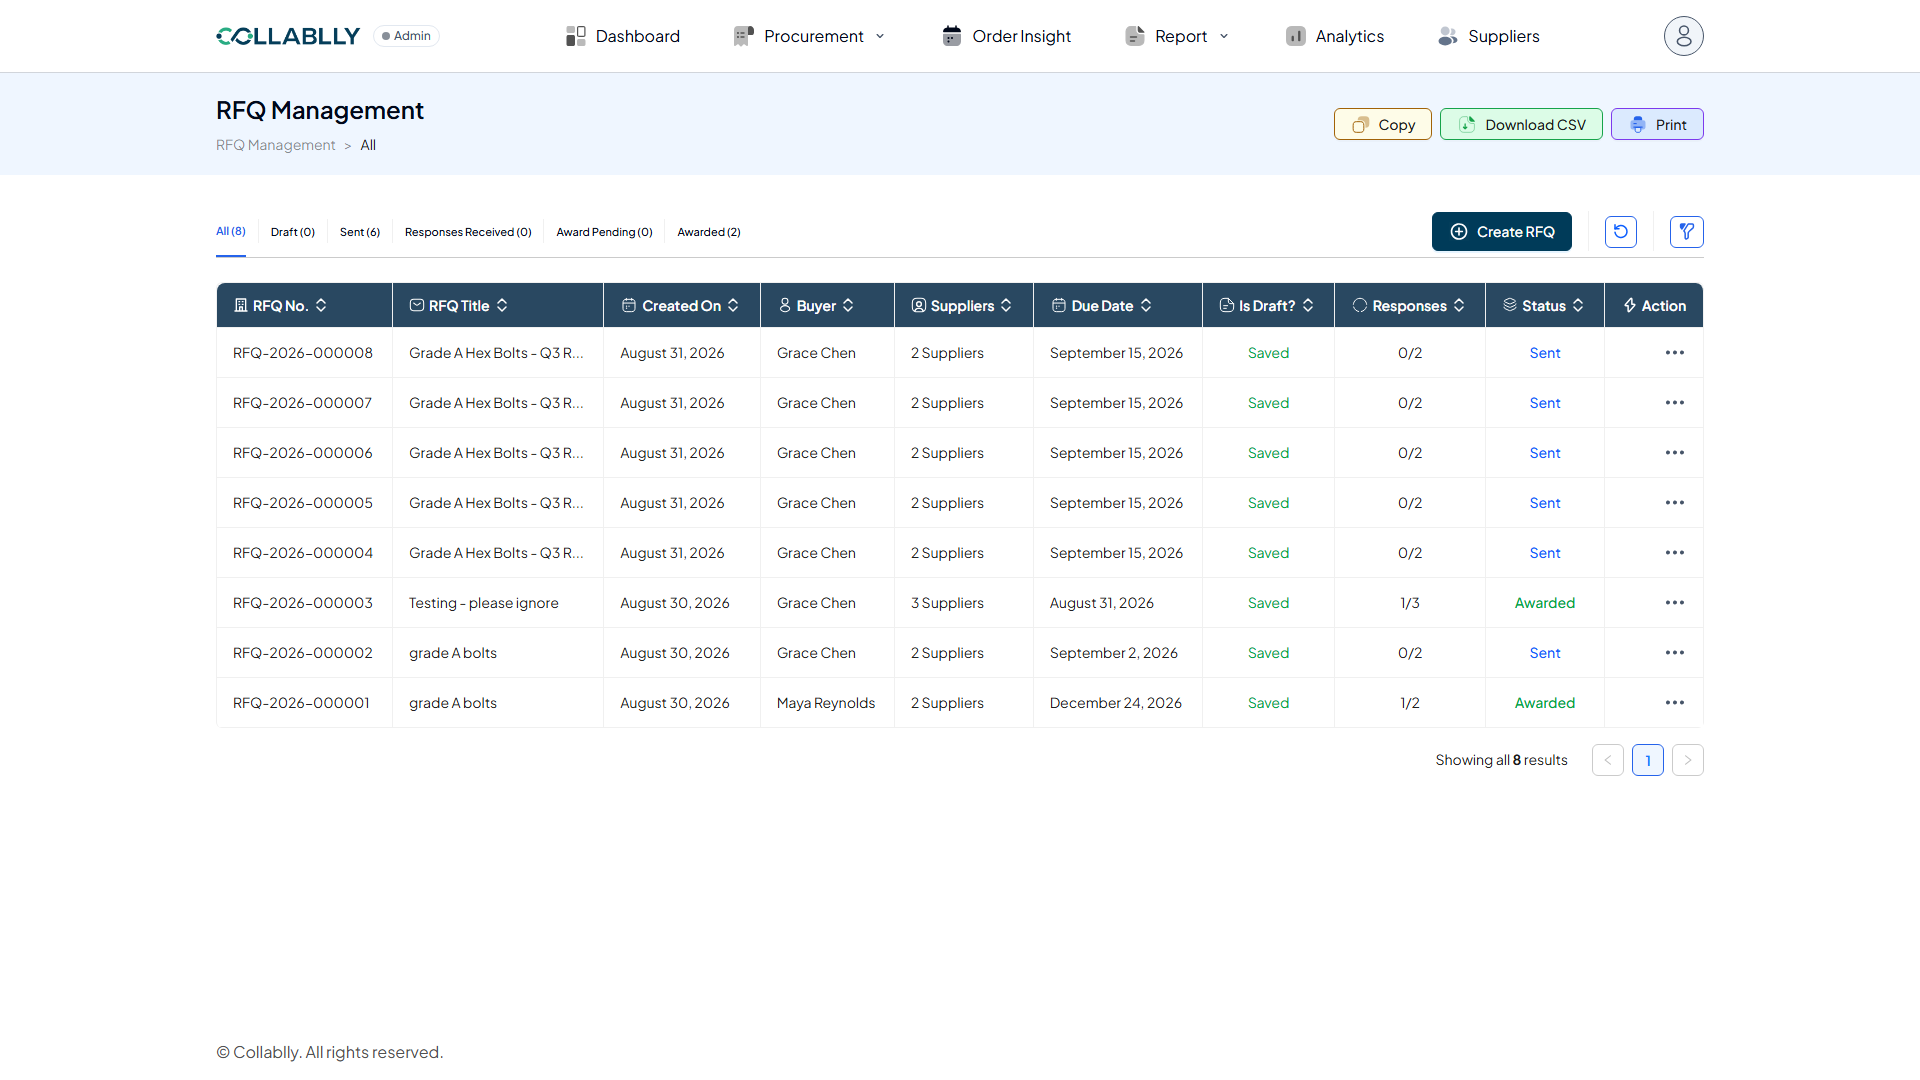
The new RFQ appears at the top with a Sent status. It stays there until a supplier responds.
- Step 29 of 30
Open its details
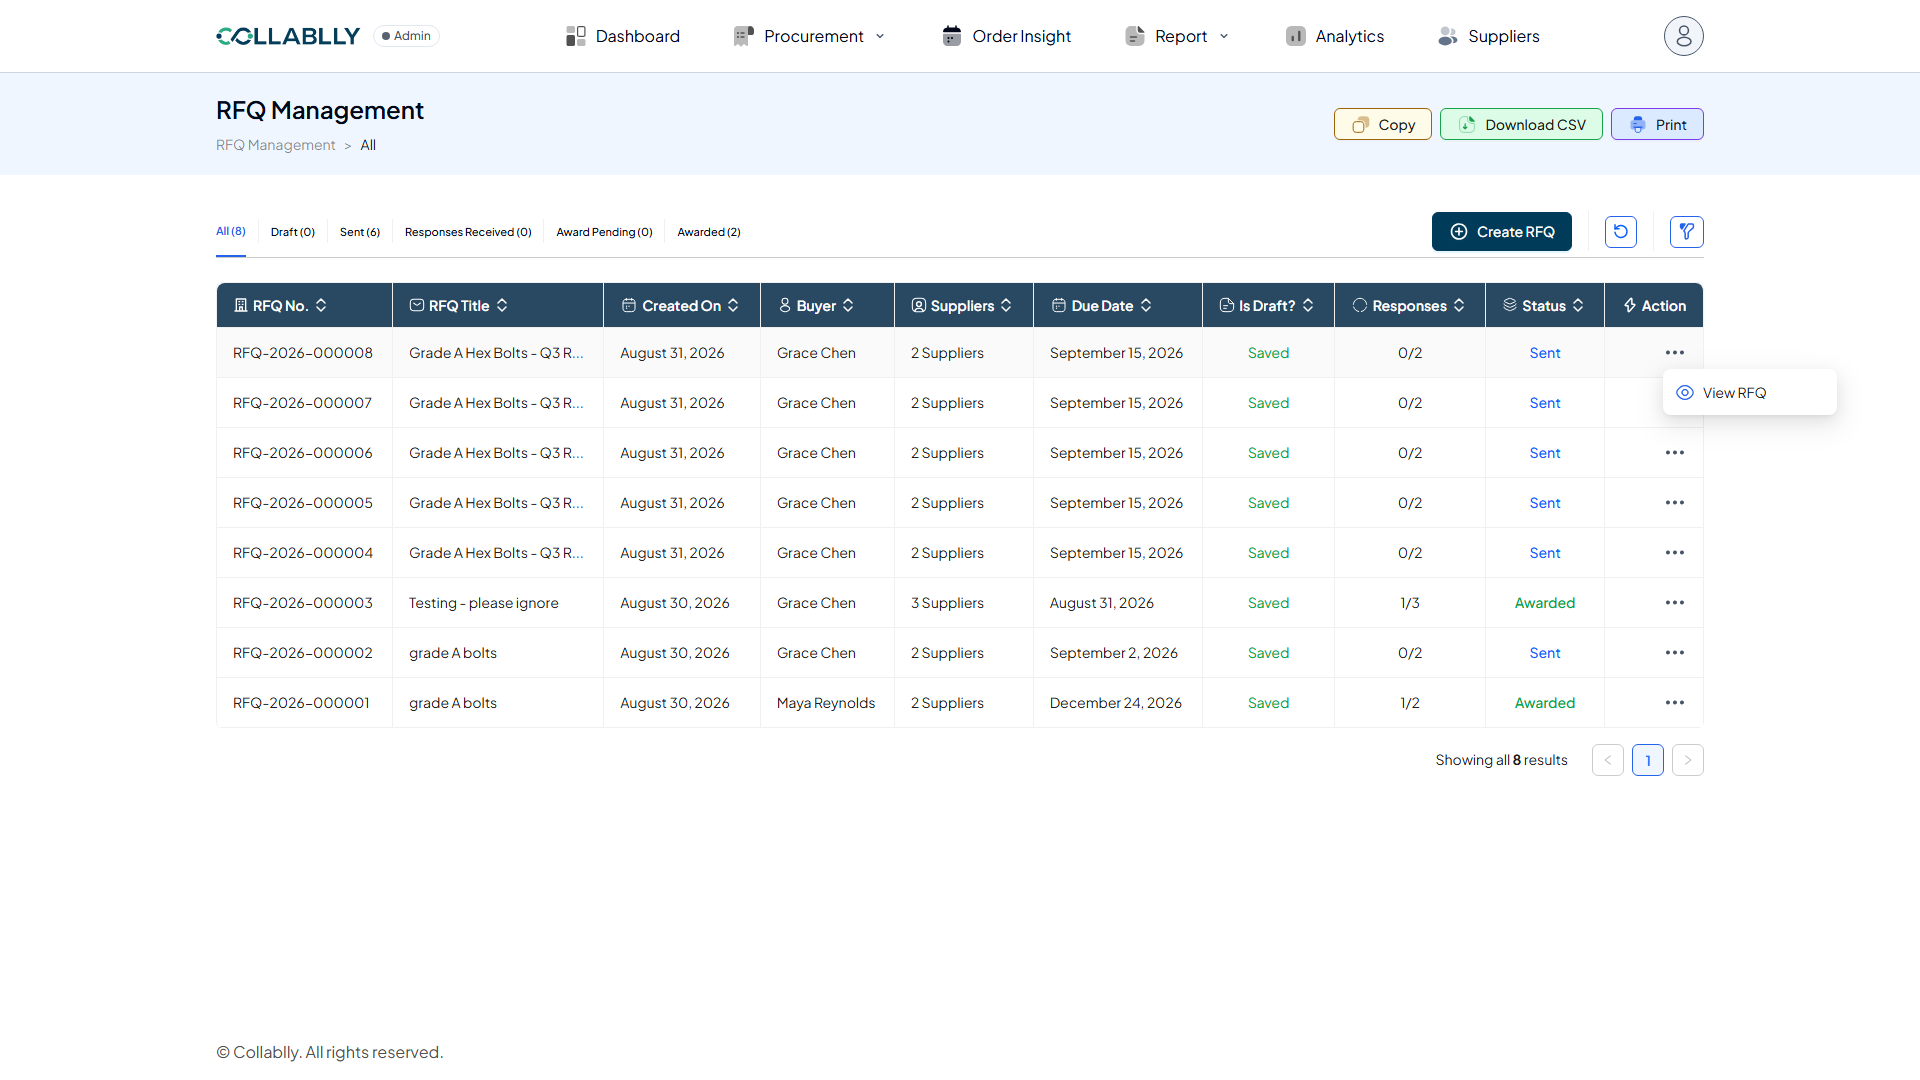
Click the … action menu on any RFQ row, then View RFQ to see full details.
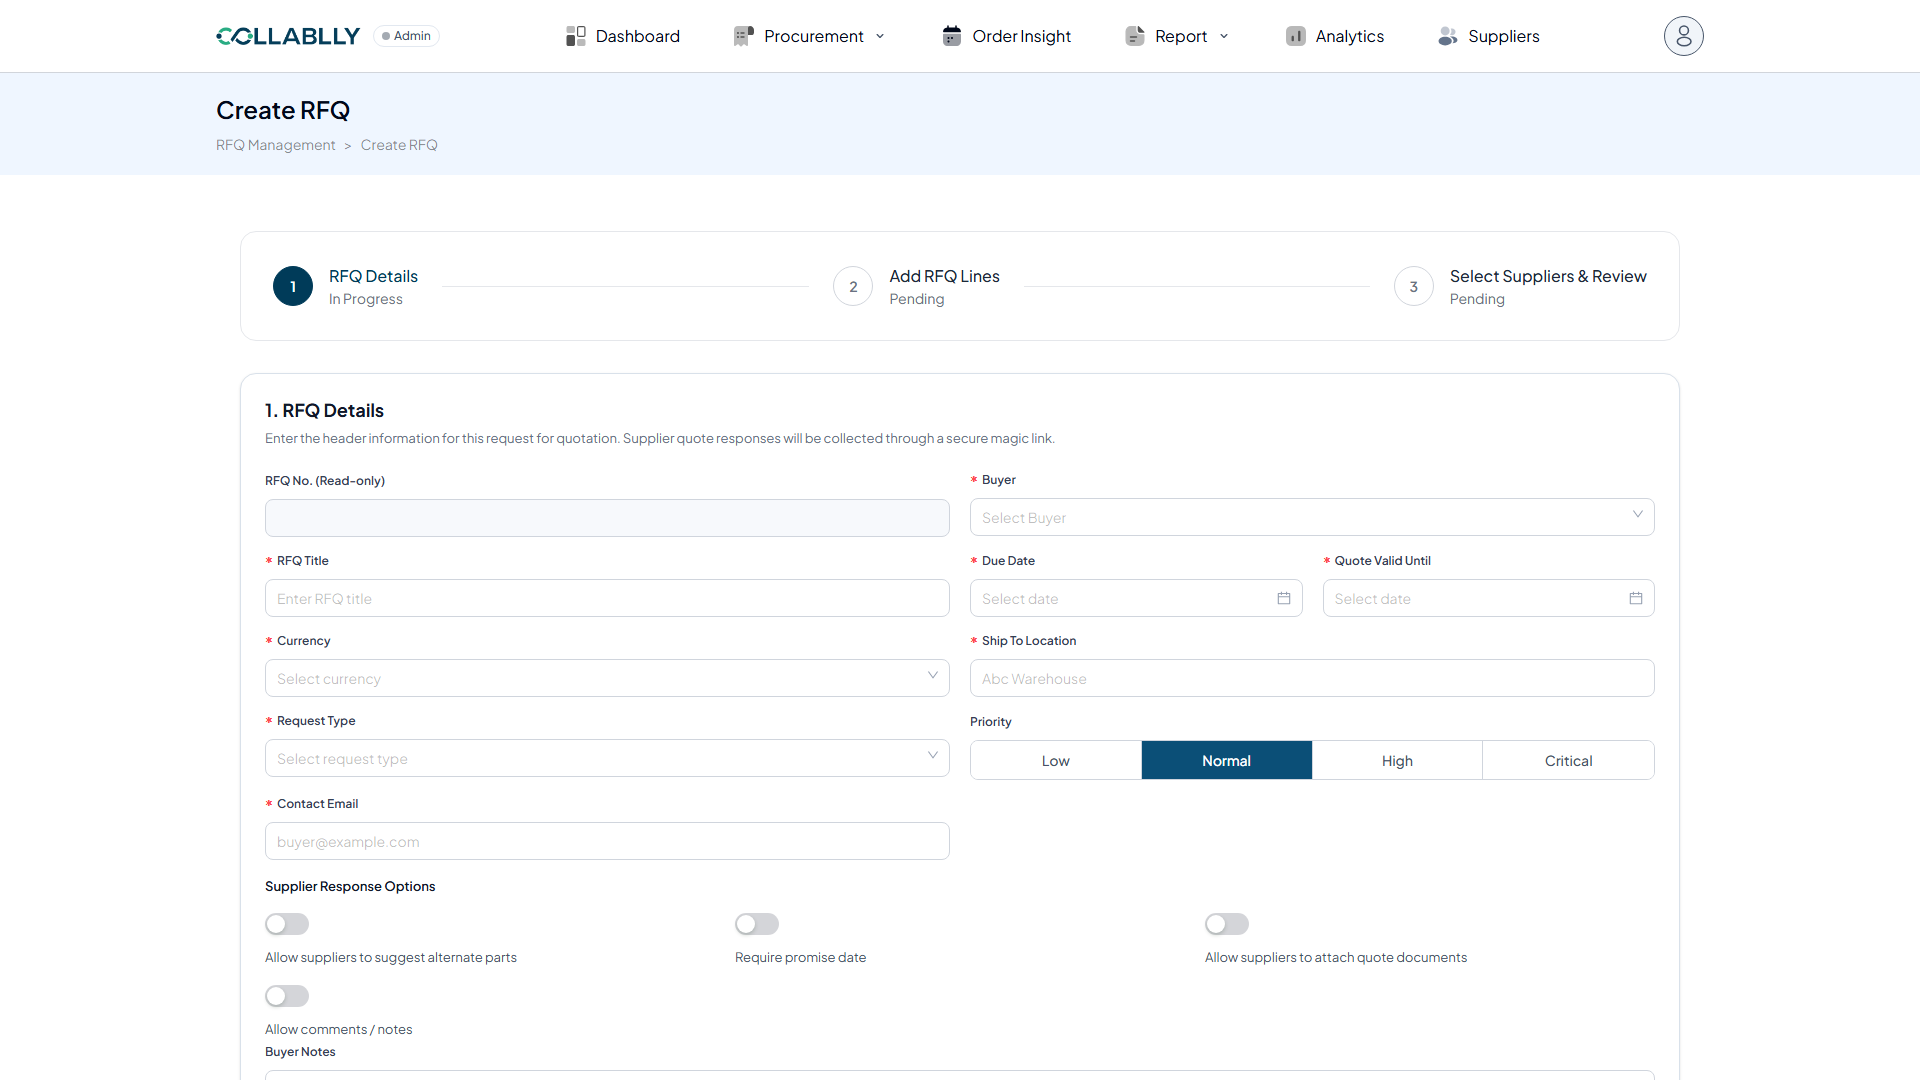
- Step 30 of 30
Review RFQ details
The detail drawer shows the header info, every supplier the RFQ was sent to with their response status, and every line item requested, all in one place.