- Step 1 of 14
Open Mass PO Update
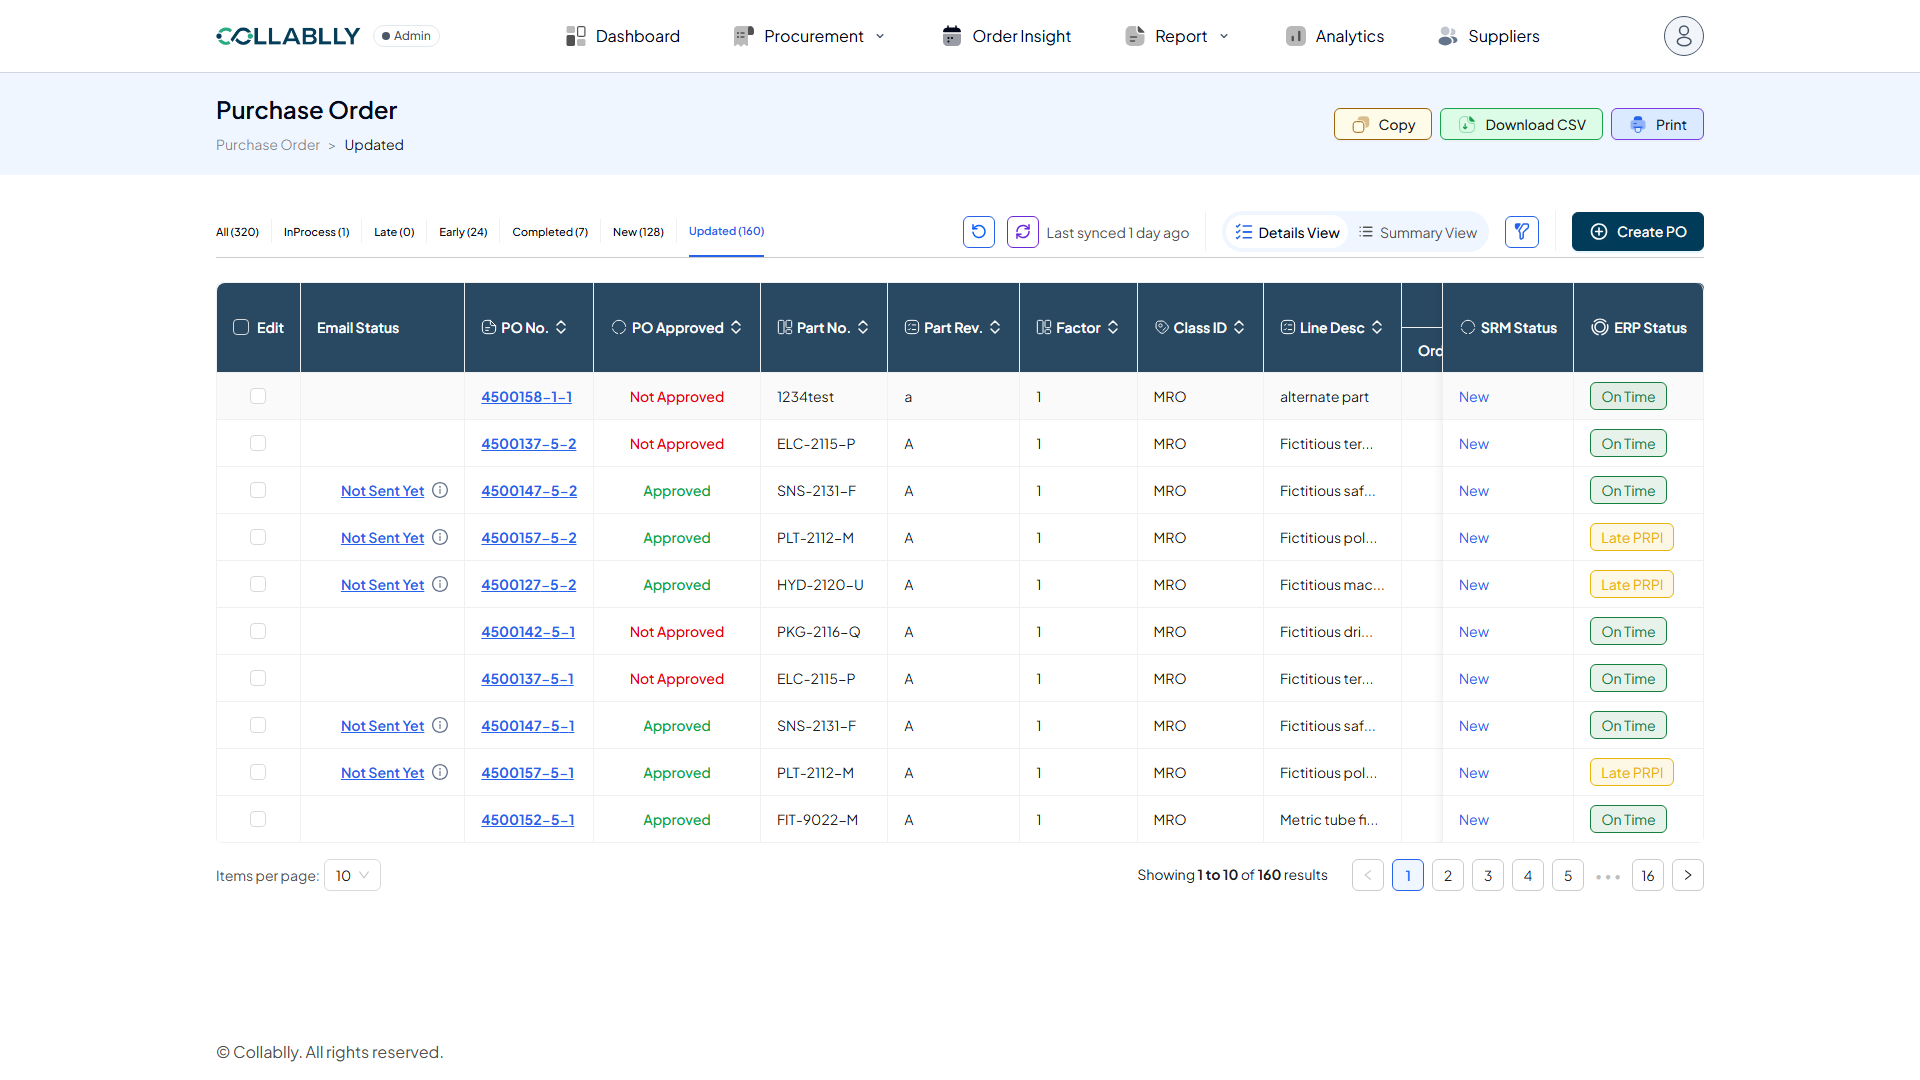
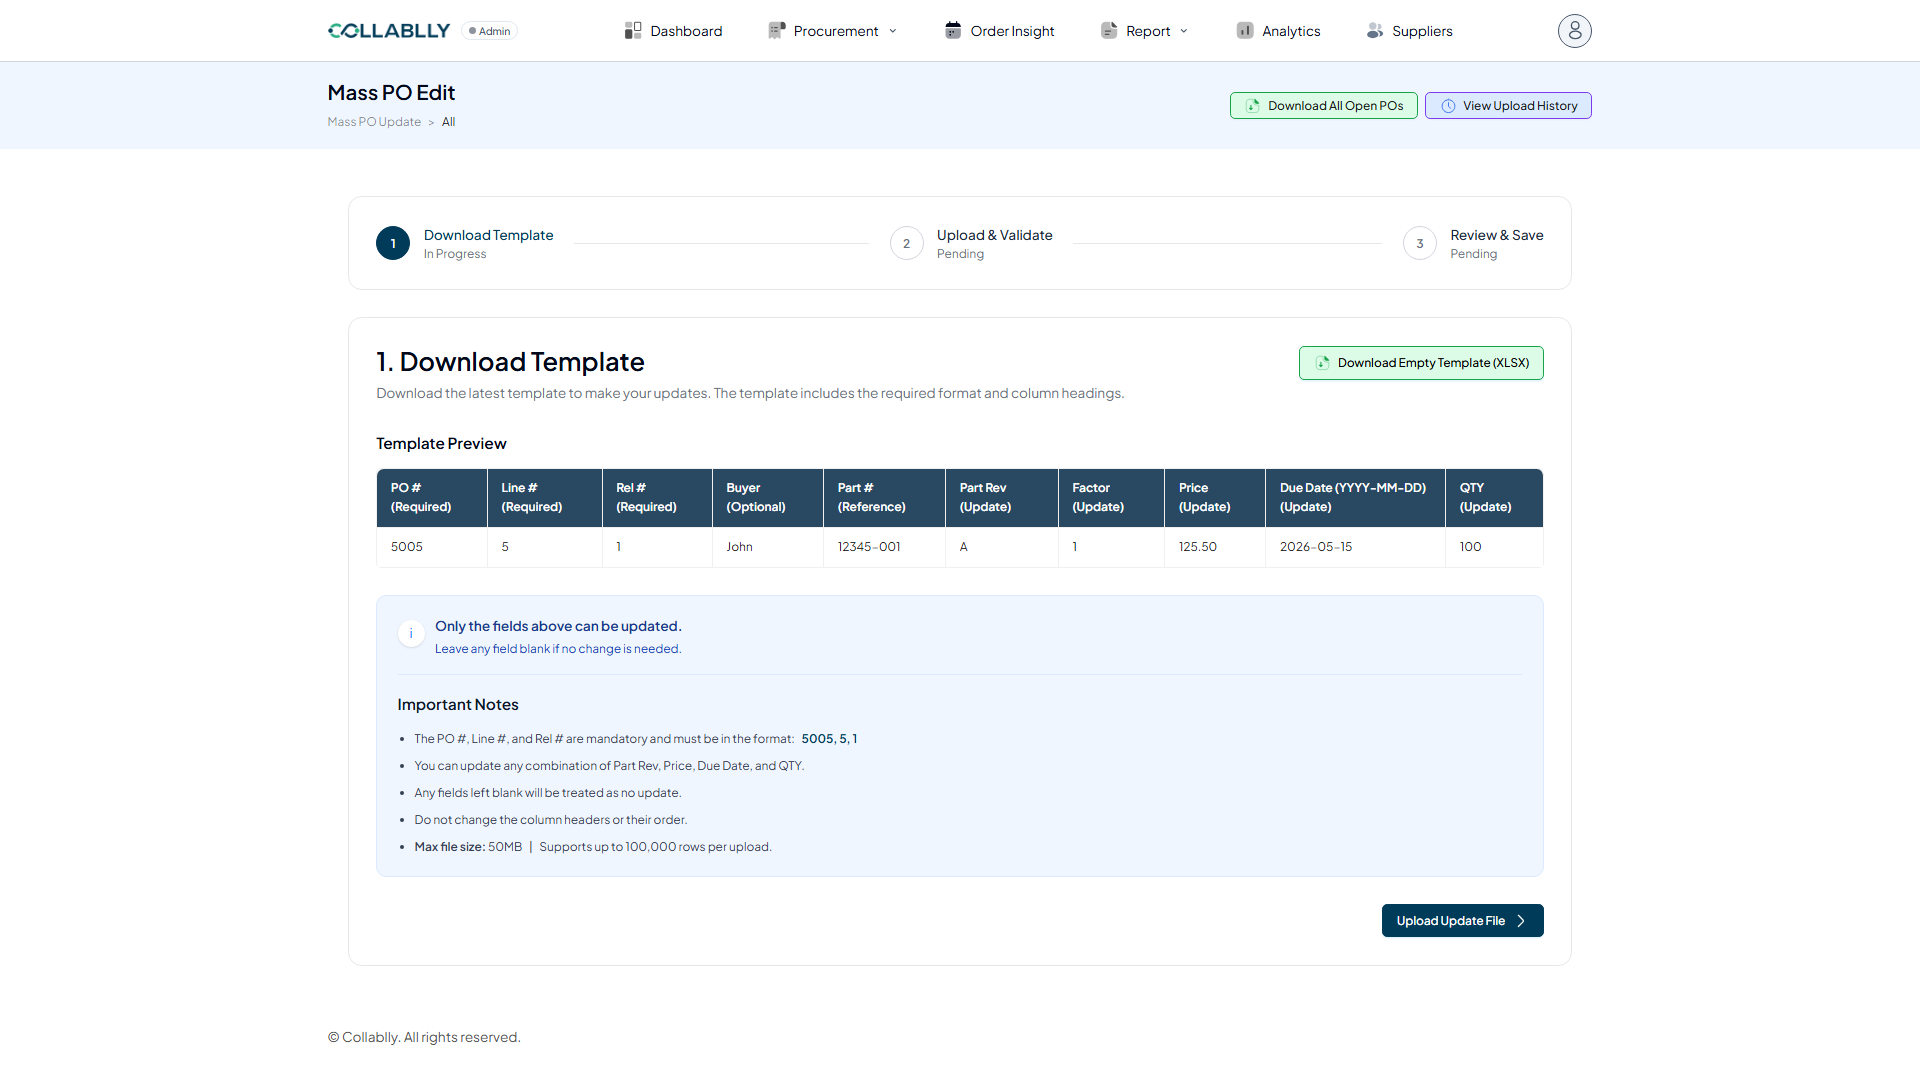
Procurement > Mass PO Update opens a 3-step guided flow: Download Template, Upload & Validate, Review & Save. Step 1 is active first.
- Step 2 of 14
Understand the template
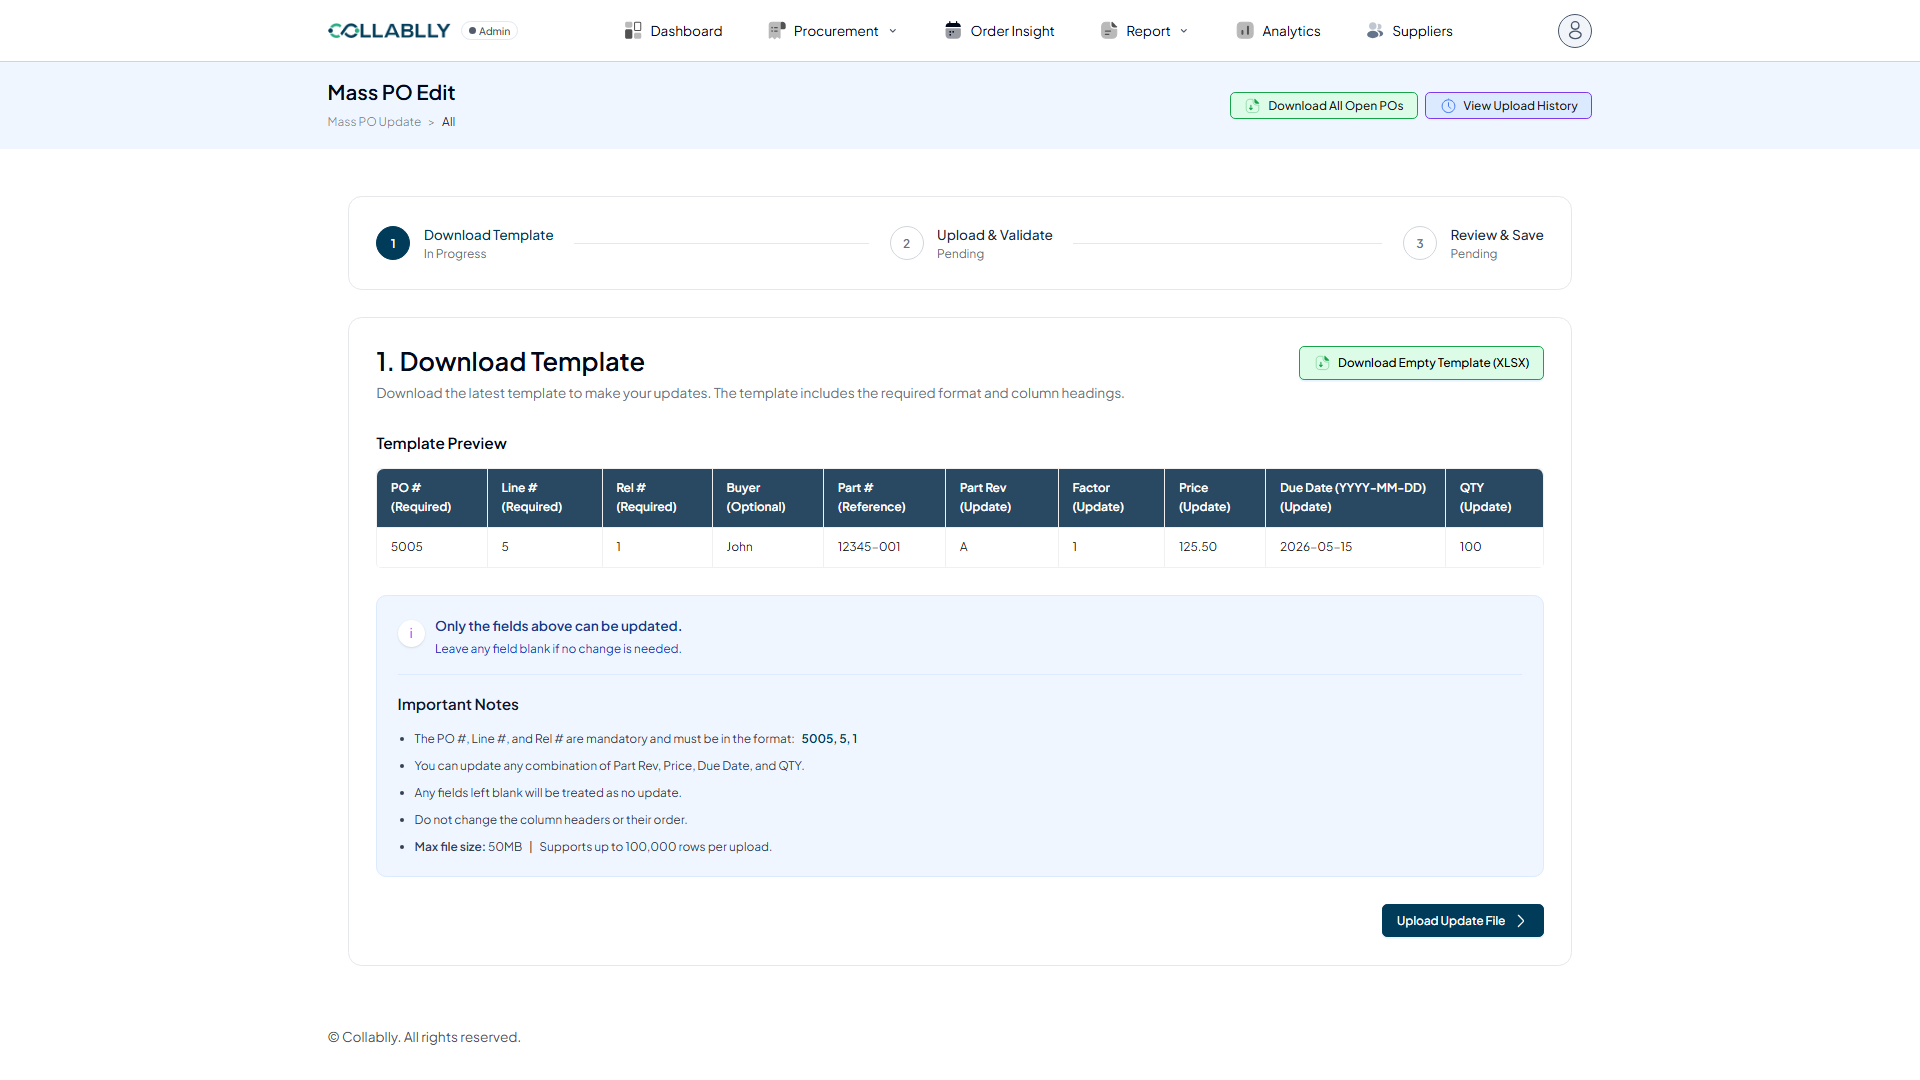
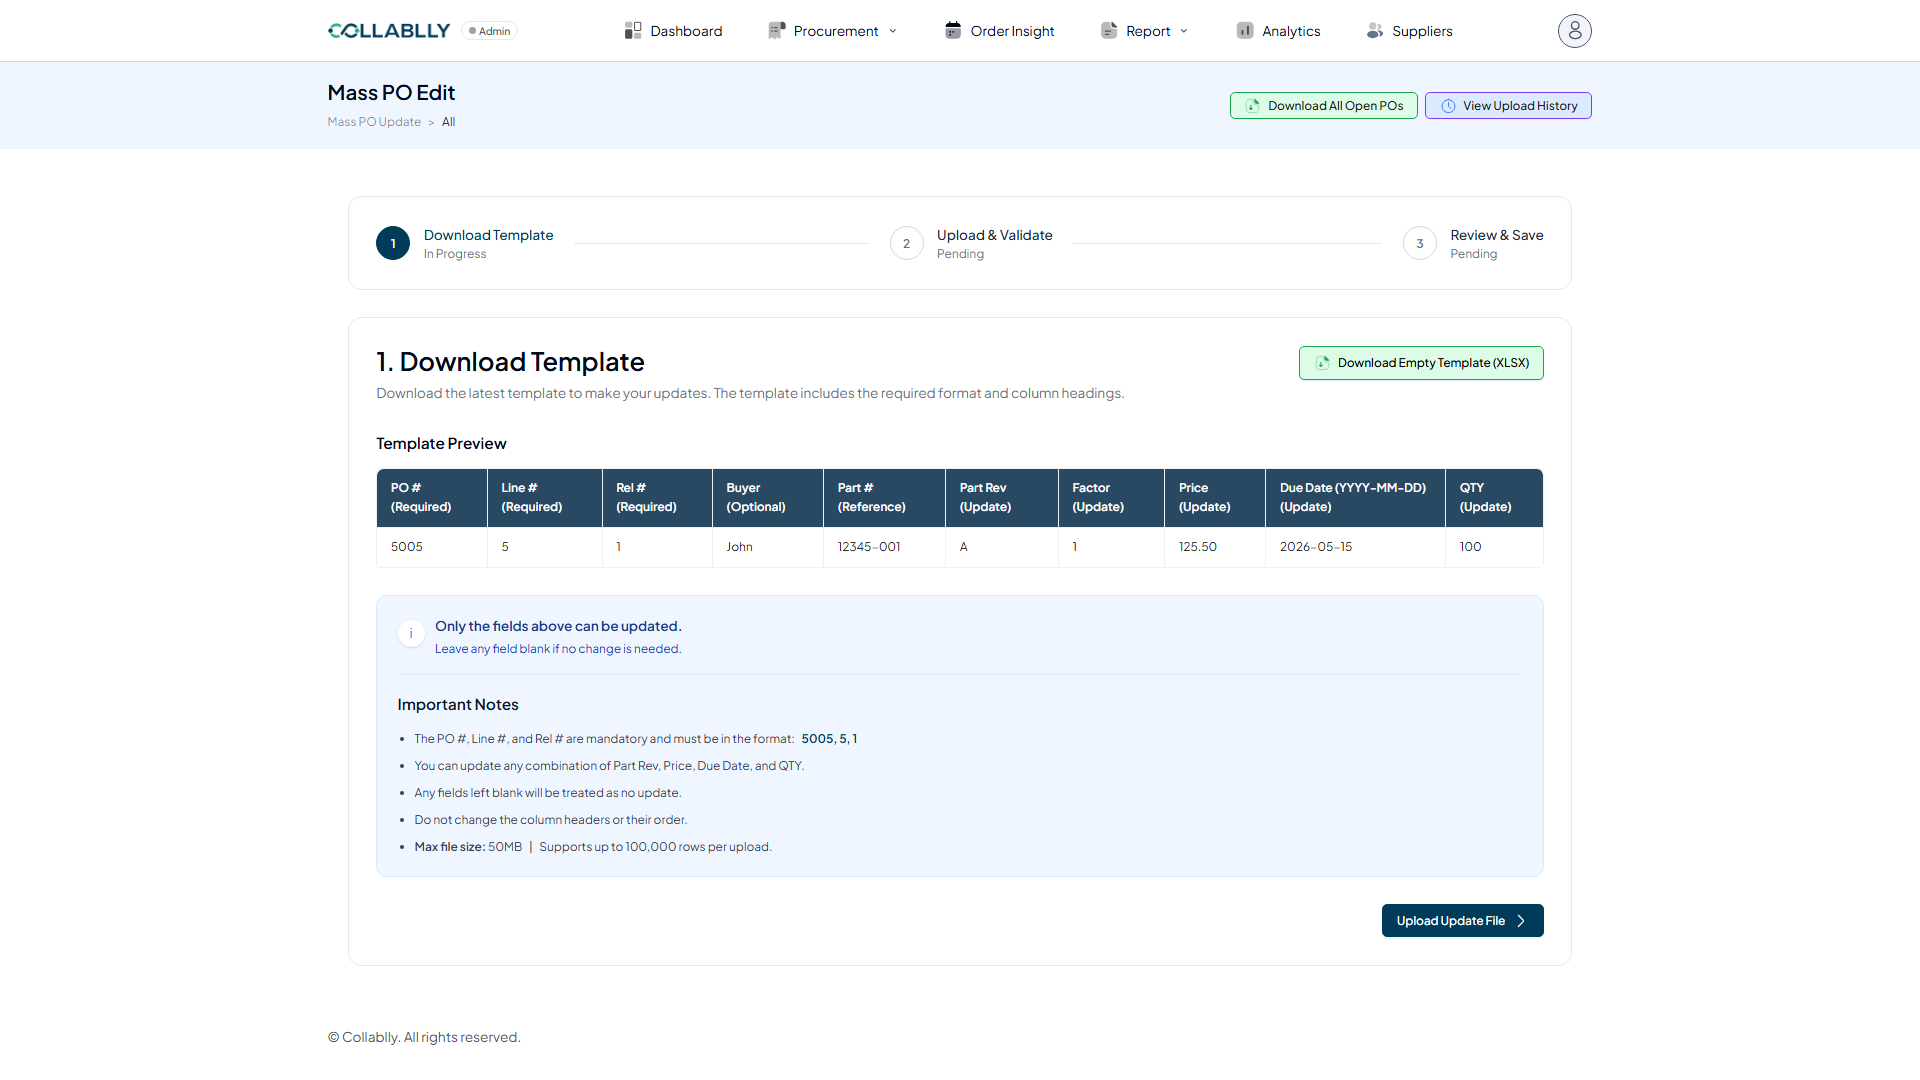
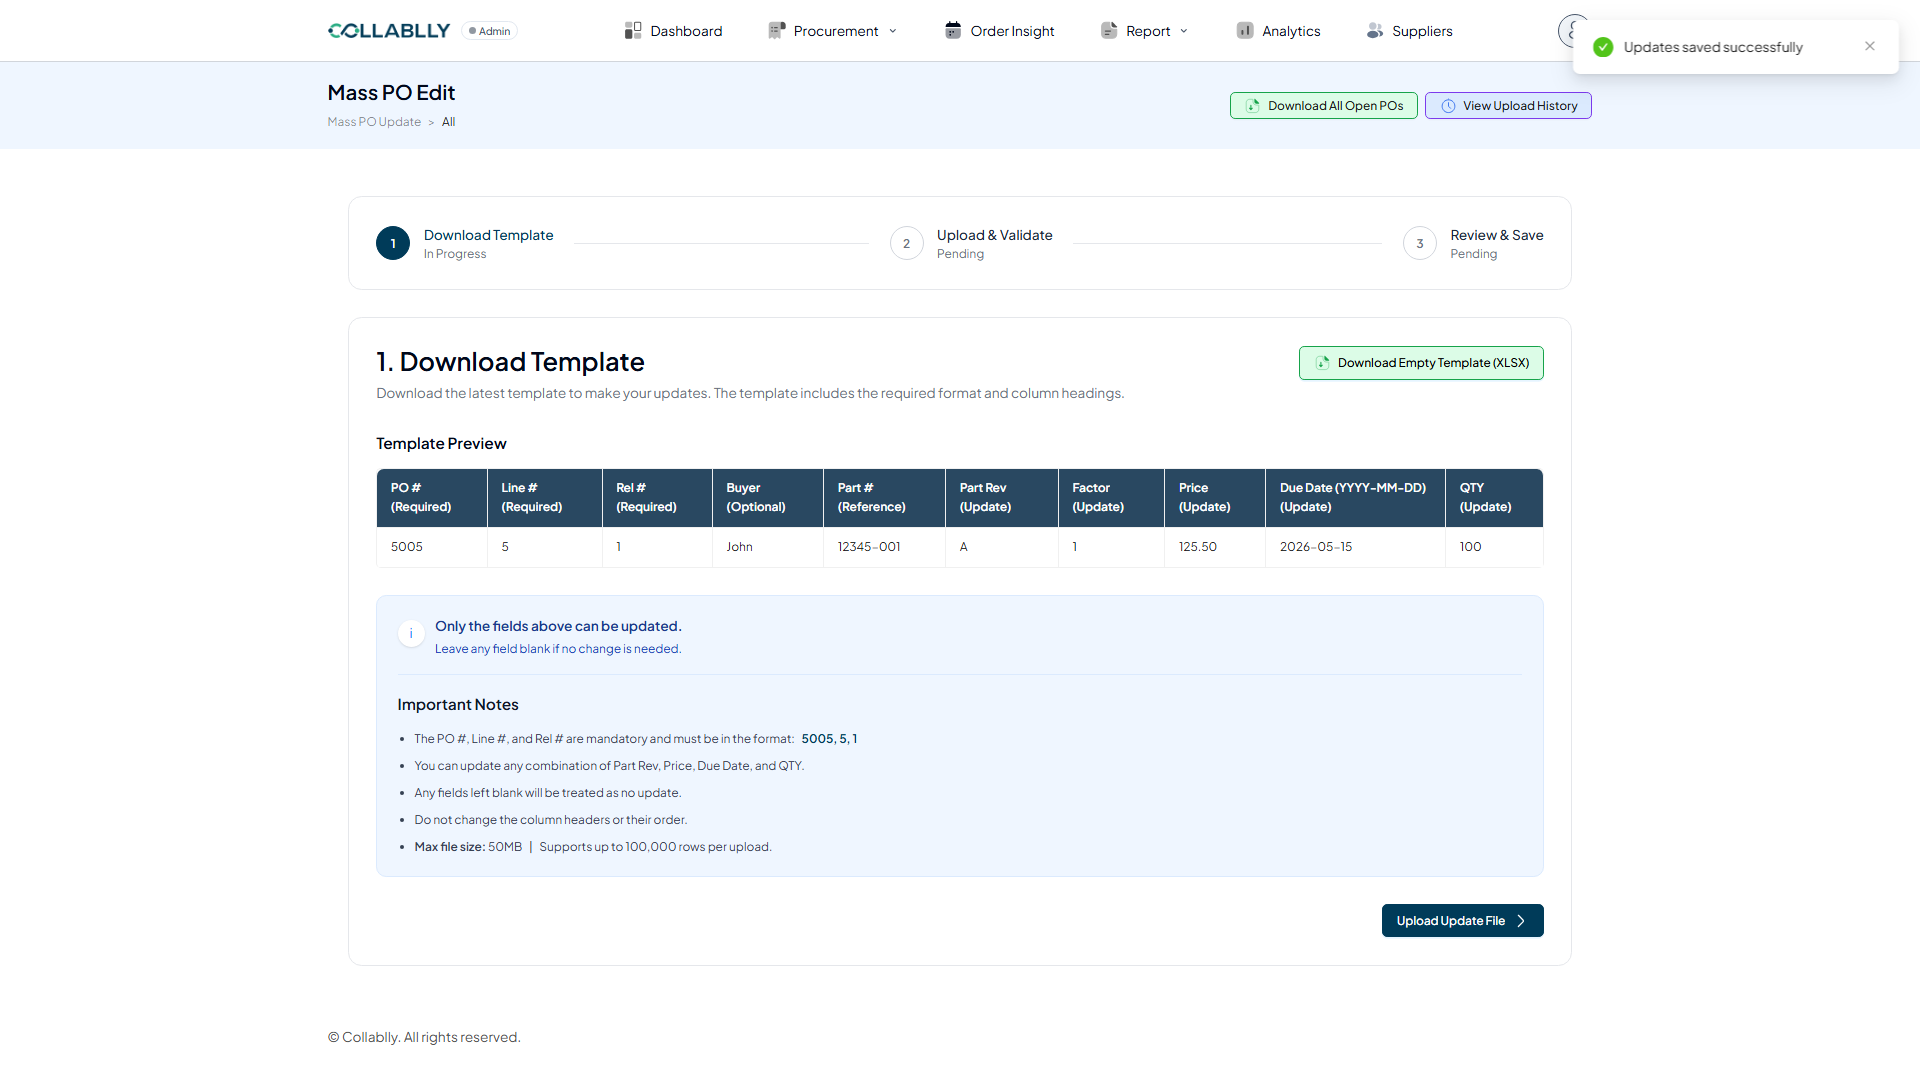
The Template Preview table shows every column and what you can do with it: PO #, Line #, and Rel # are Required (they identify the exact PO line); Buyer is Optional; Part # is Reference only; and Part Rev, Factor, Price, Due Date (YYYY-MM-DD), and QTY are the only Update columns.
- Step 3 of 14
Read the Important Notes
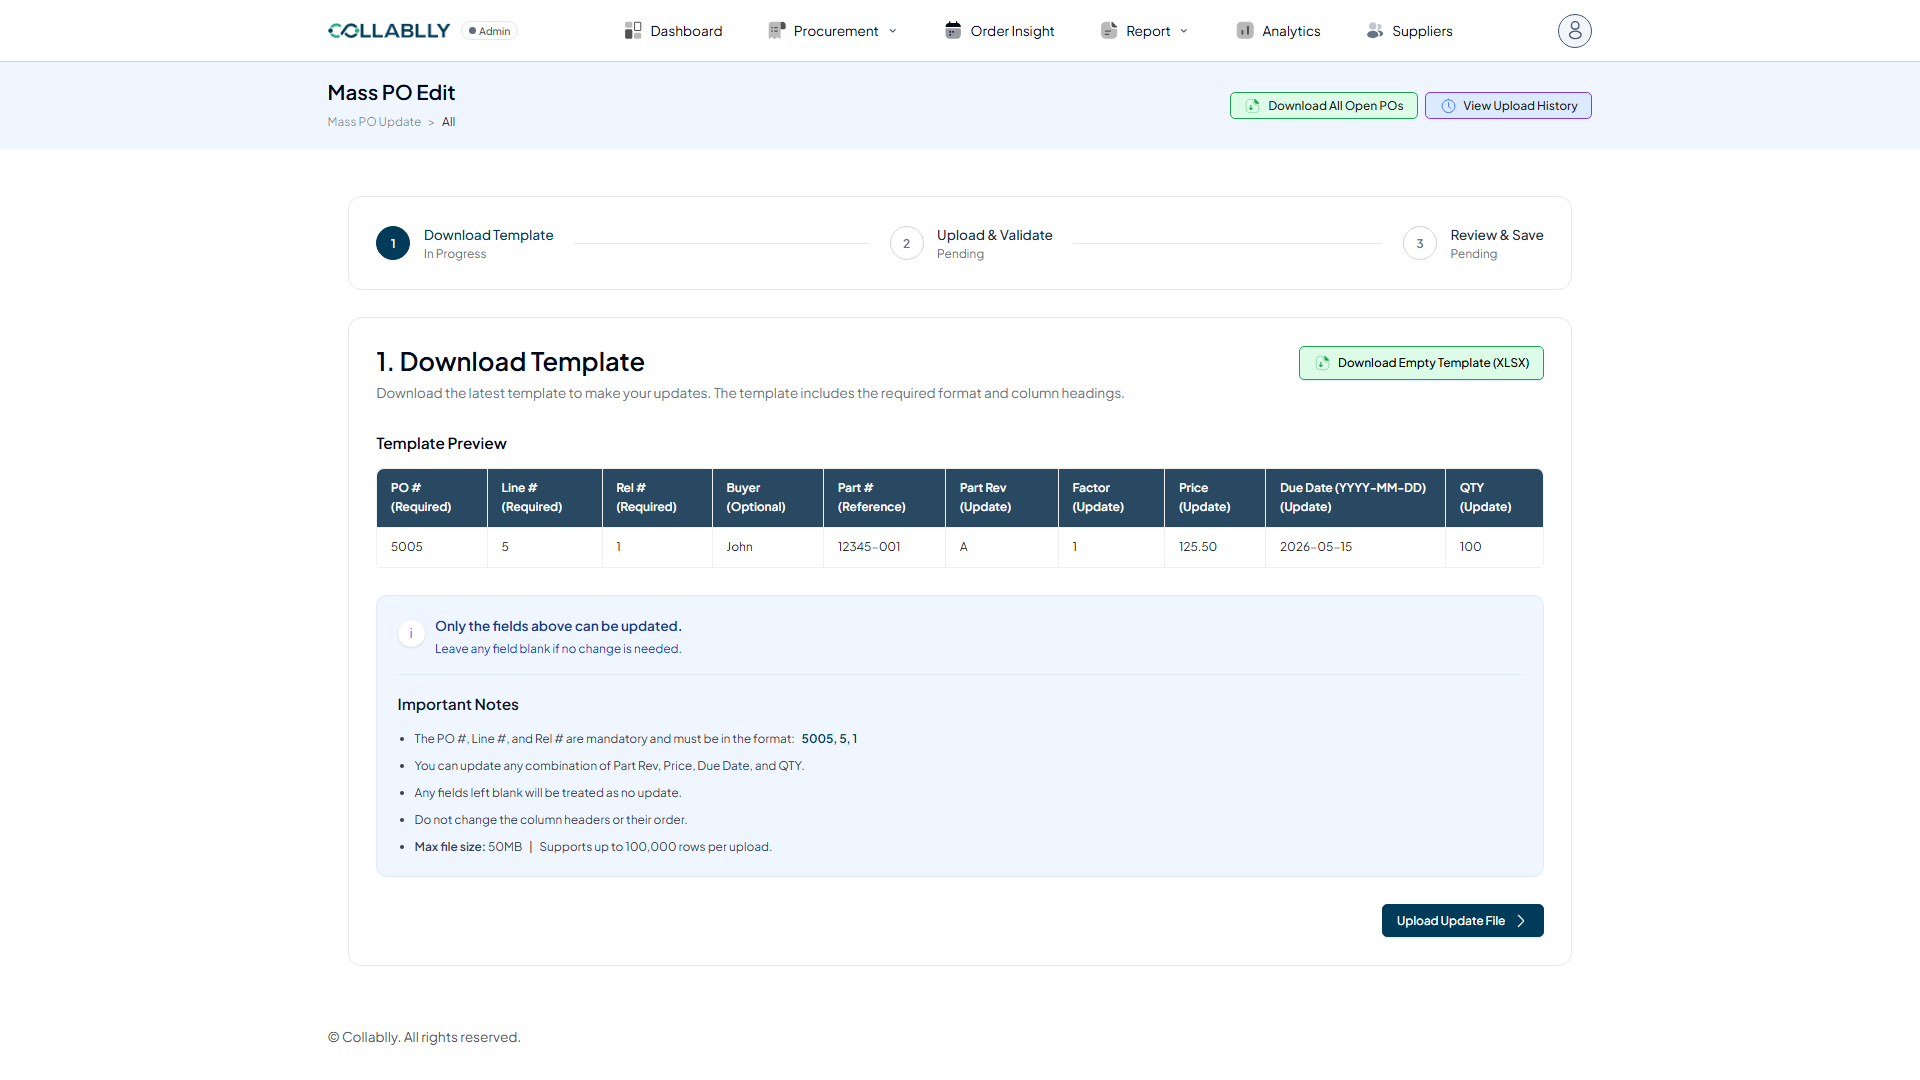
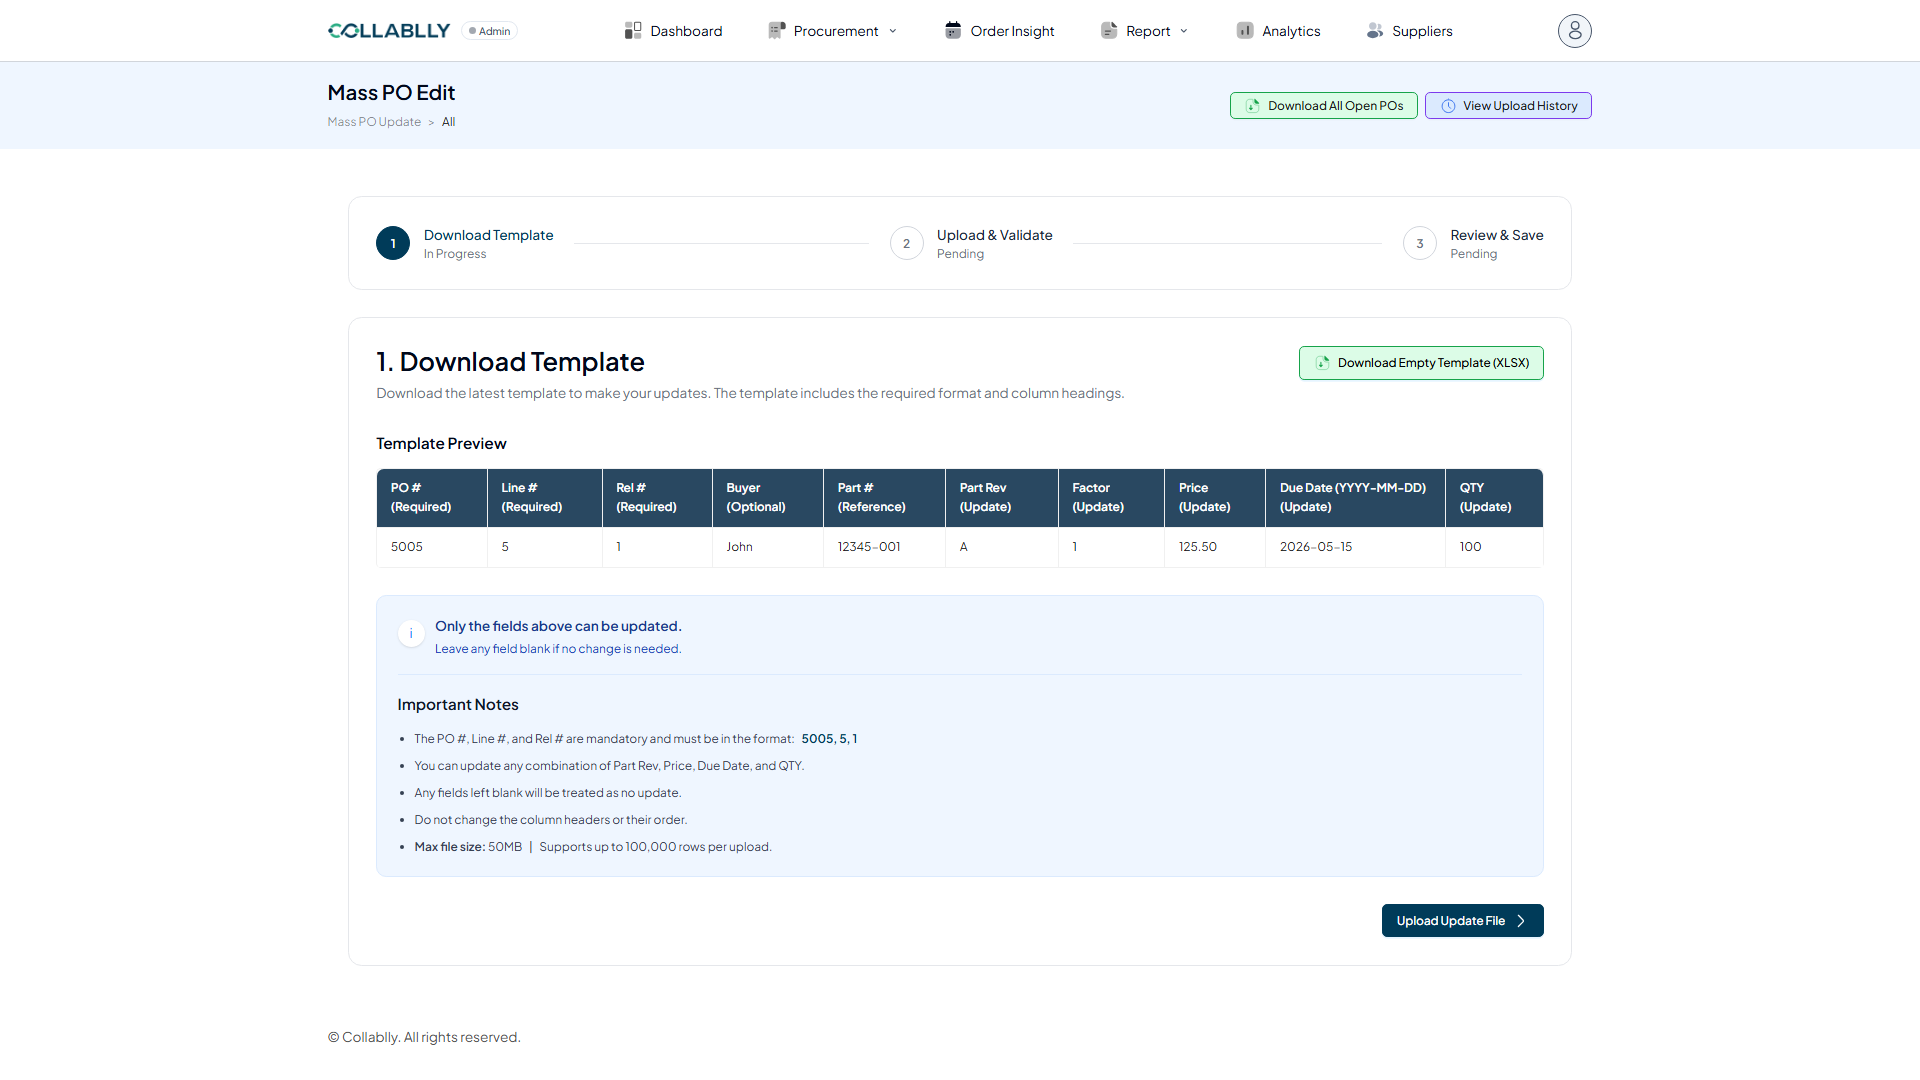
PO #, Line #, and Rel # must stay in the exact format shown (e.g. 5005, 5, 1). You can update any combination of Part Rev, Factor, Price, Due Date, and QTY. Leave a field blank to leave that value unchanged. Never rename or reorder the column headers. Files are capped at 50MB / 100,000 rows.
- Step 4 of 14
Download your data to edit
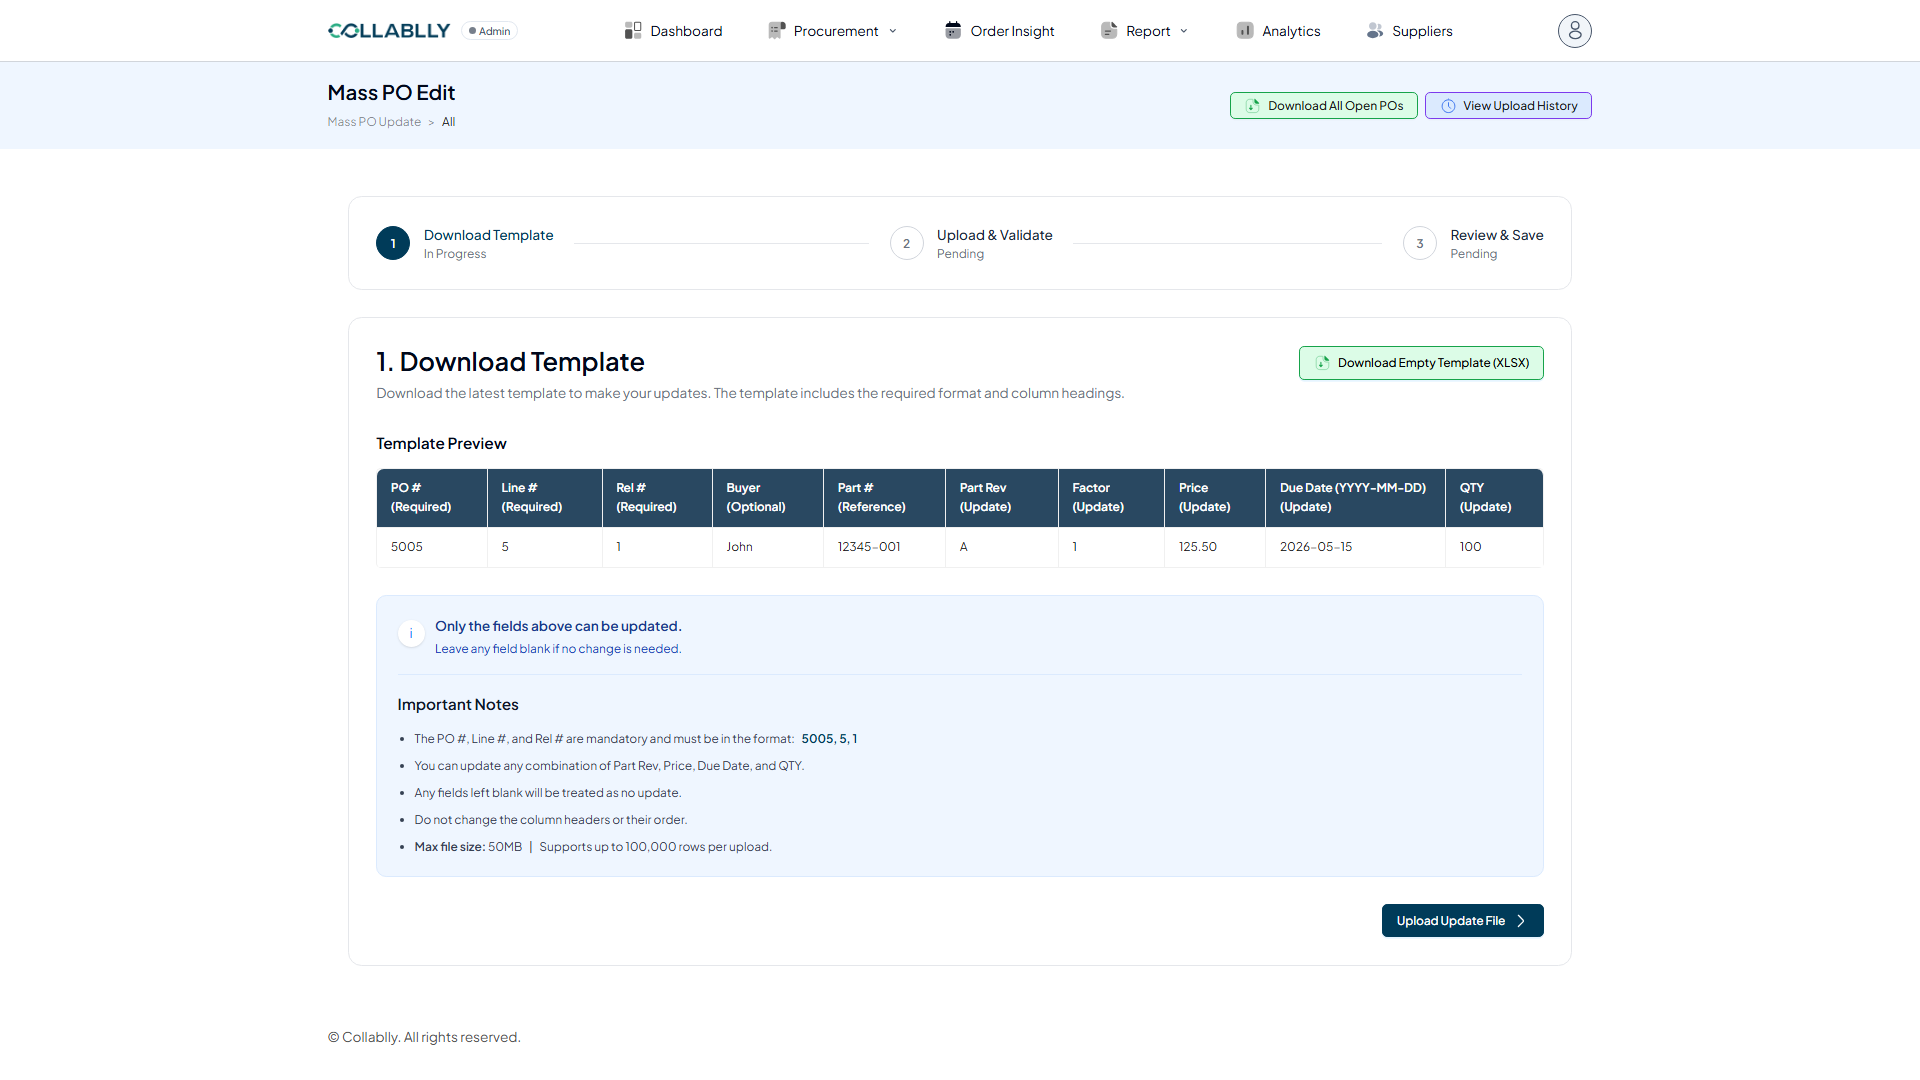
Download All Open POs exports every open PO line you can currently edit, pre-filled with real values, so you're editing existing data rather than typing PO/Line/Rel numbers from scratch.
- Step 5 of 14
Or start from a blank template
Download Empty Template (XLSX) gives you just the column headers if you'd rather build the update file yourself.
- Step 6 of 14
Move to Upload & Validate
Once your Excel file is edited (only in the Part Rev, Factor, Price, Due Date, and QTY columns), click Upload Update File to advance to step 2.
- Step 7 of 14
Select your edited file
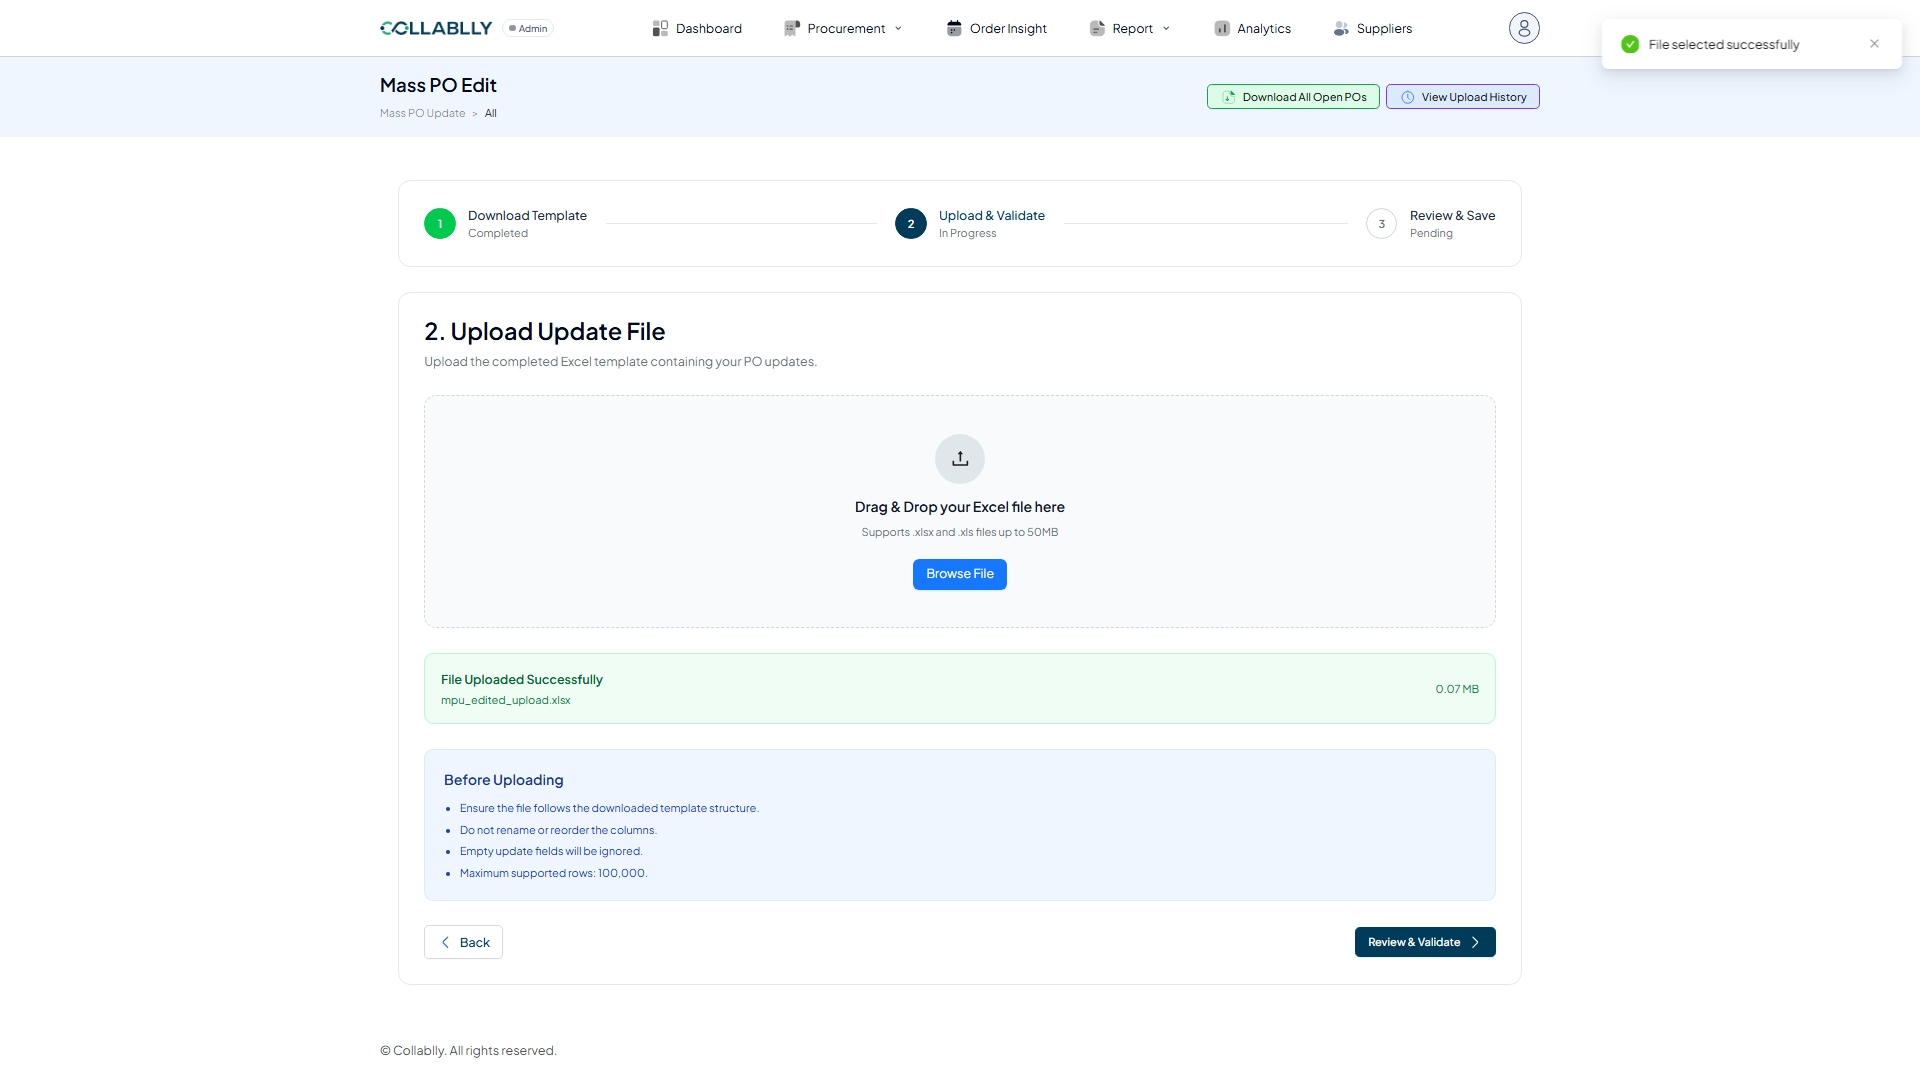
Drag and drop, or Browse File, to select the .xlsx you edited. The app accepts .xlsx/.xls up to 50MB and confirms the file name and size once it's attached. Before uploading, it reminds you: follow the downloaded template structure, don't rename or reorder columns, and blank update fields are ignored.
- Step 8 of 14
Automatic validation
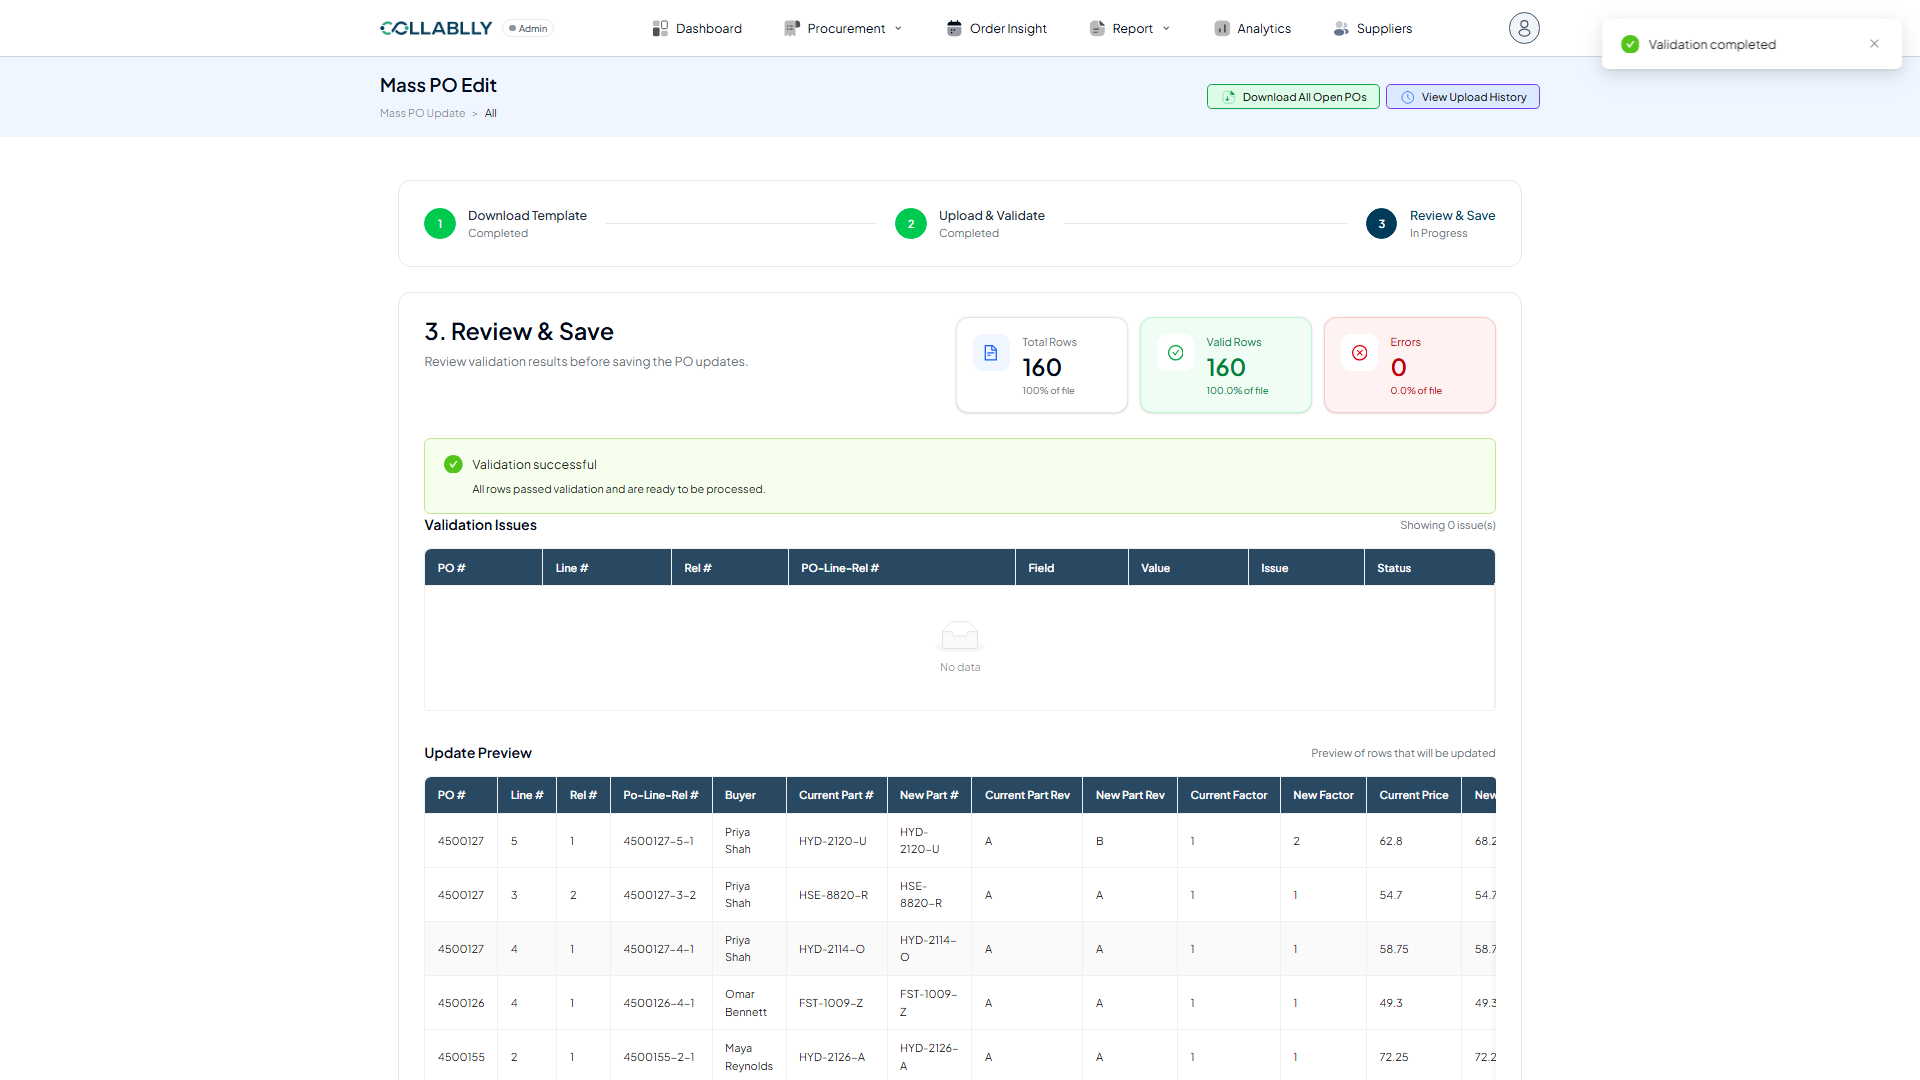
Clicking Review & Validate checks every row and reports Total Rows, Valid Rows, and Errors. In this run all 160 rows passed with 0 errors, so validation is marked successful.
- Step 9 of 14
Review the exact changes before saving
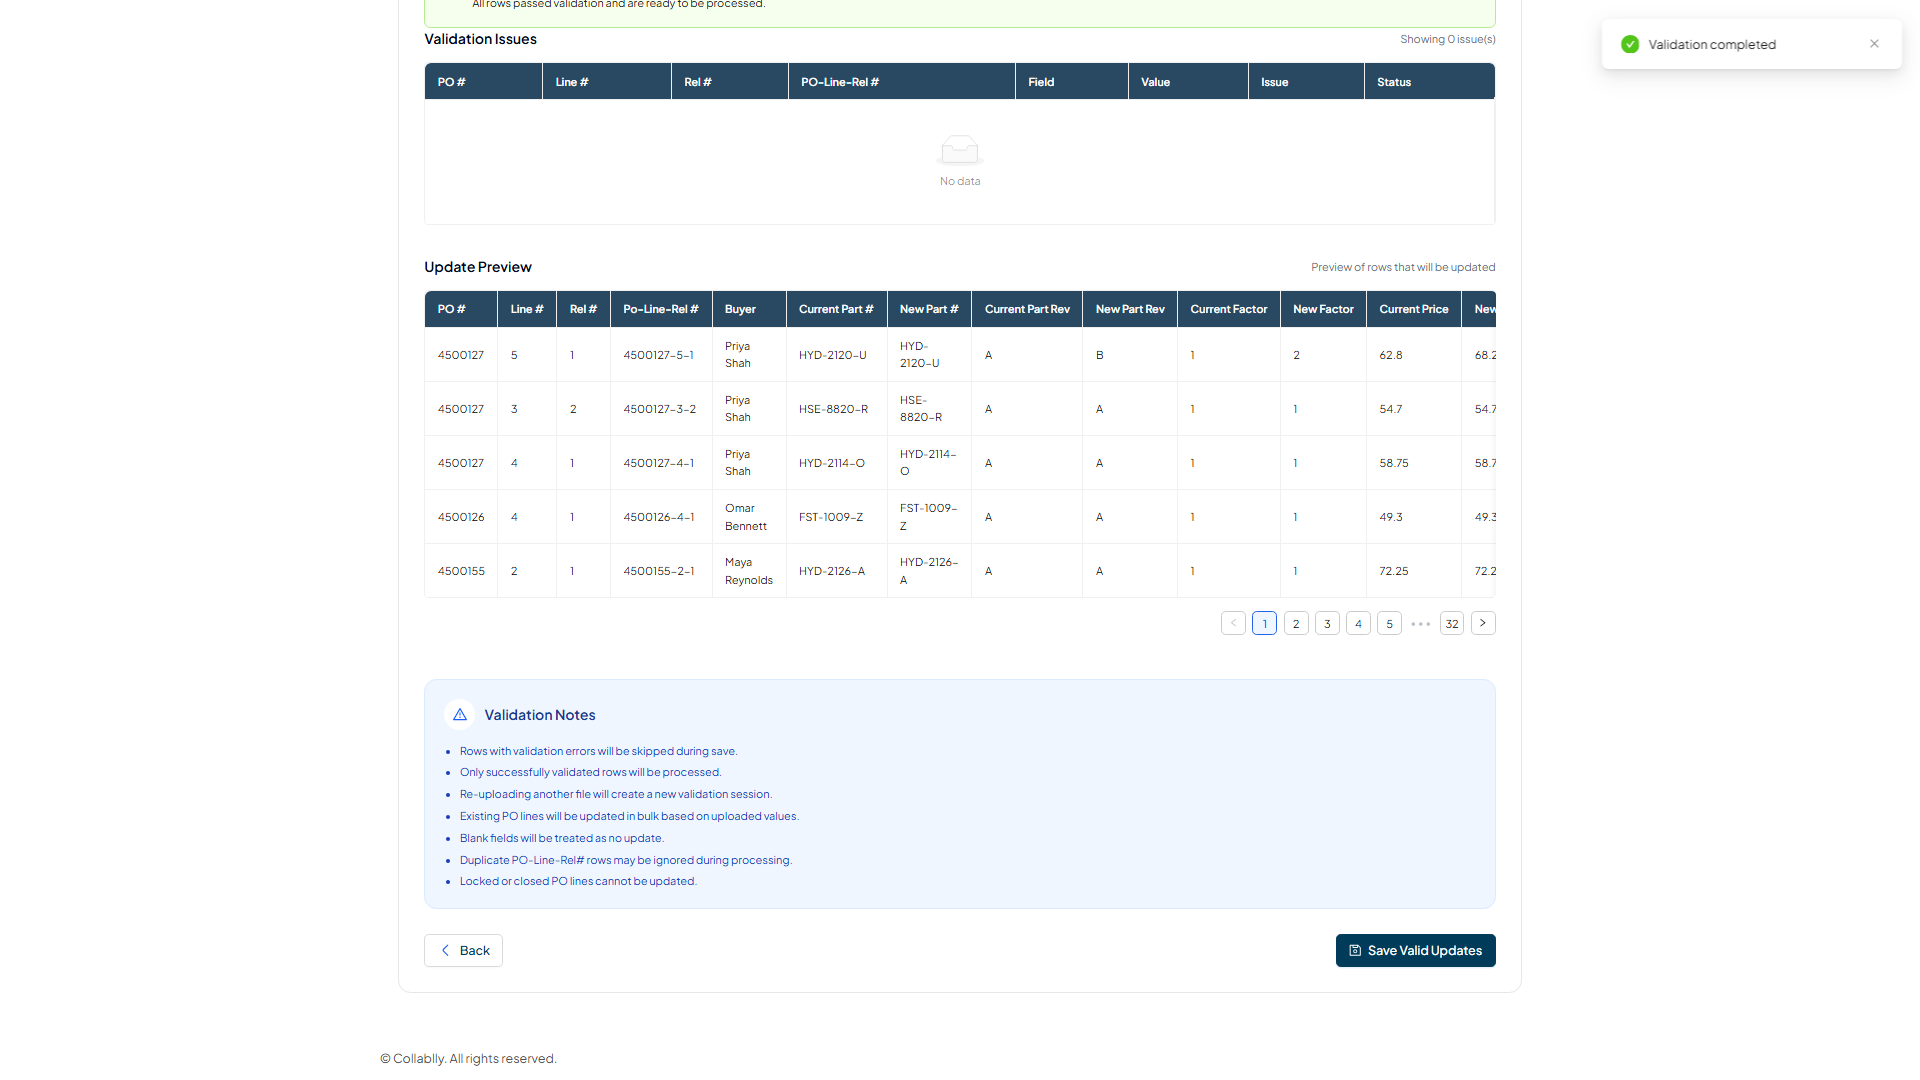
The Update Preview table shows Current vs. New for every field you touched, line by line: here PO 4500127 line 5 changes Part Rev A to B, Factor 1 to 2, Price 62.8 to 68.25, and QTY 17 to 25. The Validation Notes explain the save rules: rows with errors are skipped, blank fields mean no change, locked or closed PO lines can't be updated, and re-uploading starts a new validation session.
- Step 10 of 14
Save confirms and resets to step 1
After Save Valid Updates, a green "Updates saved successfully" confirmation appears and the flow returns to step 1, ready for your next bulk update.
- Step 11 of 14
Check the Upload History
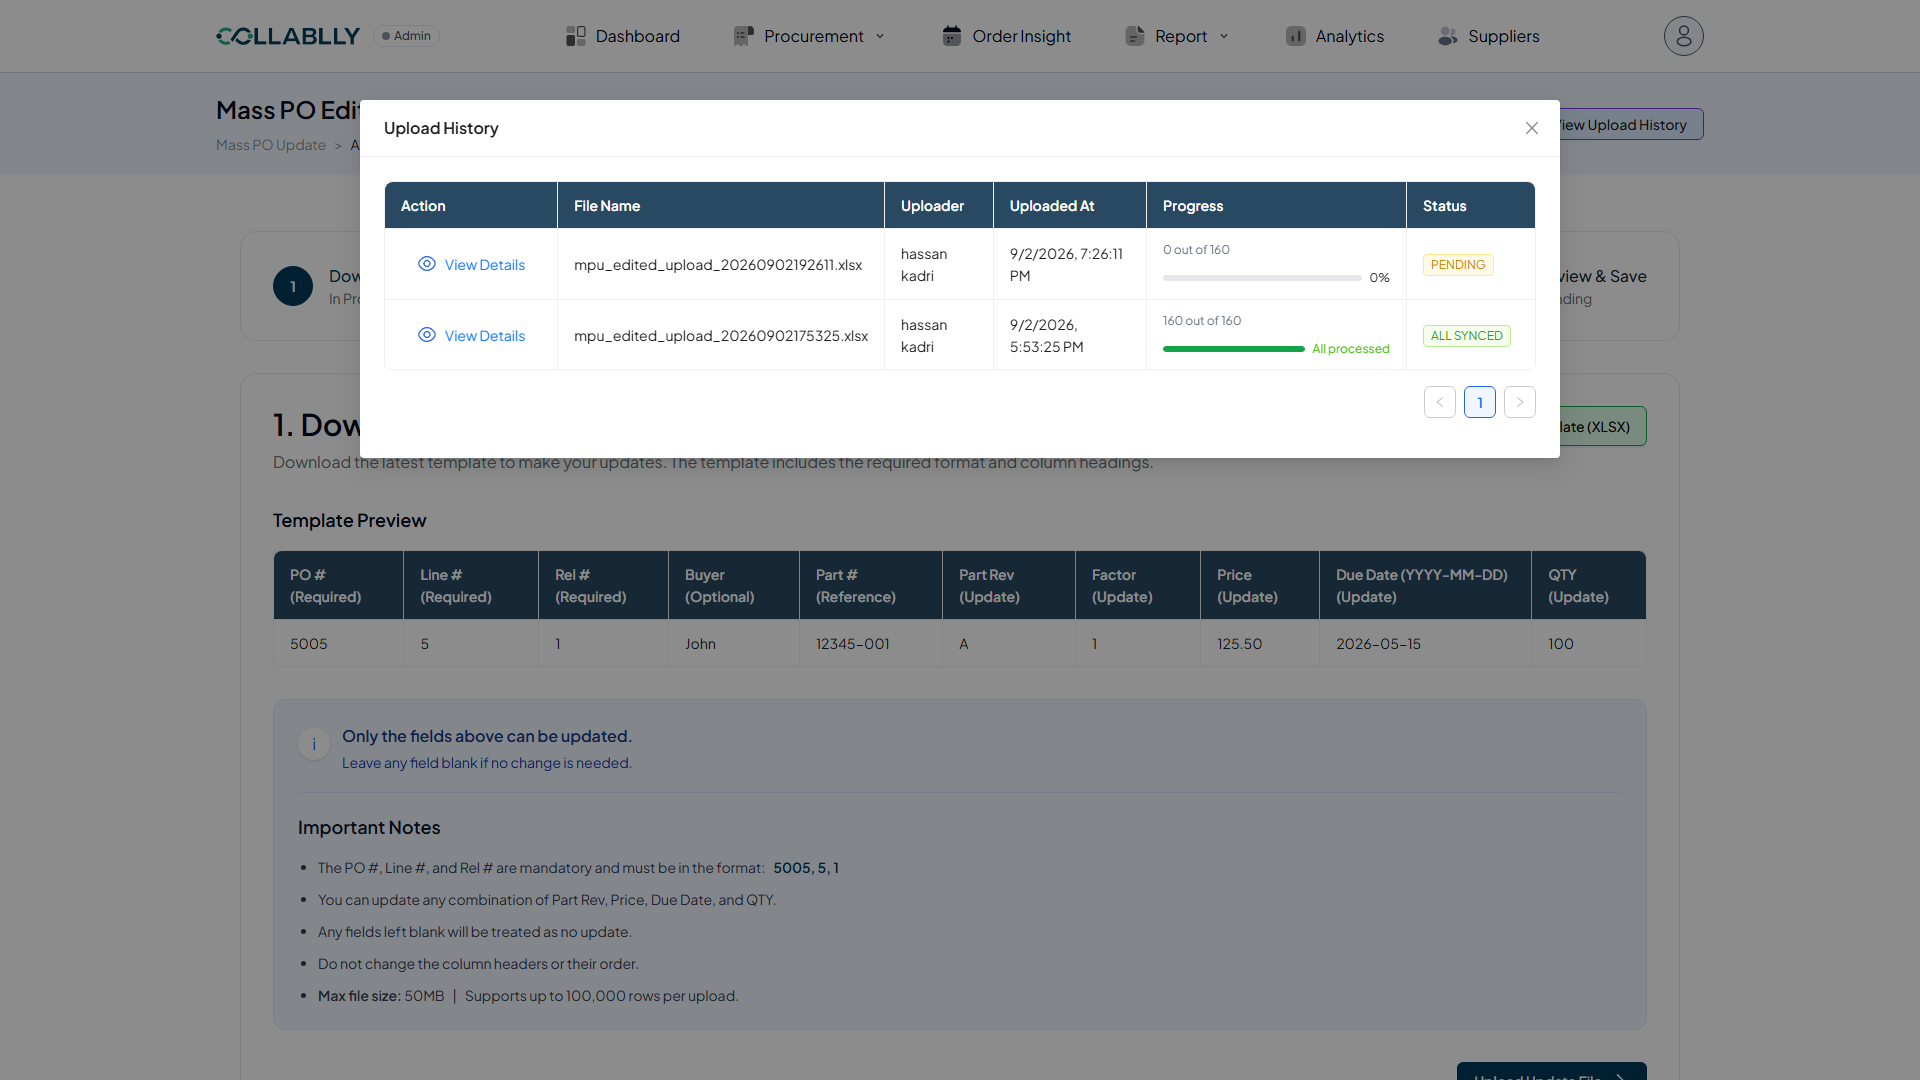
View Upload History lists every file you've uploaded: who uploaded it, when, a live Progress bar (X out of Y rows processed), and a Status badge. The newest upload here is still PENDING at 0 out of 160 while it processes; the one above it shows ALL SYNCED once every row has been written back to the PO. Use this to confirm a bulk update actually finished, not just that the file was accepted.
- Step 12 of 14
Inspect every line that changed
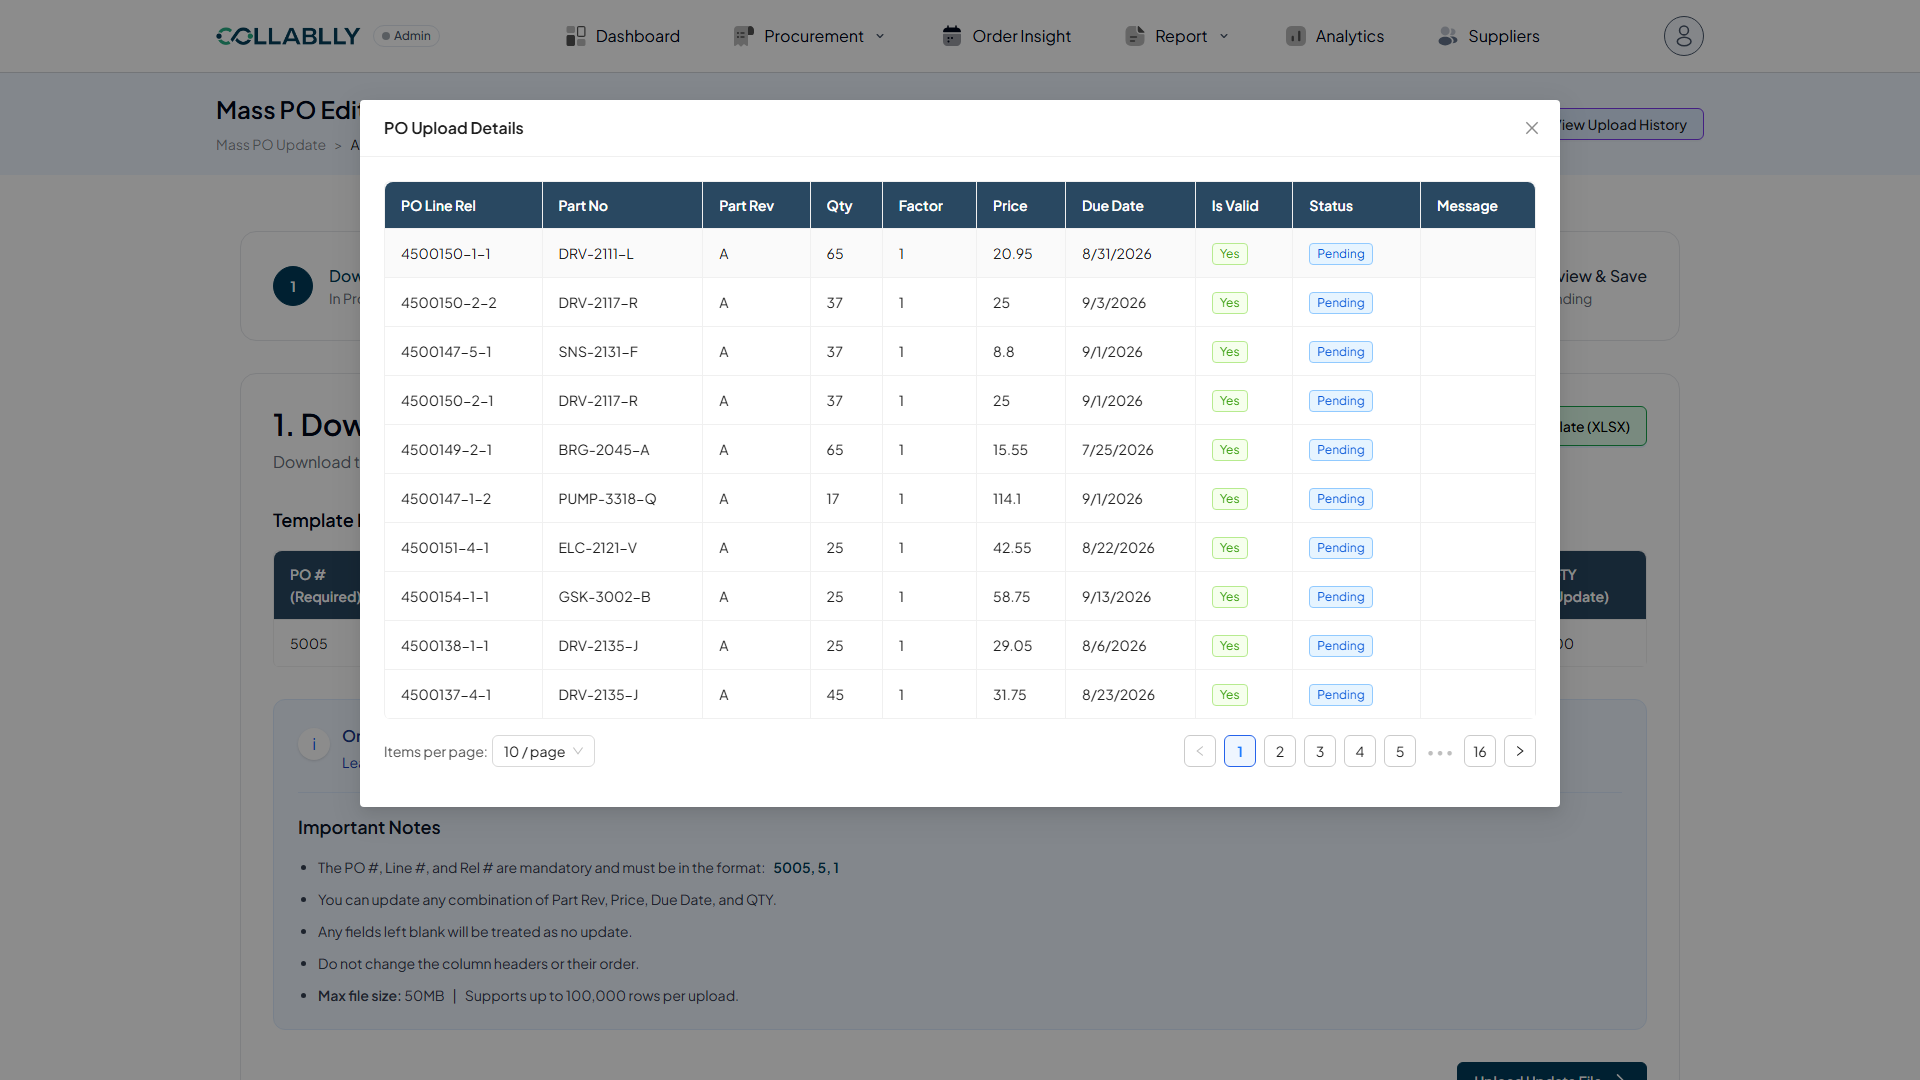
View Details opens a line-by-line breakdown of that exact upload: PO Line Rel, Part No, the new Part Rev / Qty / Factor / Price / Due Date, whether the row Is Valid, its per-row Status (Pending while it's still writing back to the PO, then Synced), and any Message explaining a skip or error. This is the definitive record of what changed on every single PO line in that file.
- Step 13 of 14
See it on your Dashboard
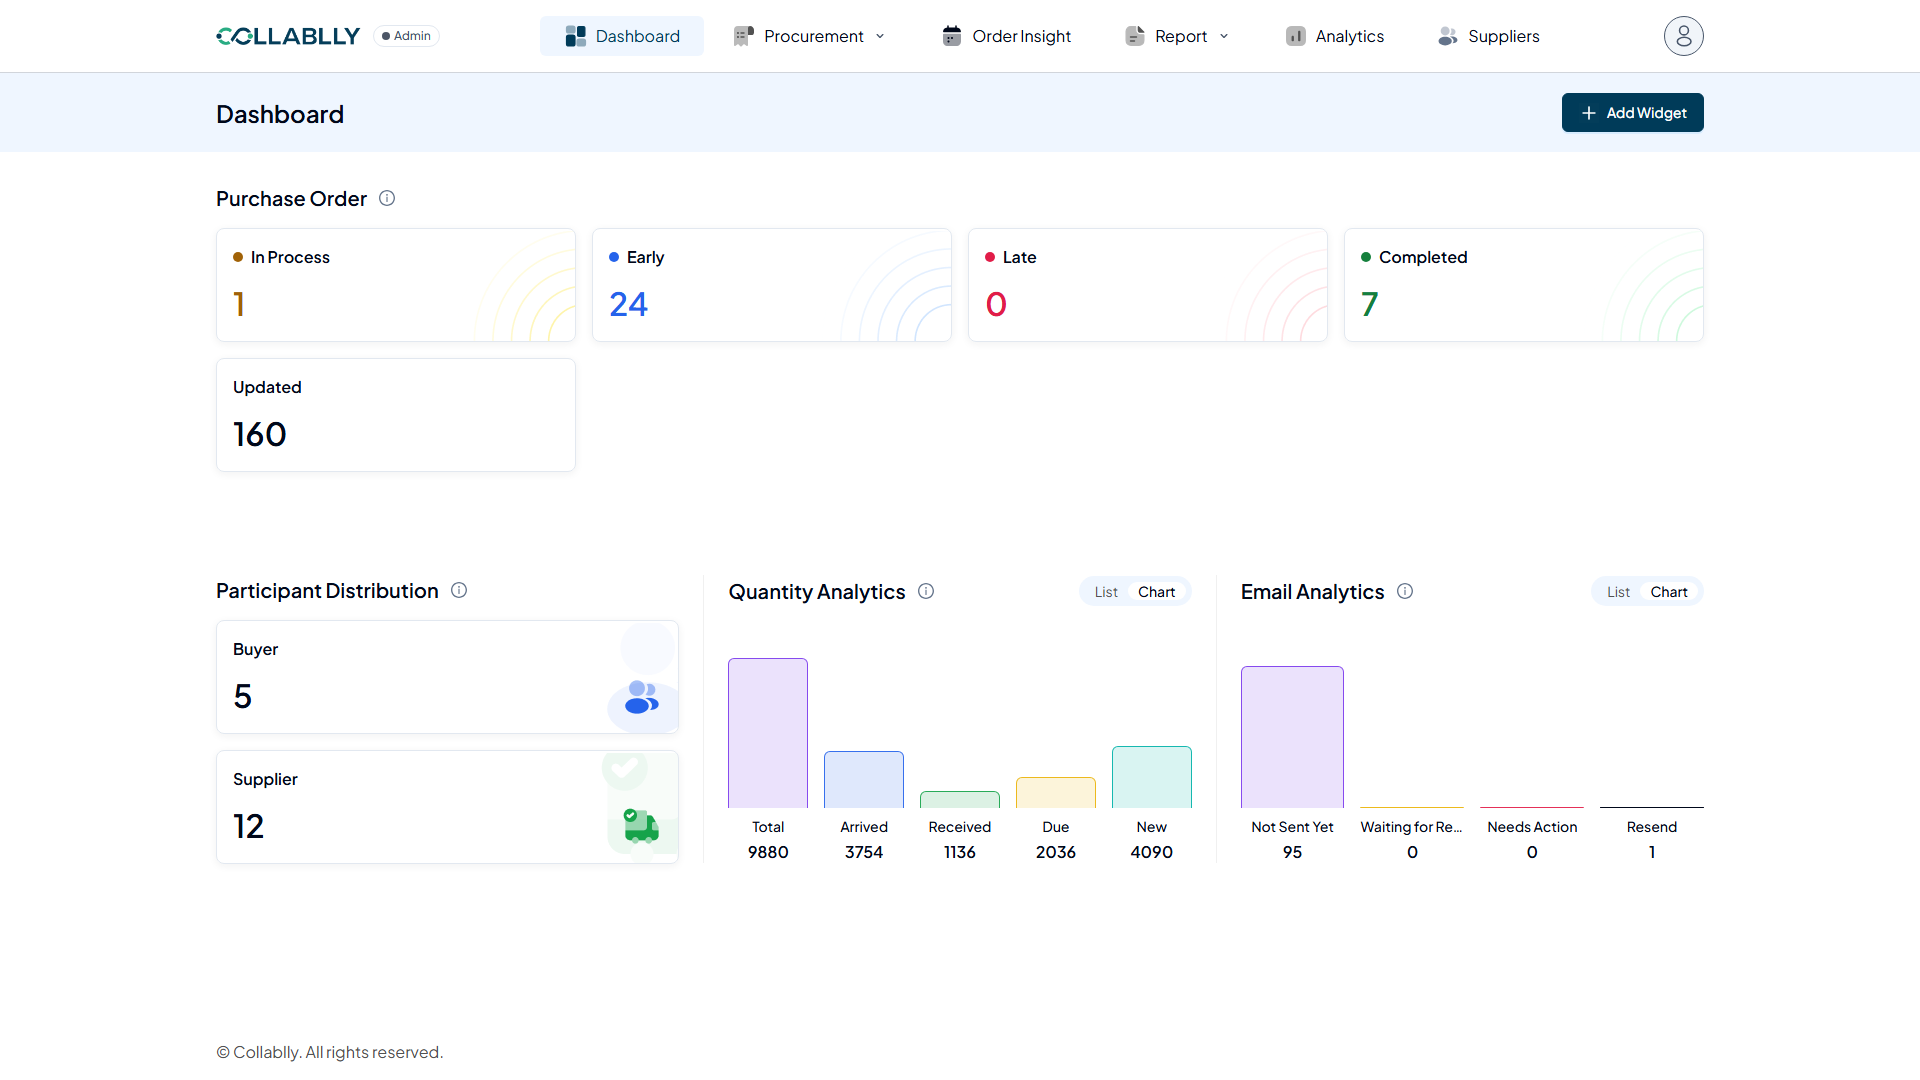
Back on the Dashboard, the Purchase Order section's Updated tile counts every PO line changed by Mass PO Update. Click it to jump straight to those lines.
- Step 14 of 14
Ready to notify suppliers
The Updated filter in Purchase Order's Details View lists every PO line touched by the bulk update, exactly like any other status. From here, treat these lines like the rest of your open POs: open the PO in Summary View and use the Action menu to send the update to the supplier so they can review and accept the new values (see the Purchase Order guide for that full send-and-accept flow).