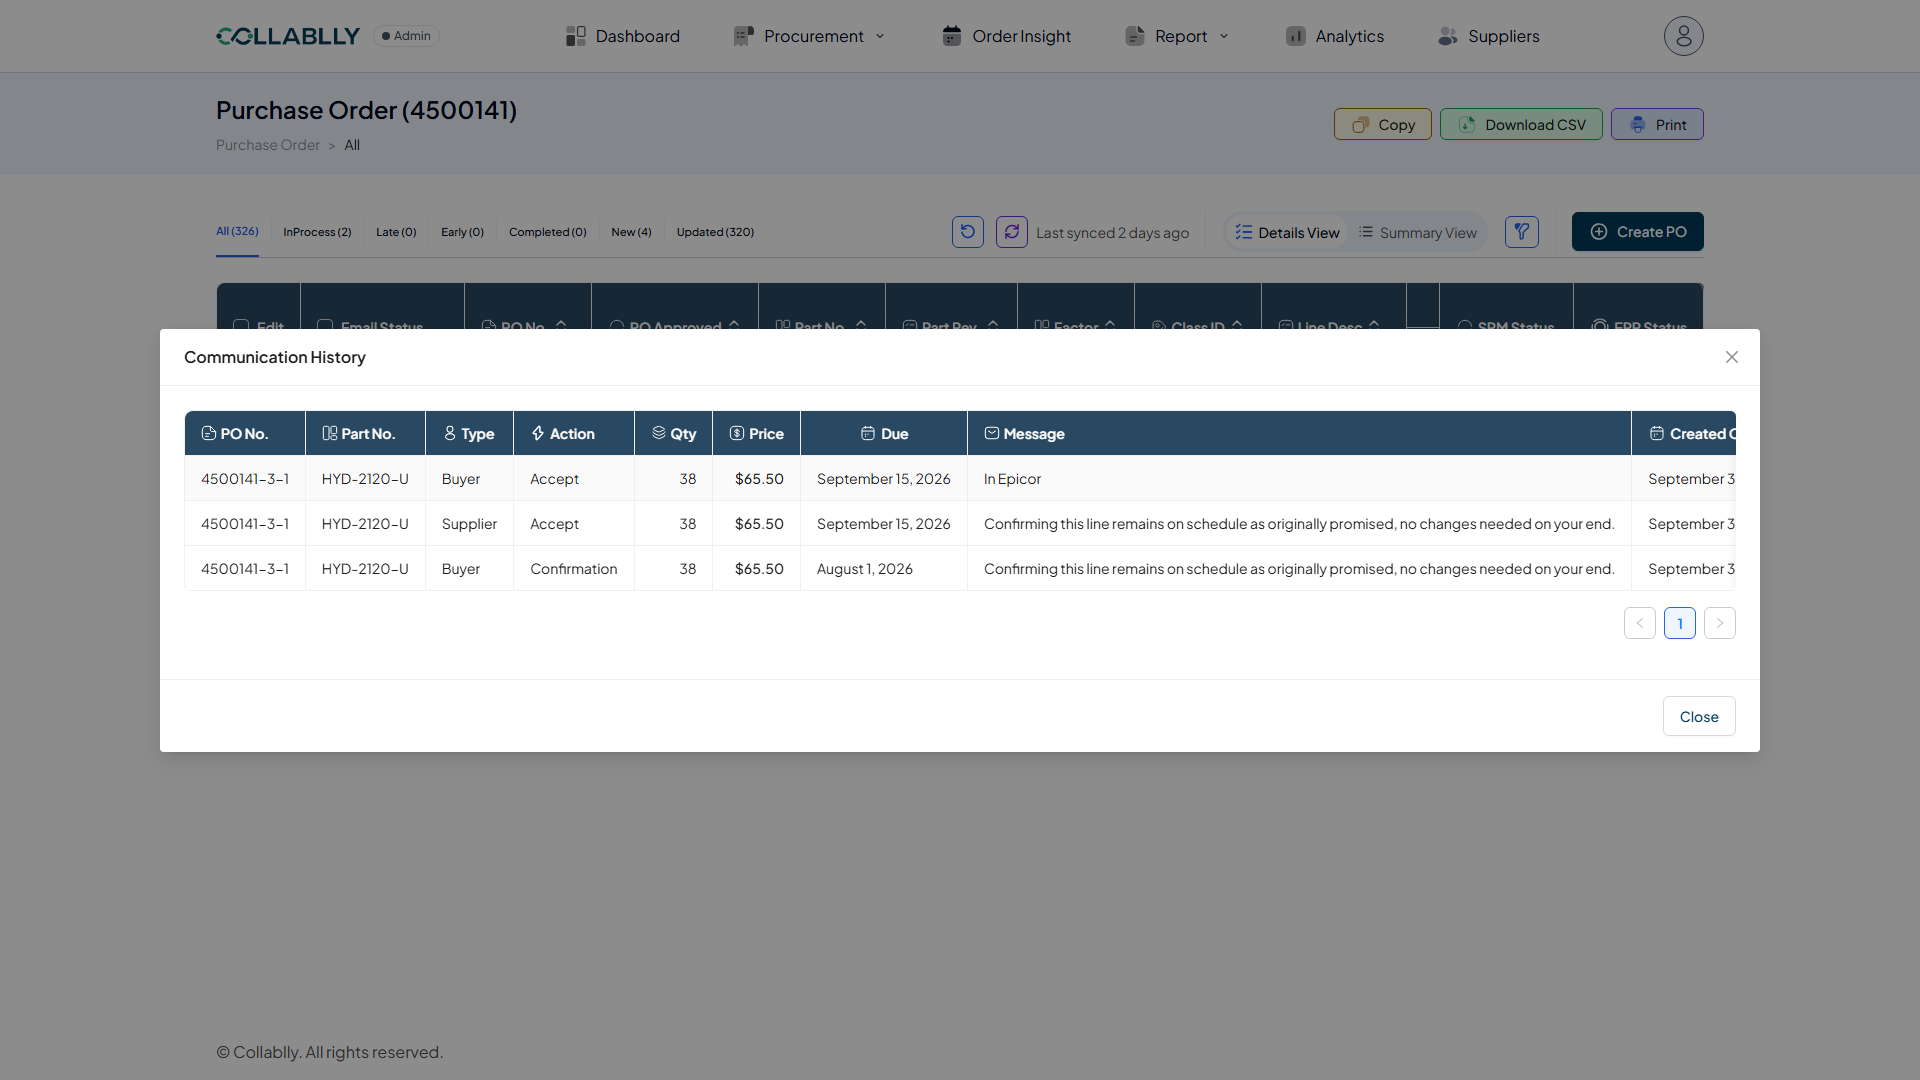
- Step 1 of 12
Open an acknowledged PO's lines
Pick a PO that's already Acknowledged, then click its PO number to see the individual lines. Each line has its own Email Status. A blank status means nothing's been sent for that line yet; Not Sent Yet is the same thing, just made explicit and clickable.
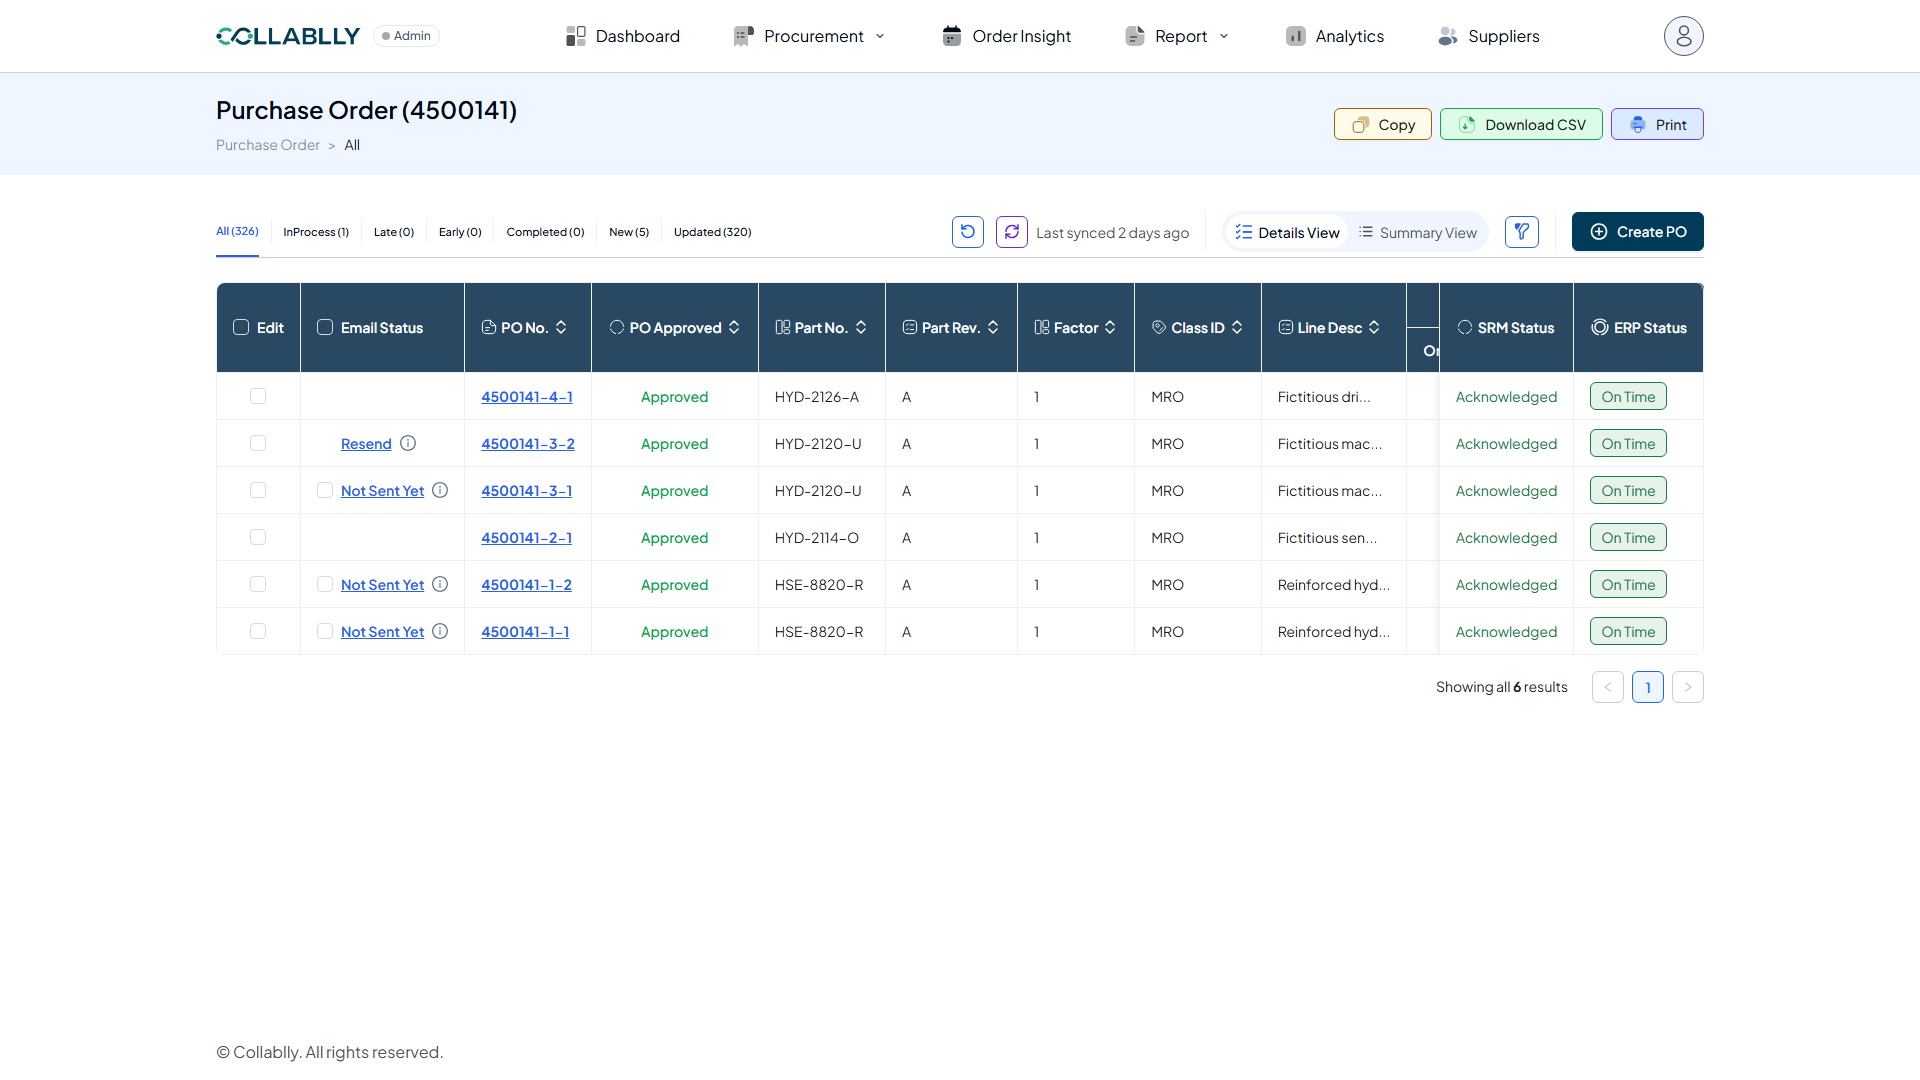
- Step 2 of 12
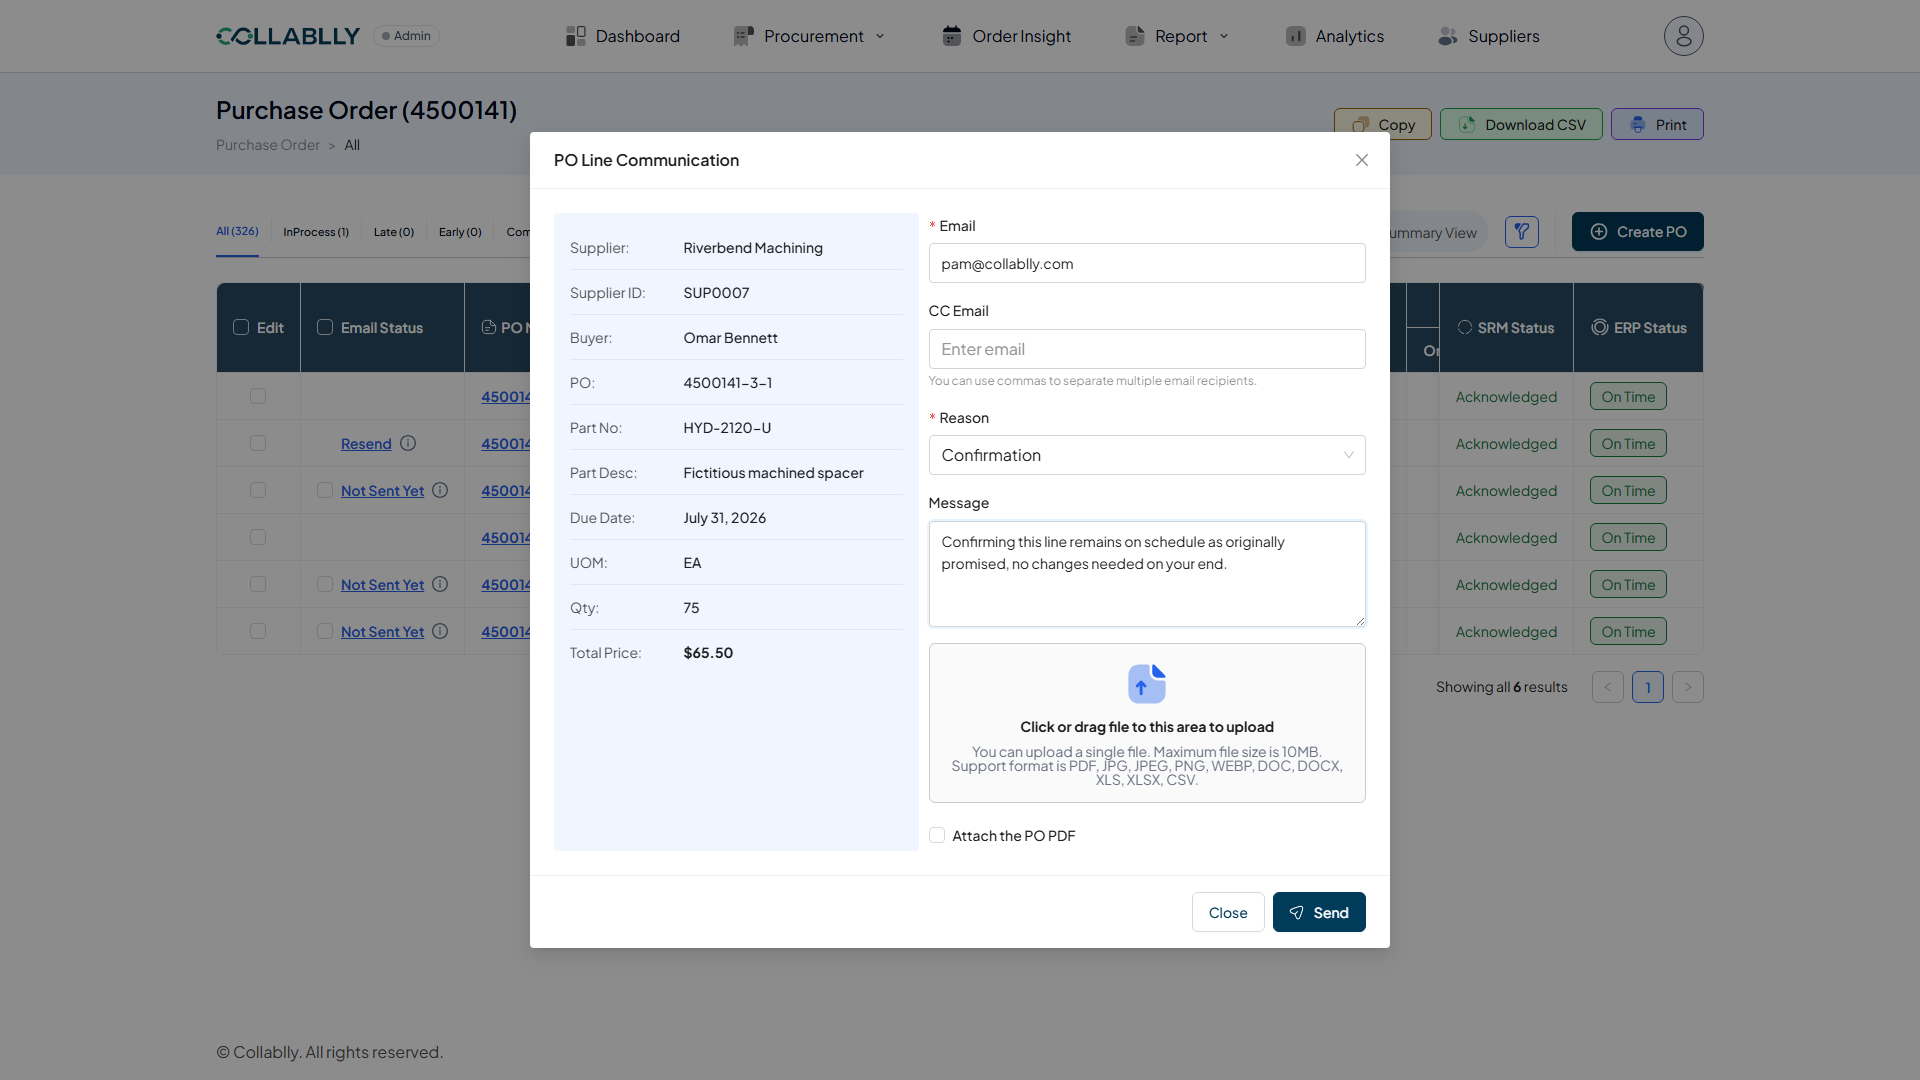
Click Not Sent Yet
This opens PO Line Communication for that single line: a summary (Supplier, Buyer, PO, Part No, Part Desc, Due Date, UOM, Qty, Total Price) plus an editable Email, an optional CC Email, and a required Reason.
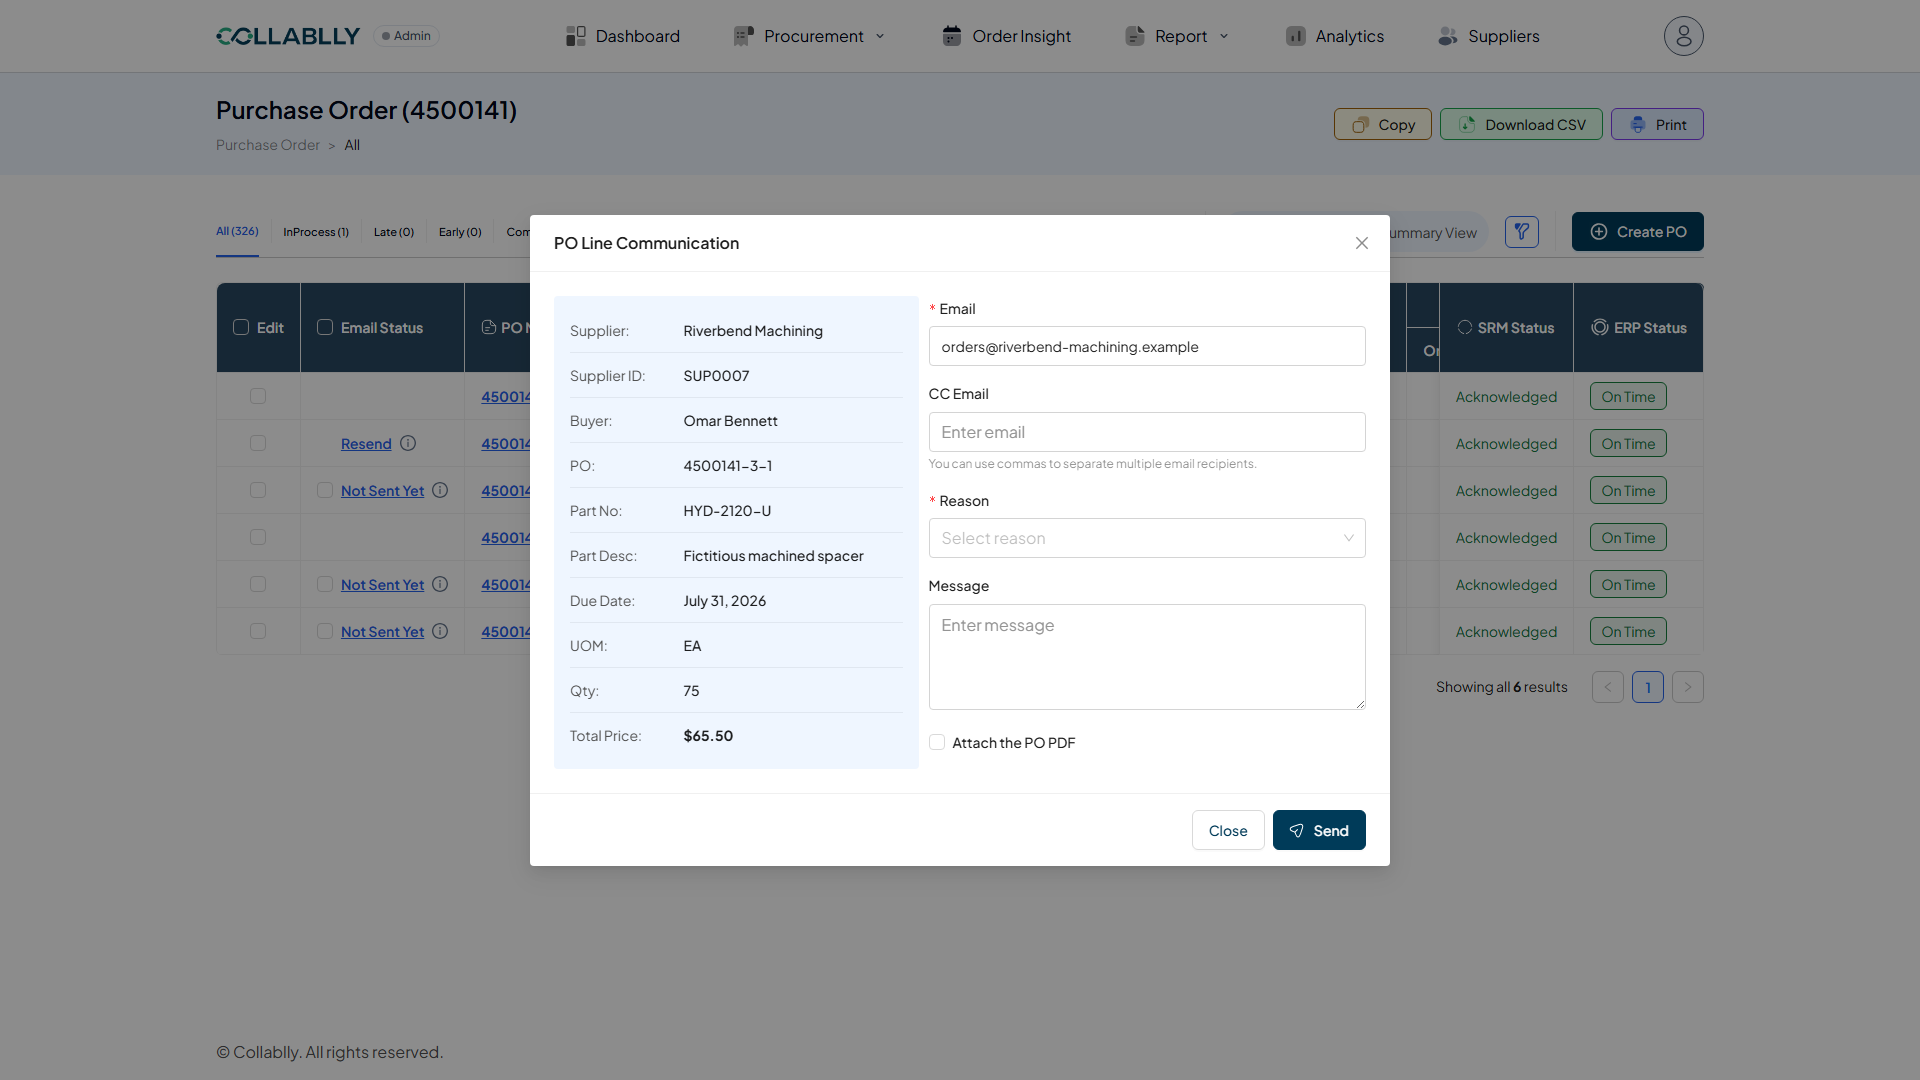
- Step 3 of 12
Pick a Reason
Three options. Confirmation tells the supplier everything's on track exactly as originally promised, no changes. Change is for proposing a new due date yourself, it adds a New Due Date field right in this form. Update is the general-purpose option: no structured field to fill in, just a Message and an optional file attachment, best for anything that doesn't fit the other two, like a revised drawing, a Mass PO Update-driven change to price or quantity, or any other note that isn't specifically a due-date change.
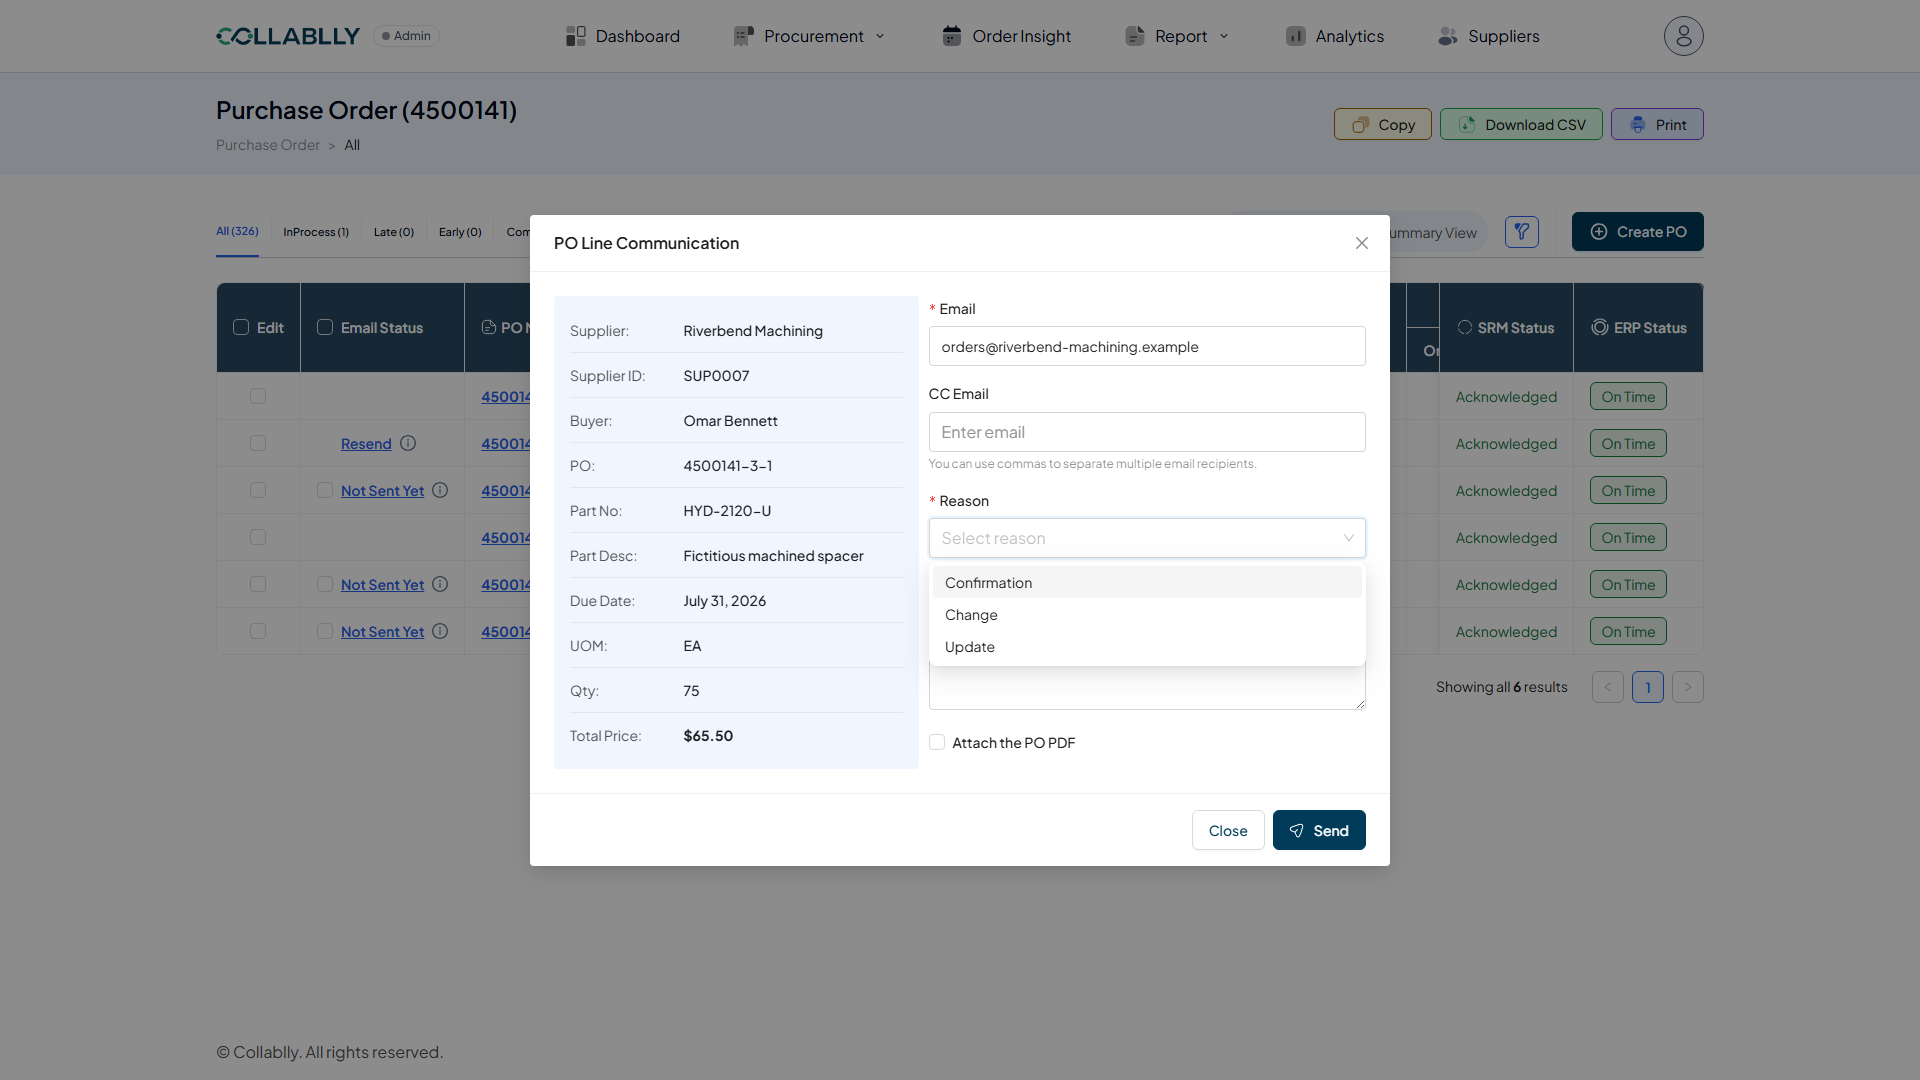
- Step 4 of 12
Add a message and send
With Confirmation selected, write a short note (here: "Confirming this line remains on schedule as originally promised, no changes needed on your end.") and click Send. Attaching a file or the PO PDF is optional.
- Step 5 of 12
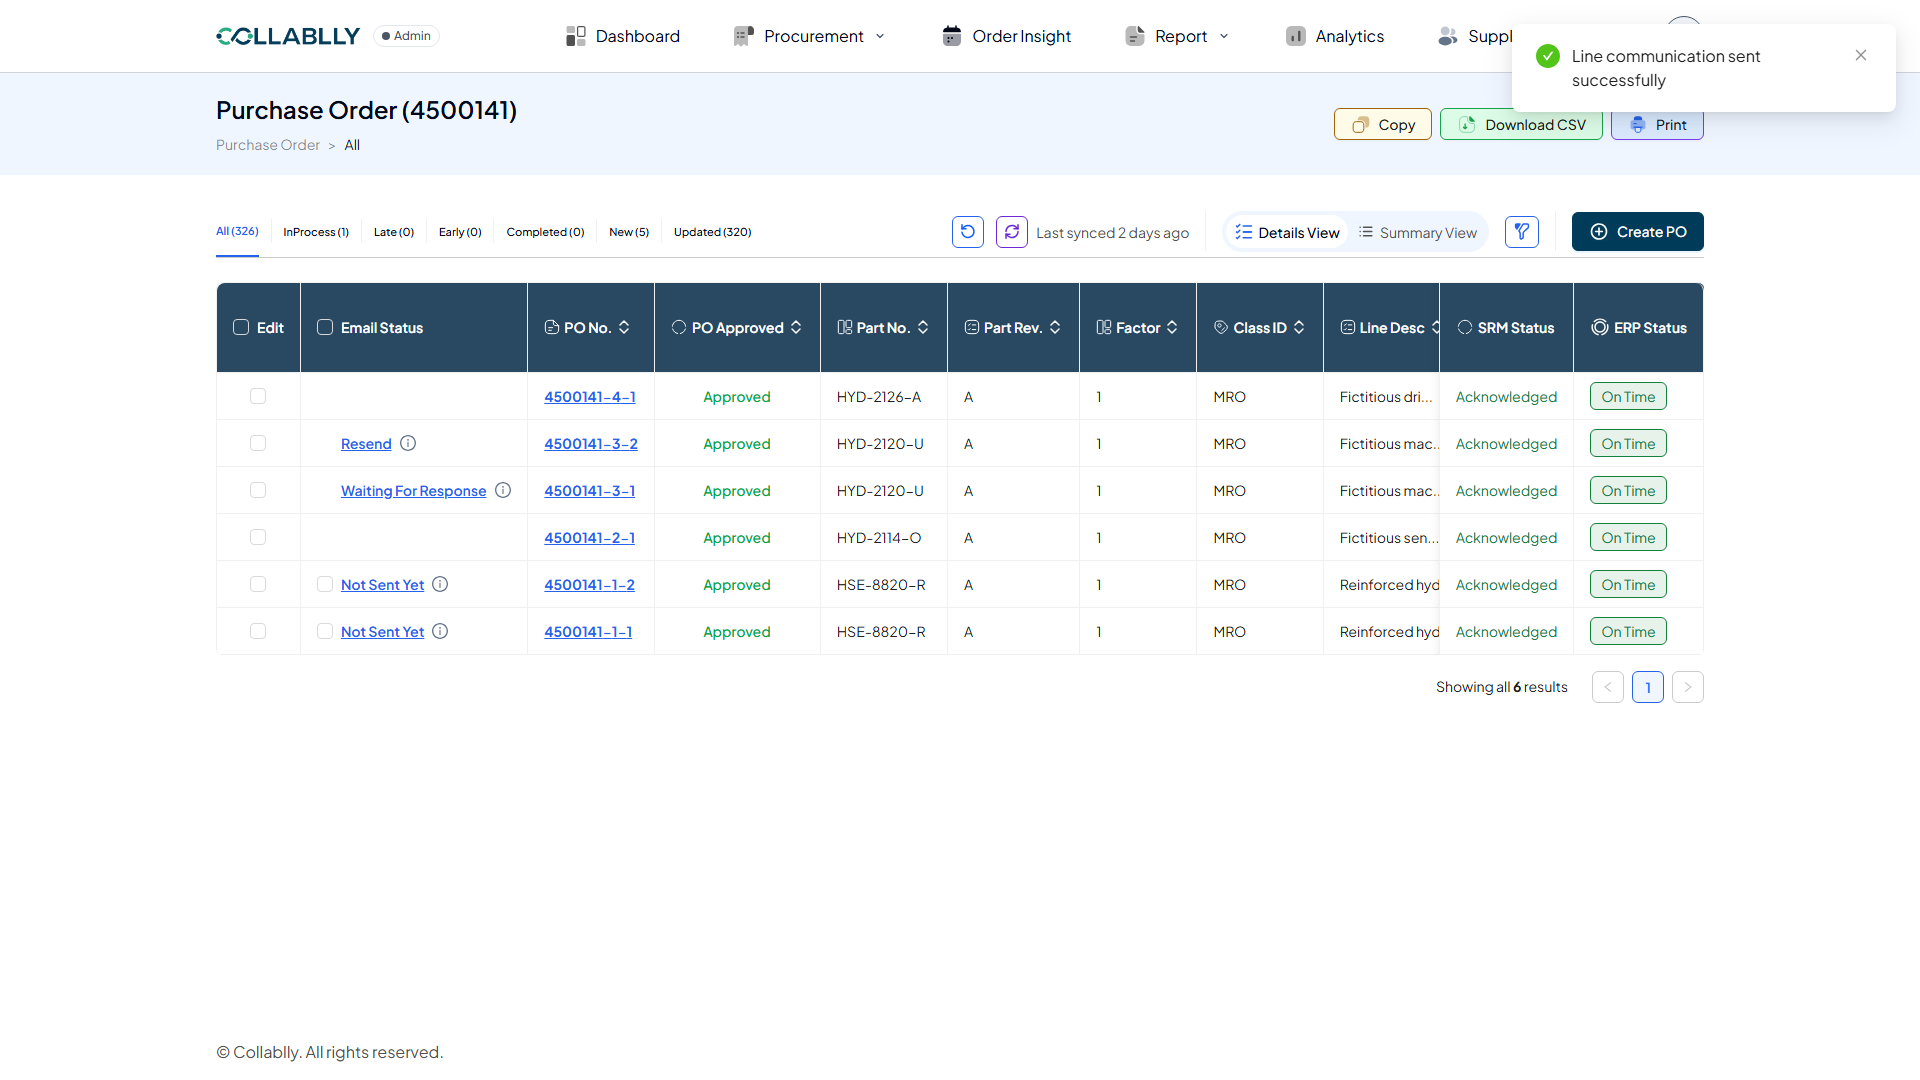
Status becomes Waiting For Response
The line's Email Status updates immediately. It stays Waiting For Response until the supplier acts on the email.
- Step 6 of 12
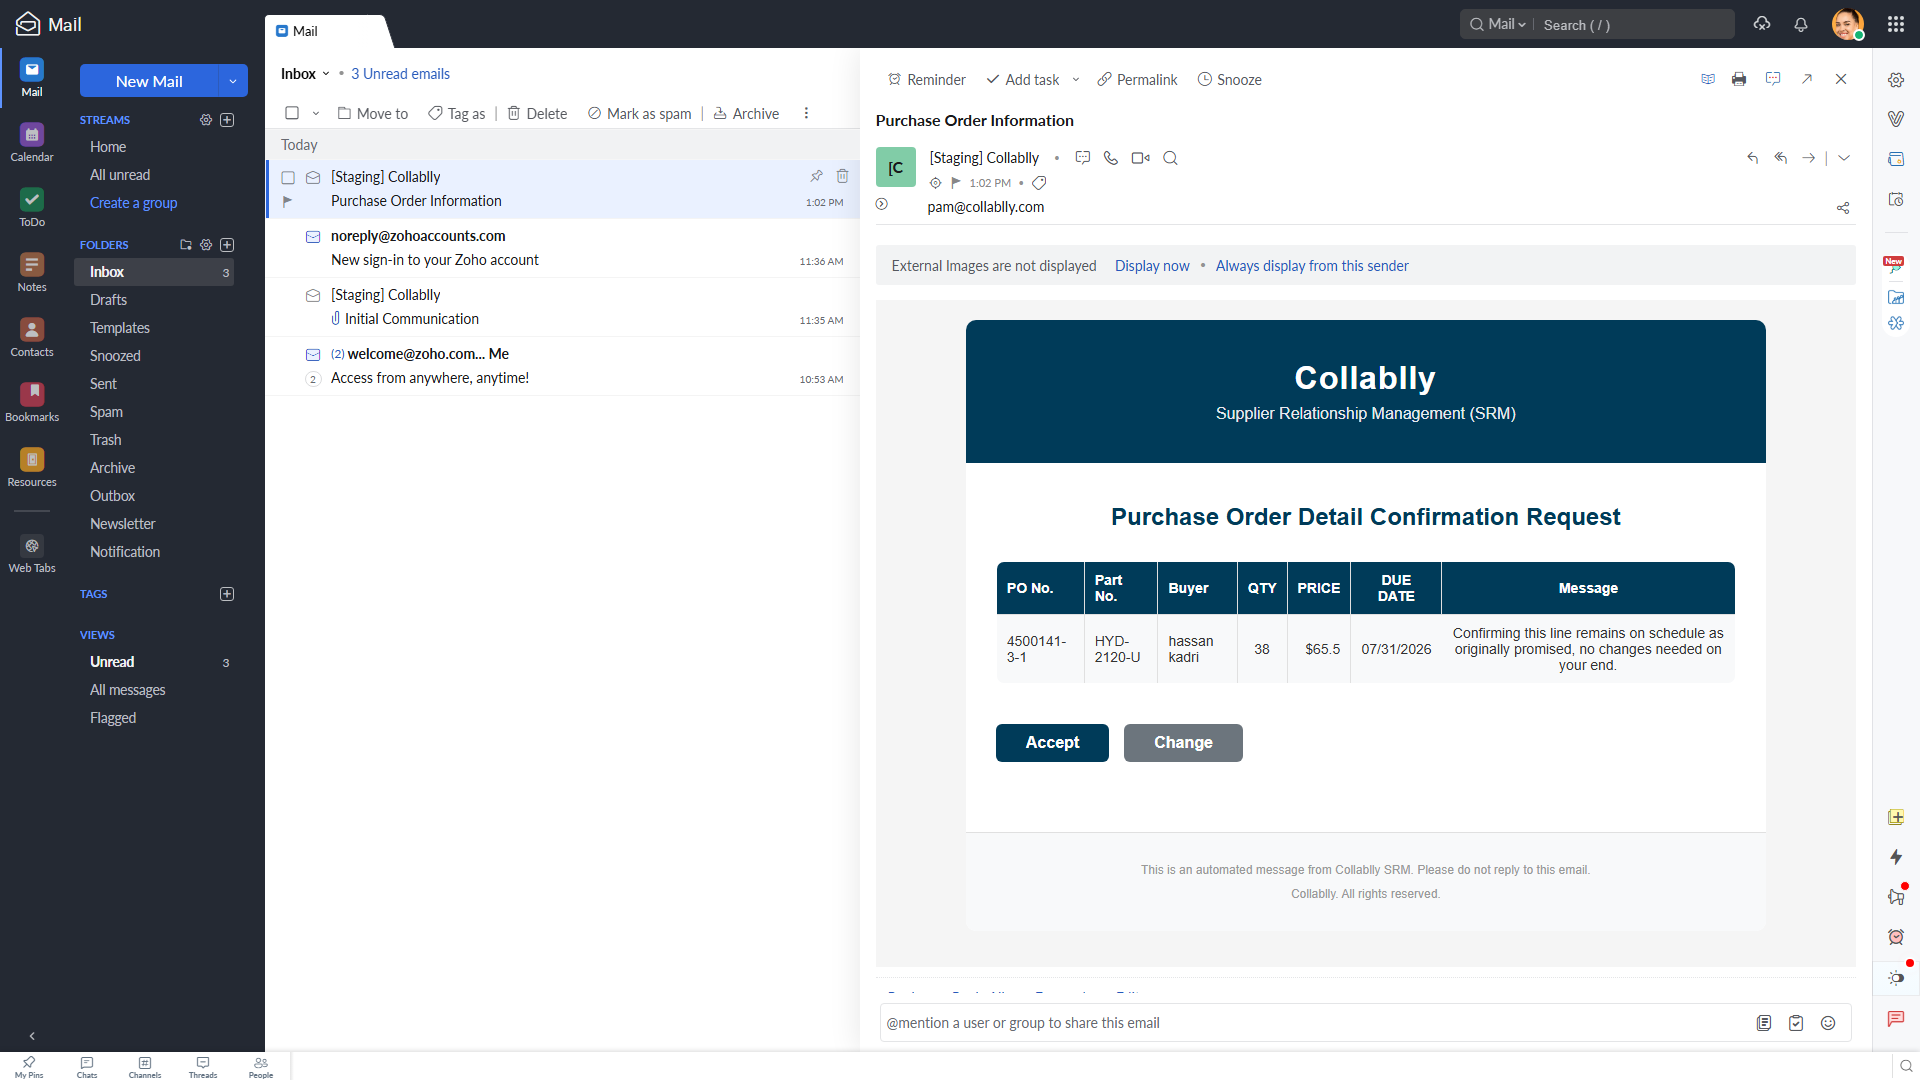
The supplier's email: two buttons
The email shows the same PO line details in a table, plus the buyer's Message, and two buttons: Accept confirms the line as-is. Change lets the supplier propose a different due date instead of simply agreeing. Both lead to the same kind of confirmation page next, just with a due date field that's editable when the supplier picked Change.
- Step 7 of 12
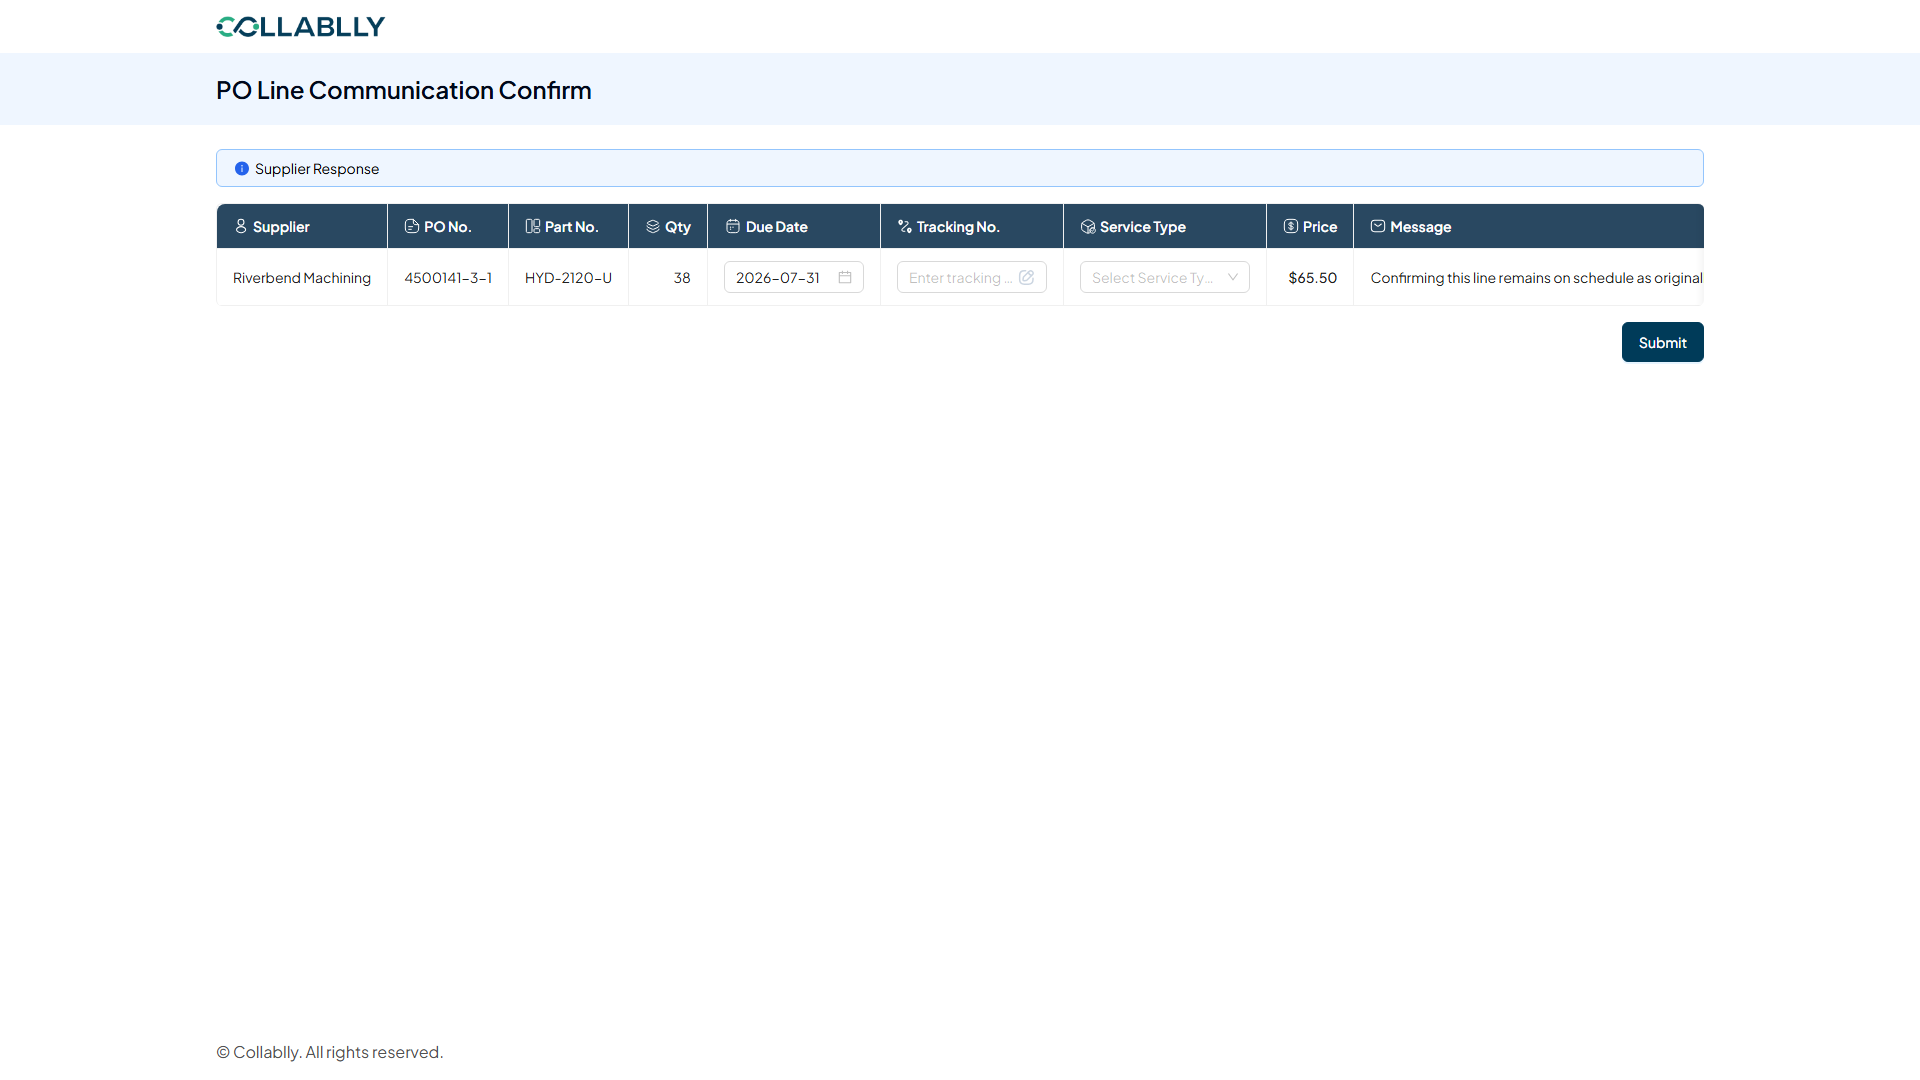
The supplier's confirmation page
Clicking Accept opens PO Line Communication Confirm, no login needed. The line's details are pre-filled; the supplier can optionally add a Tracking No. and pick a Service Type (FedEx, UPS Ground, and similar) before submitting, useful once the order has actually shipped.
- Step 8 of 12
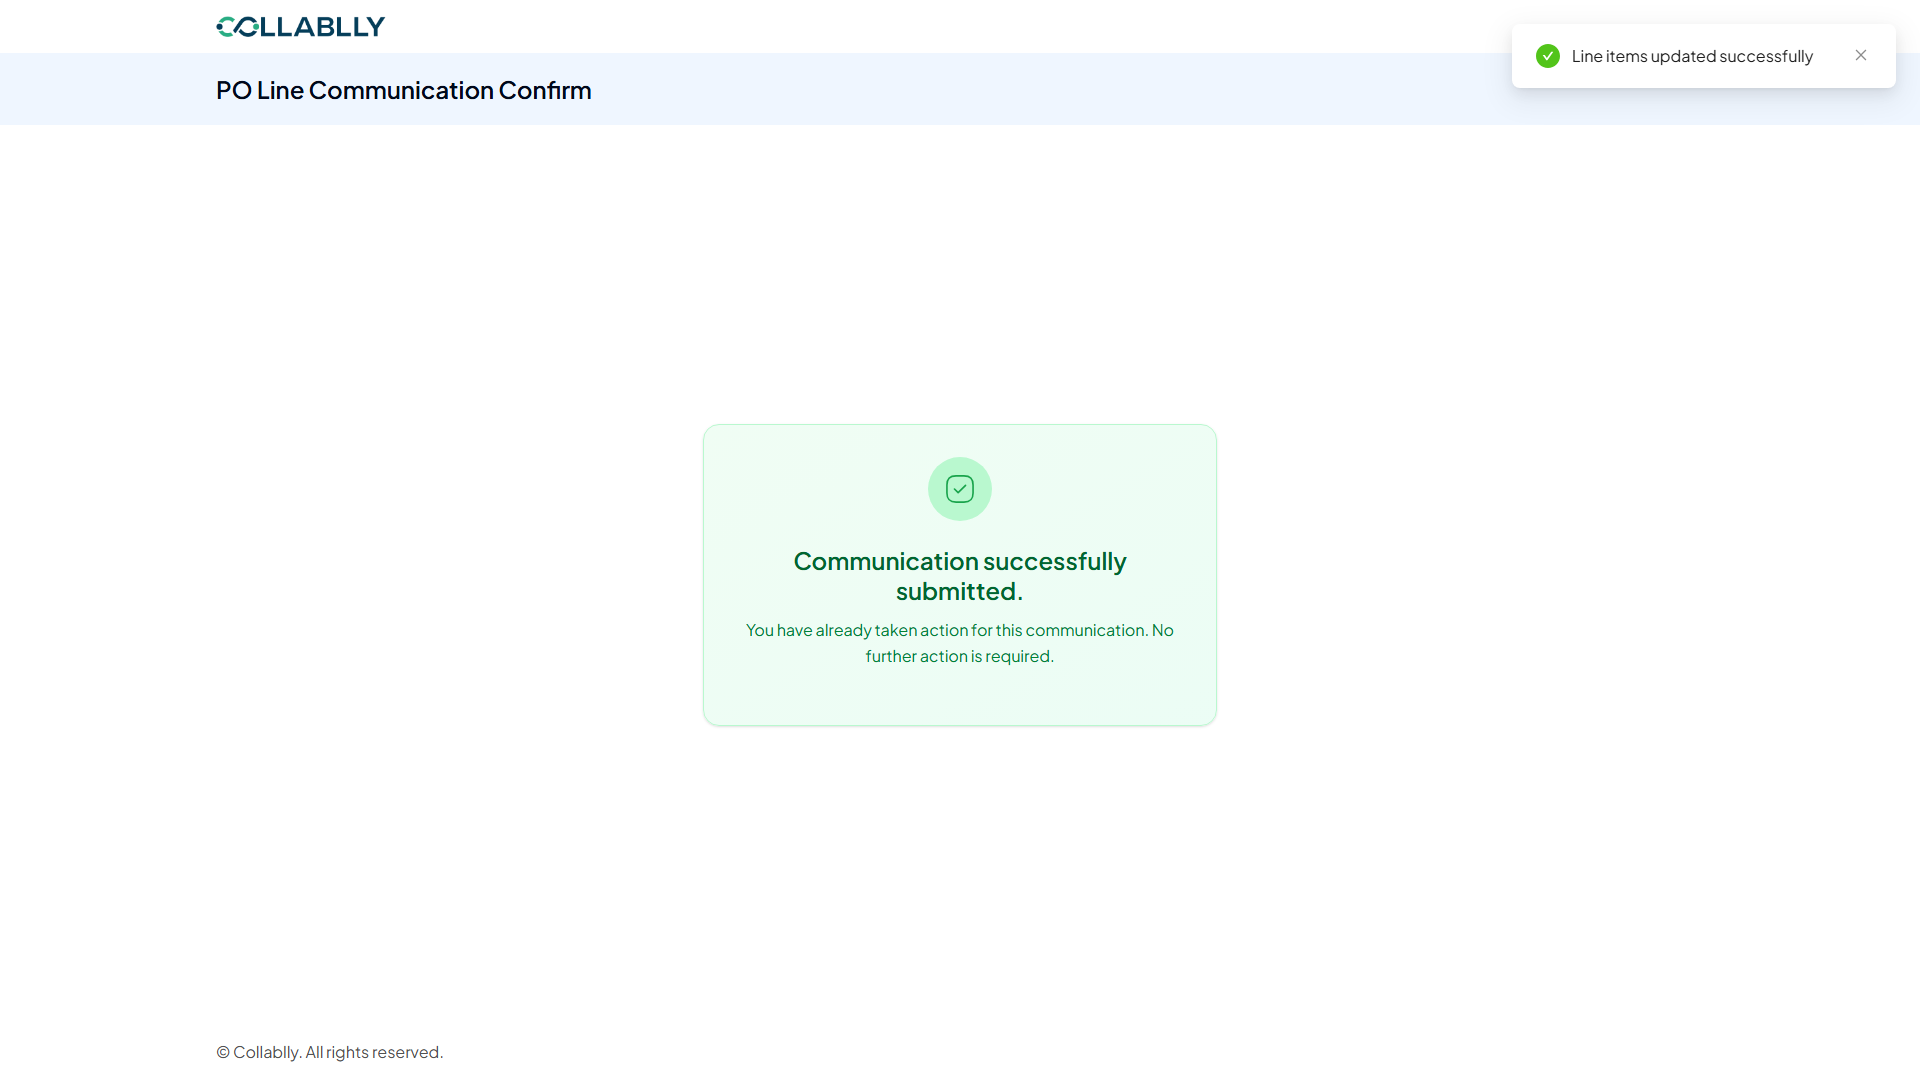
Submitted
"Communication successfully submitted." The supplier's part is done, the ball is back in the buyer's court.
- Step 9 of 12
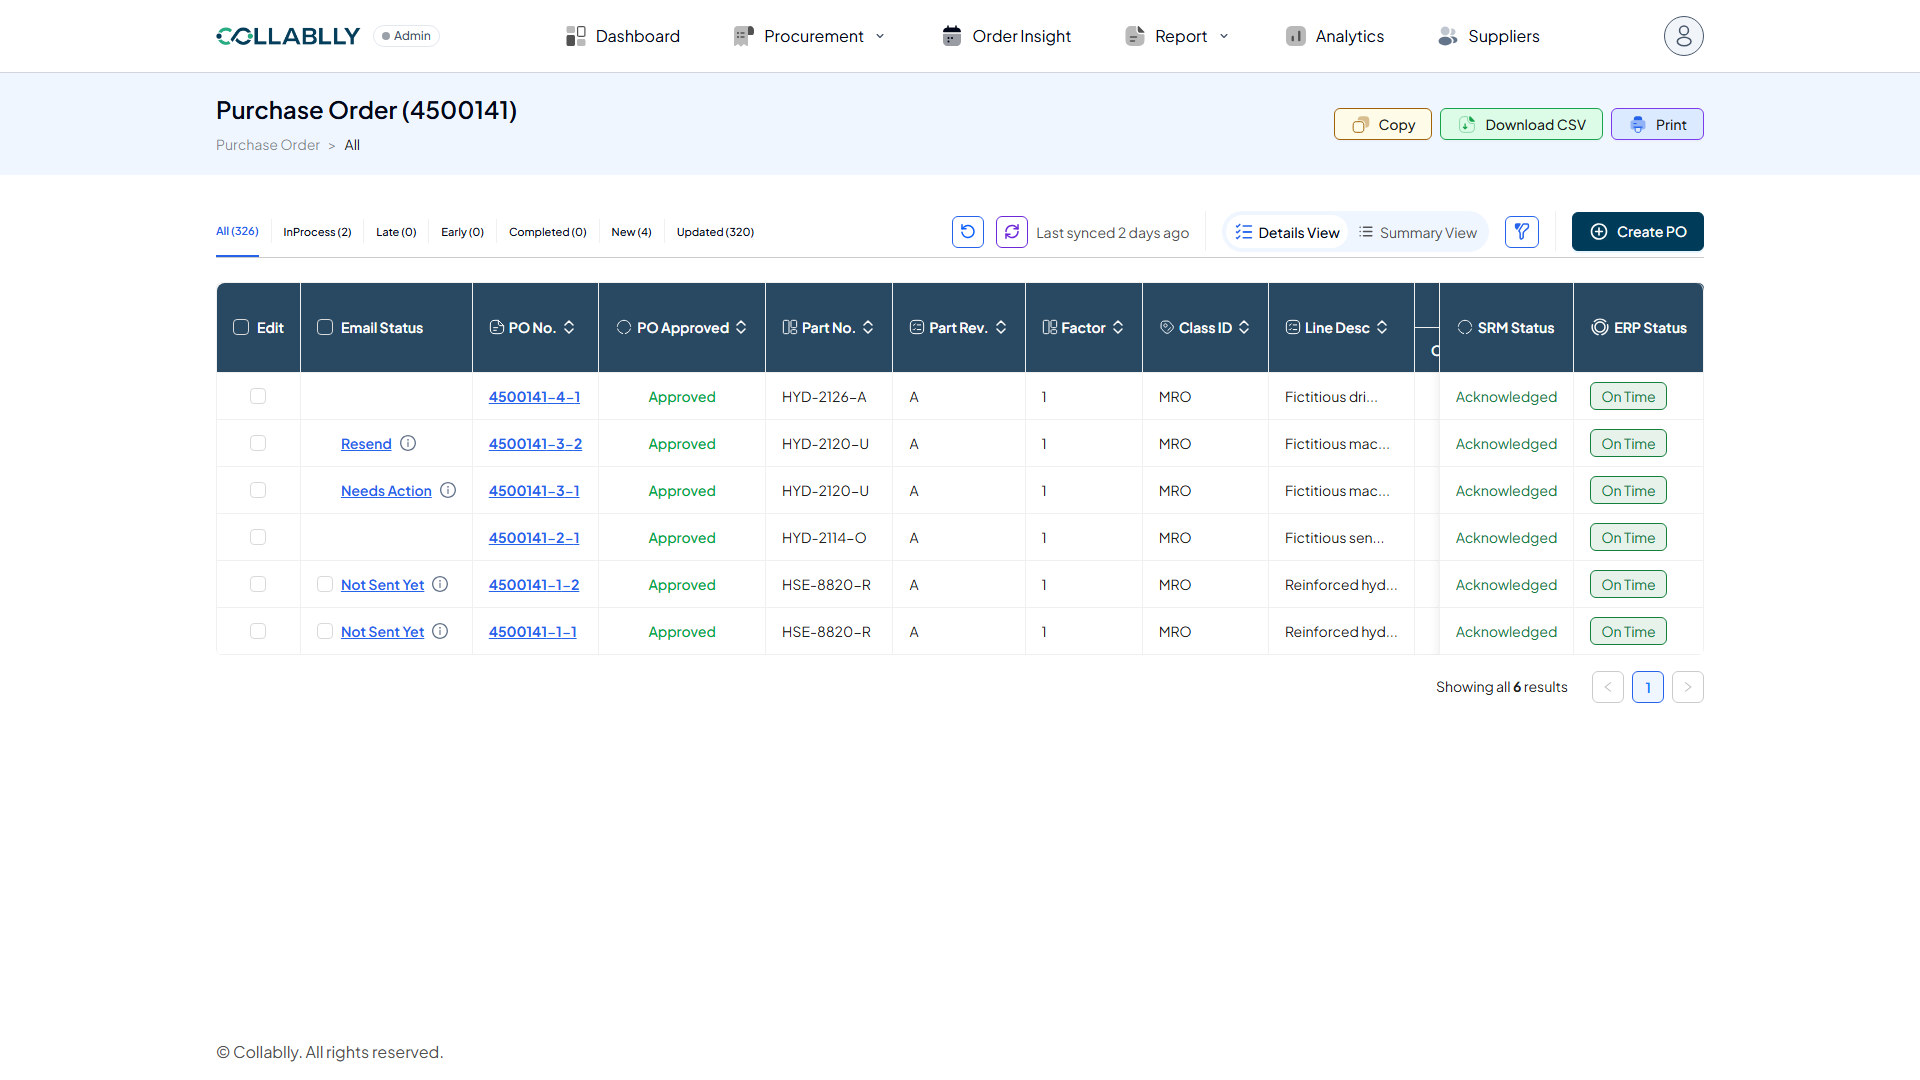
Status becomes Needs Action
Back in Details View, the line's Email Status now reads Needs Action, the supplier replied, and it's waiting on the buyer.
- Step 10 of 12
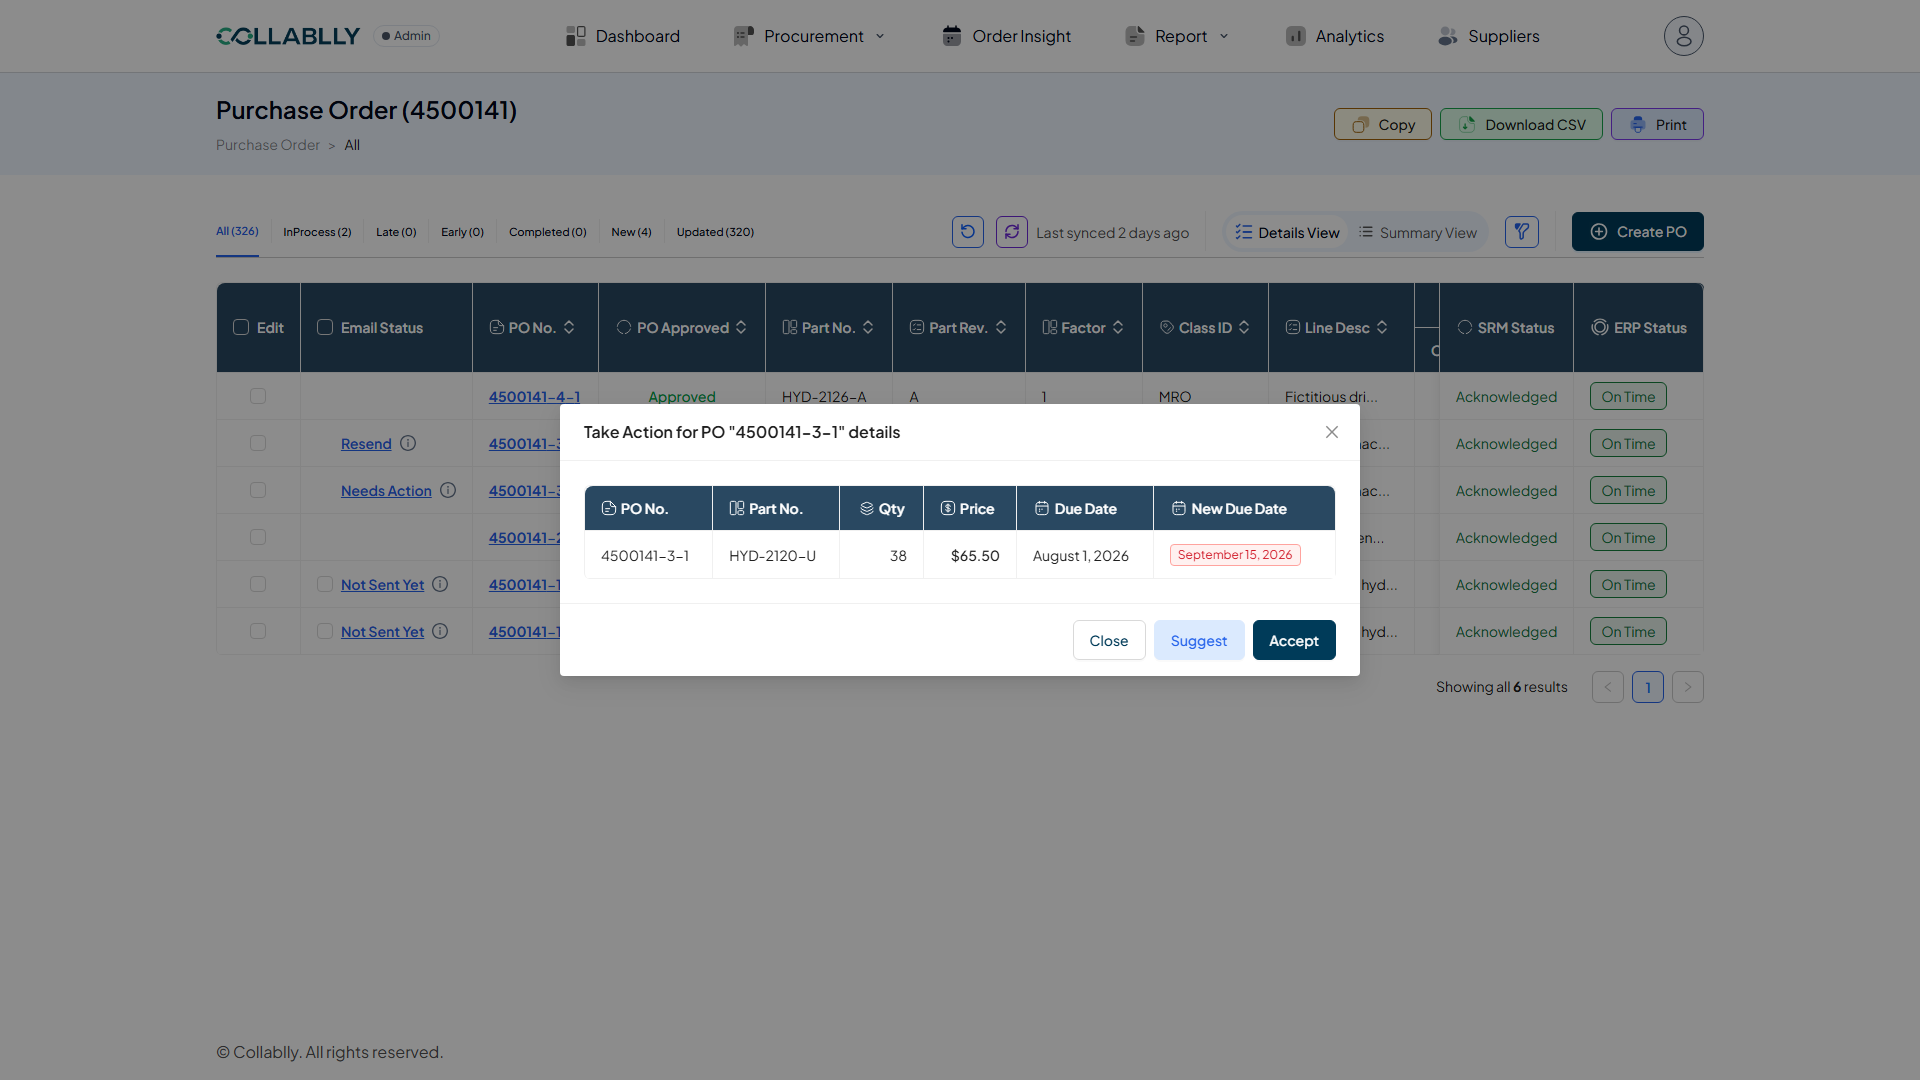
Review what the supplier sent back
Clicking Needs Action opens Take Action, showing the original Due Date next to the supplier's New Due Date side by side. From here the buyer can Suggest something different or Accept what the supplier proposed.
- Step 11 of 12
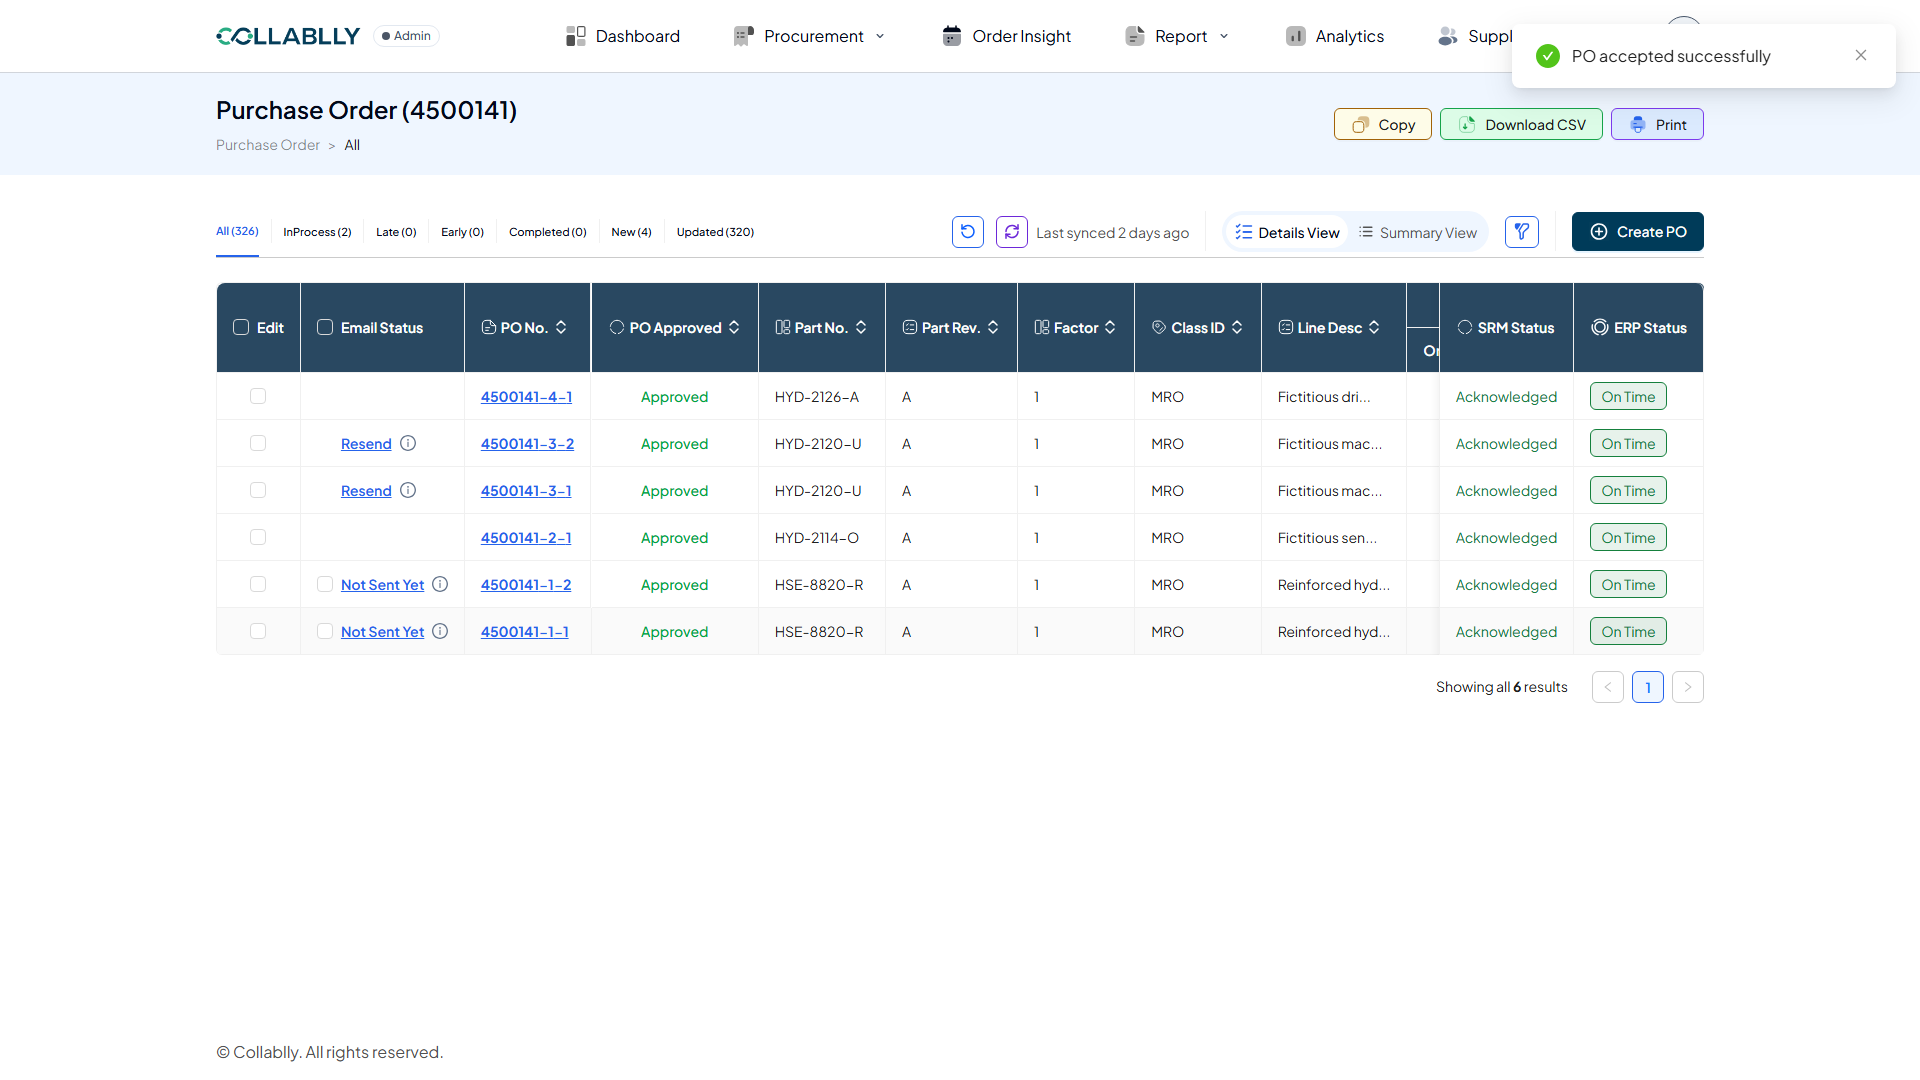
Accepted, status becomes Resend
"PO accepted successfully." The line's Email Status now reads Resend, the cycle is complete, and the line is available to contact again any time a new conversation is needed.
- Step 12 of 12
The full record
Clicking the line's PO number shows Communication History with every step logged: Buyer Confirmation, Supplier Accept, and Buyer Accept, each with its own Qty, Price, Due date, and Message. Nothing about this conversation gets lost.