- Step 1 of 14
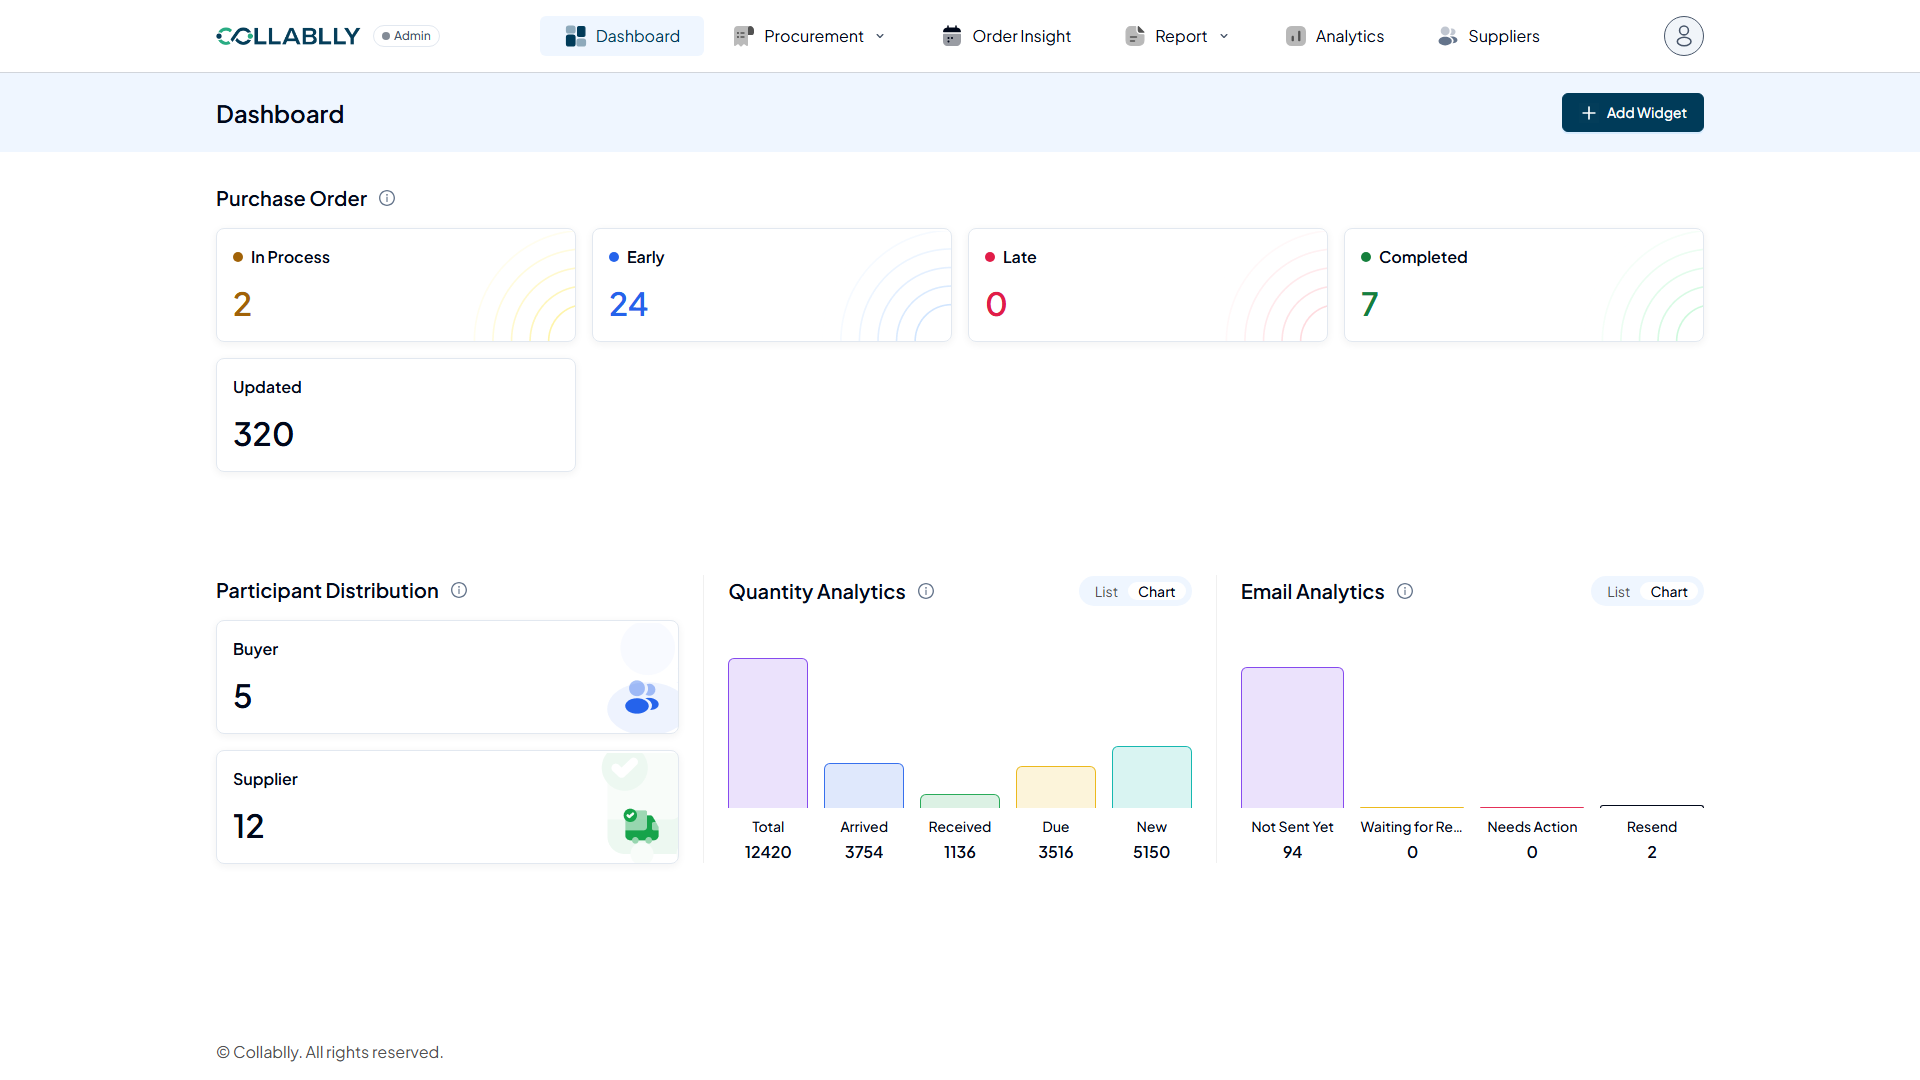
Start at the Dashboard
This workflow starts from the Dashboard, not Purchase Order. Click Order Insight in the top nav to see what's actually short.
- Step 2 of 14
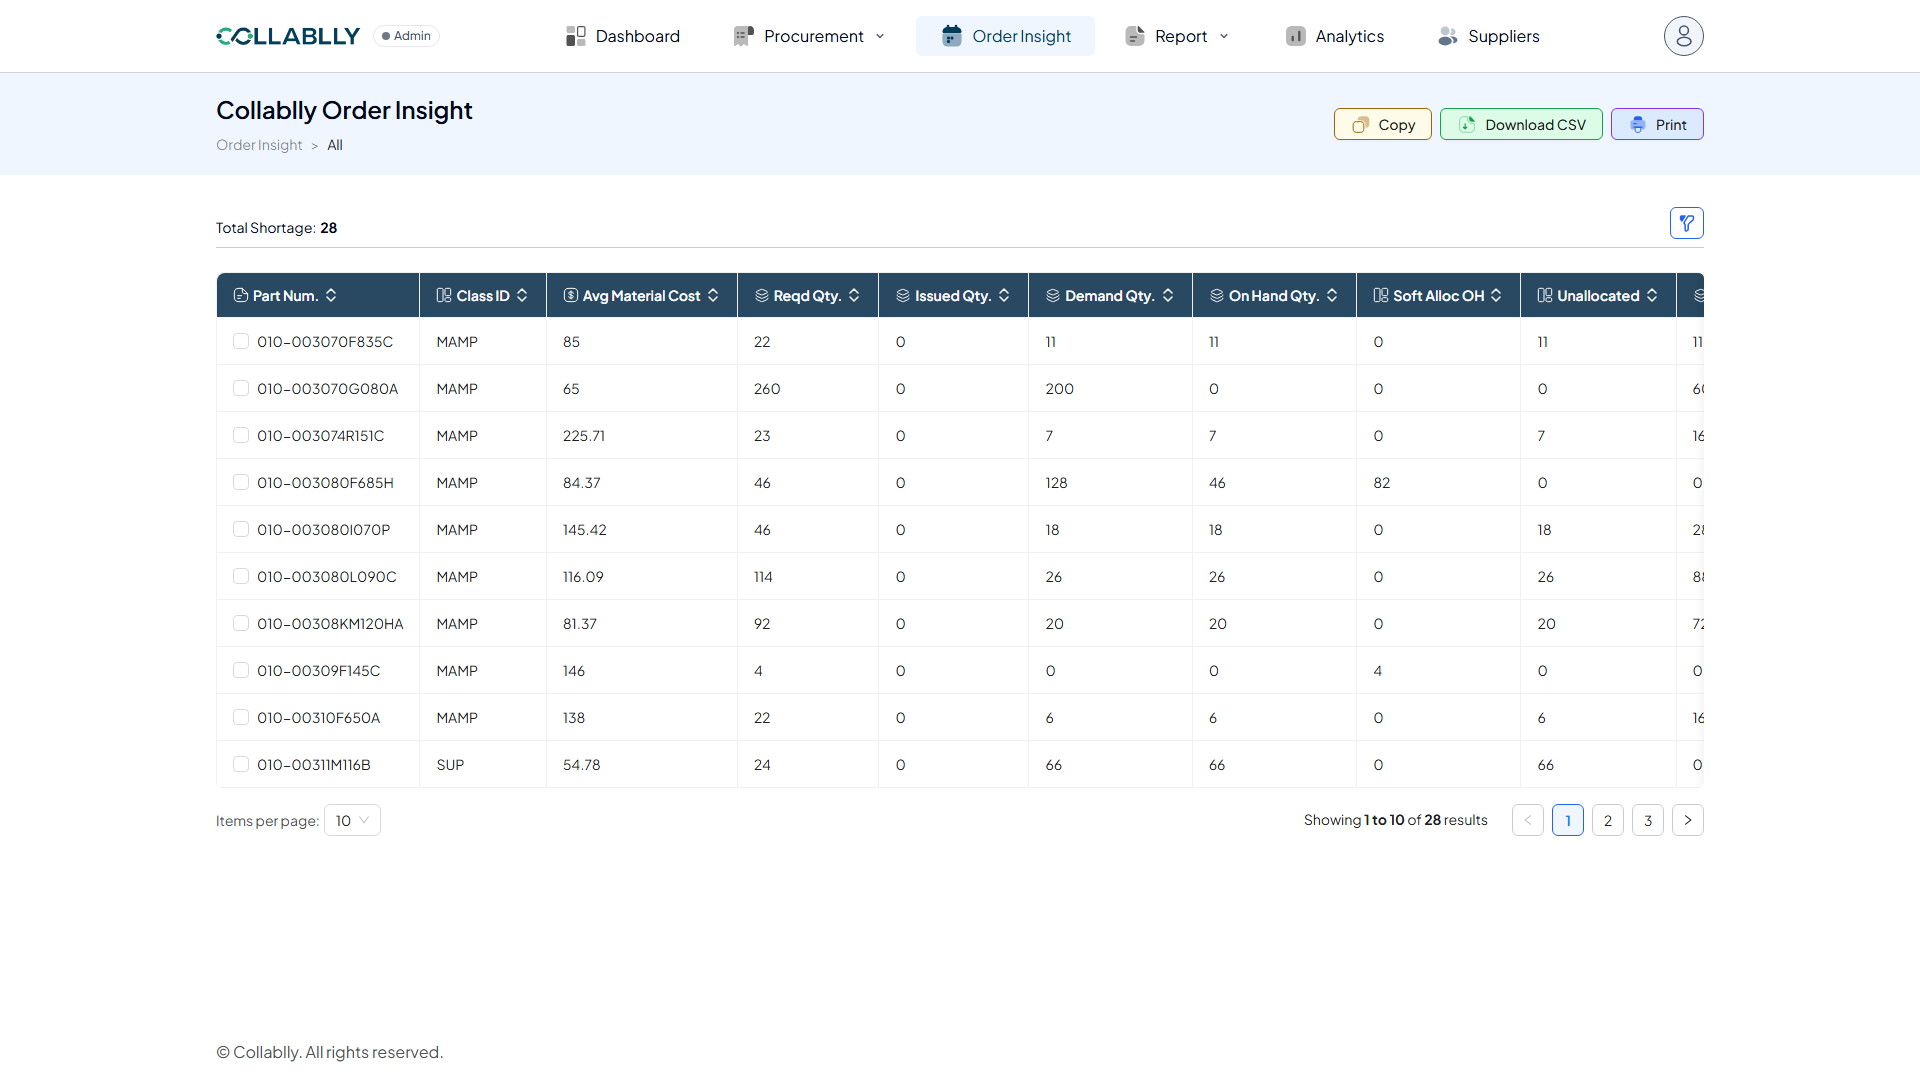
See what's short
Order Insight lists every part with a shortage, 28 of them here, with Reqd Qty, On Hand Qty, and Unallocated columns showing exactly how far short each one is. Each row has its own checkbox.
- Step 3 of 14
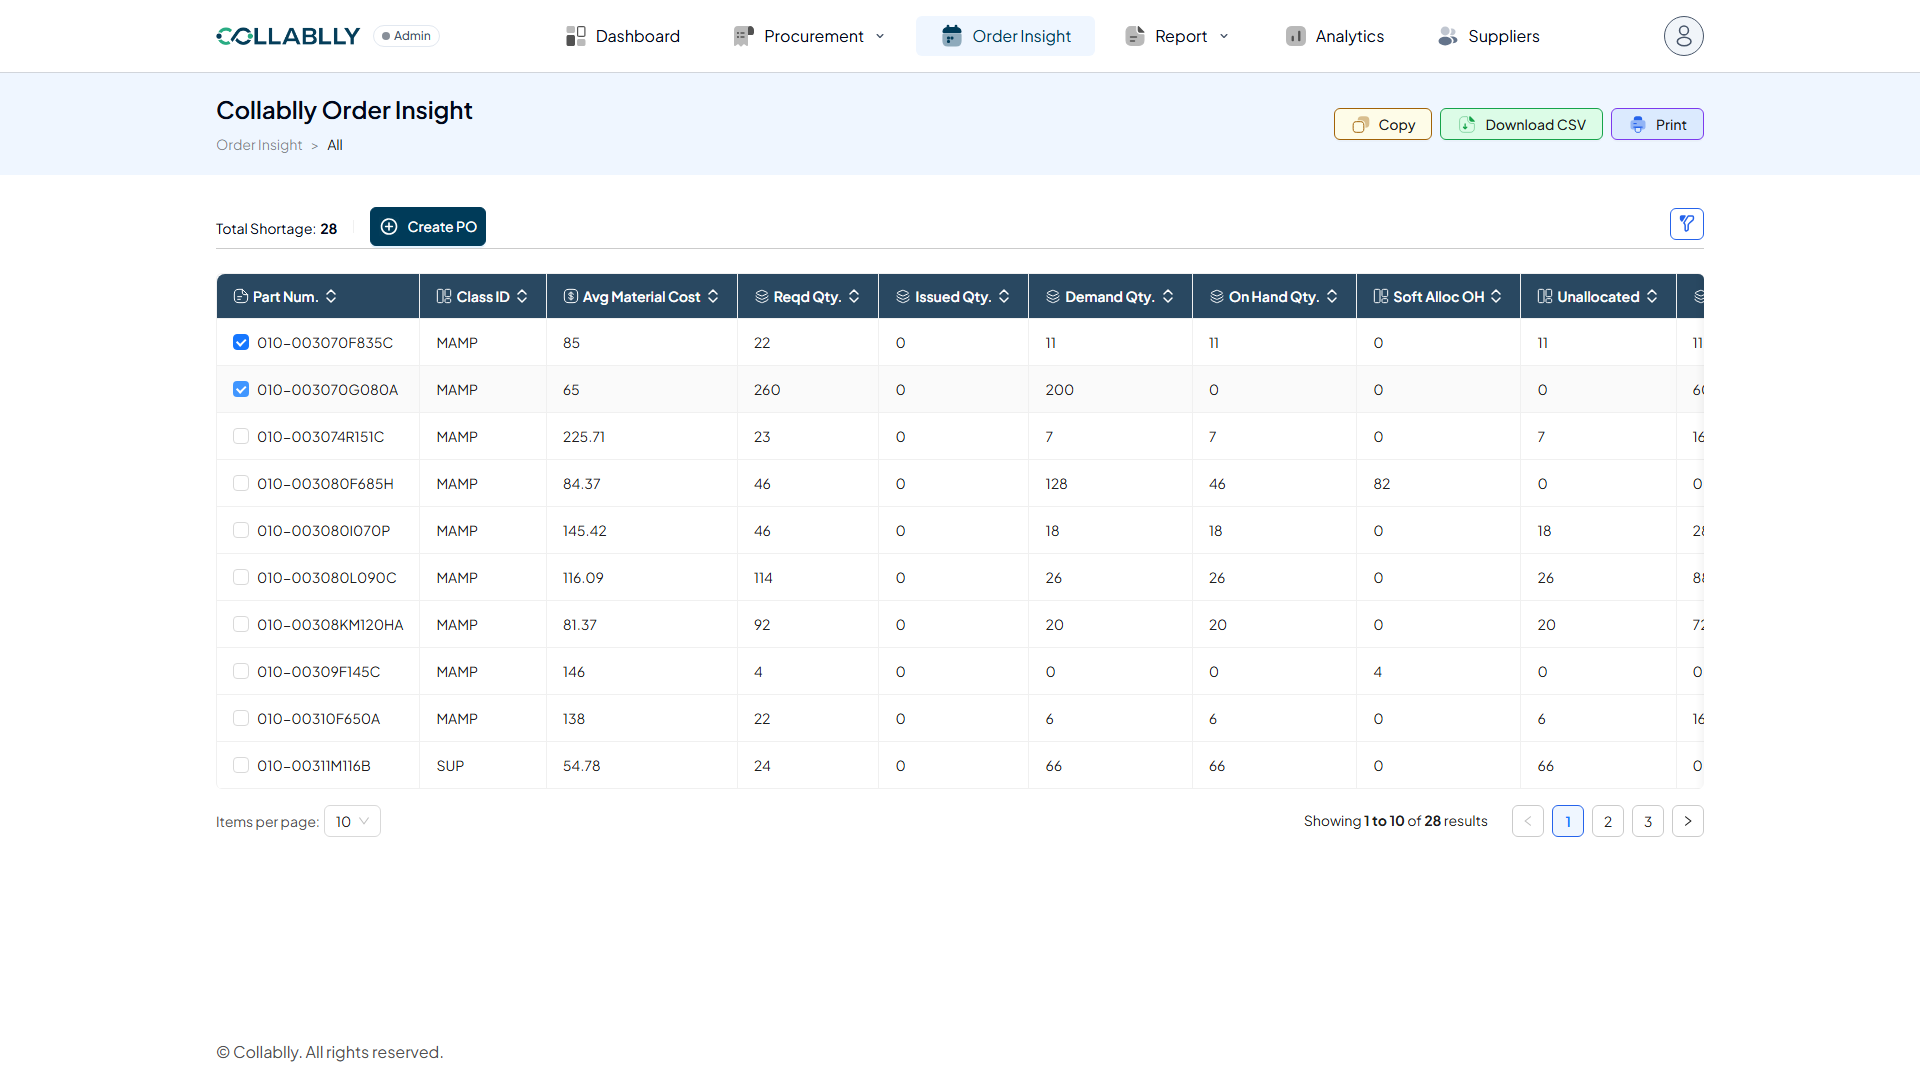
Check the lines you want to order
Checking a row's box is what tells the system you want a PO for that shortage. Here, two rows are checked. Checking any row at all makes a new Create PO button appear next to the Total Shortage count.
- Step 4 of 14
Click Create PO
This button only appears once at least one row is checked. Clicking it opens a Create PO modal built from exactly the rows you selected.
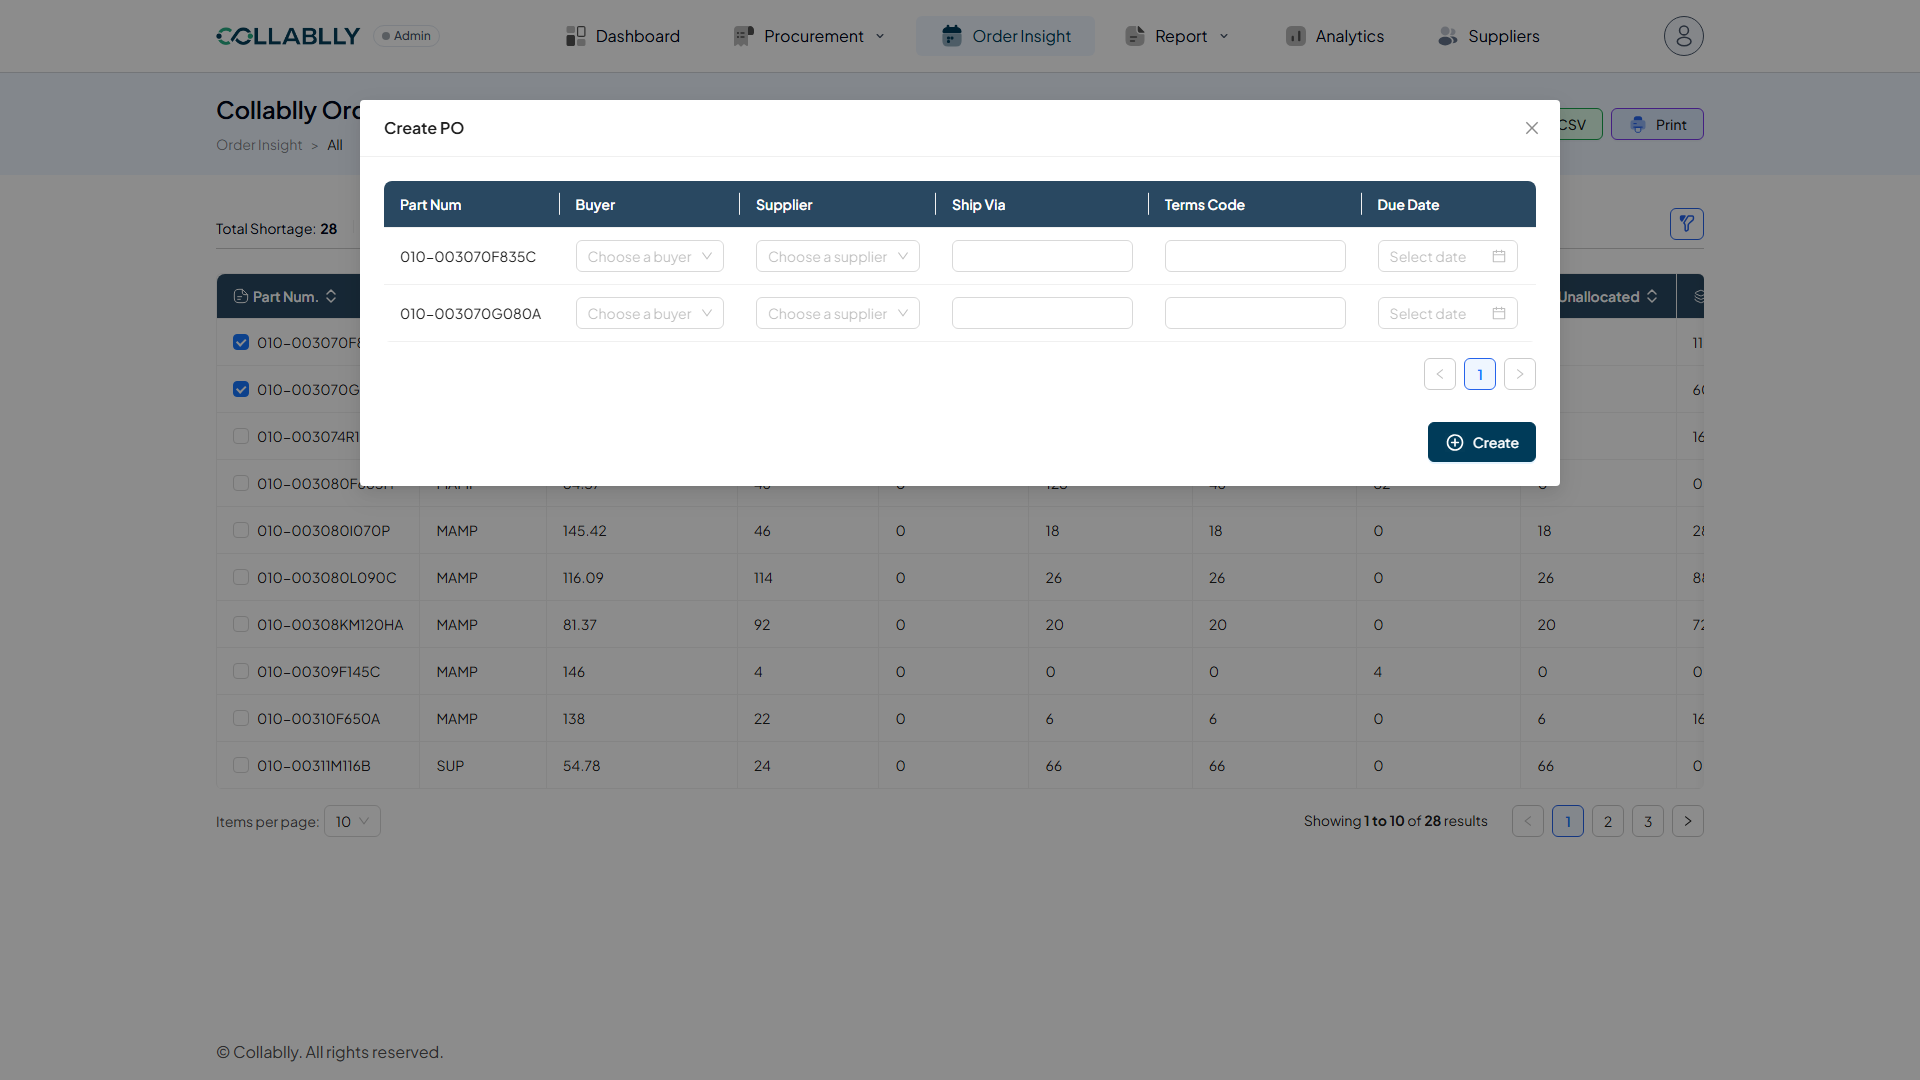
- Step 5 of 14
One row per part, waiting for details
The modal lists one row per selected part: Part Num, Buyer, Supplier, Ship Via, Terms Code, Due Date. Nothing is filled in yet, Buyer and Supplier are required before Create will do anything.
- Step 6 of 14
Pick a buyer and supplier
Choosing a Supplier auto-fills Ship Via and Terms Code from that supplier's record, the same auto-fill seen when creating a PO from scratch. Both rows here use the same Buyer and Supplier, Daniel Brooks and BlueRock Metals.
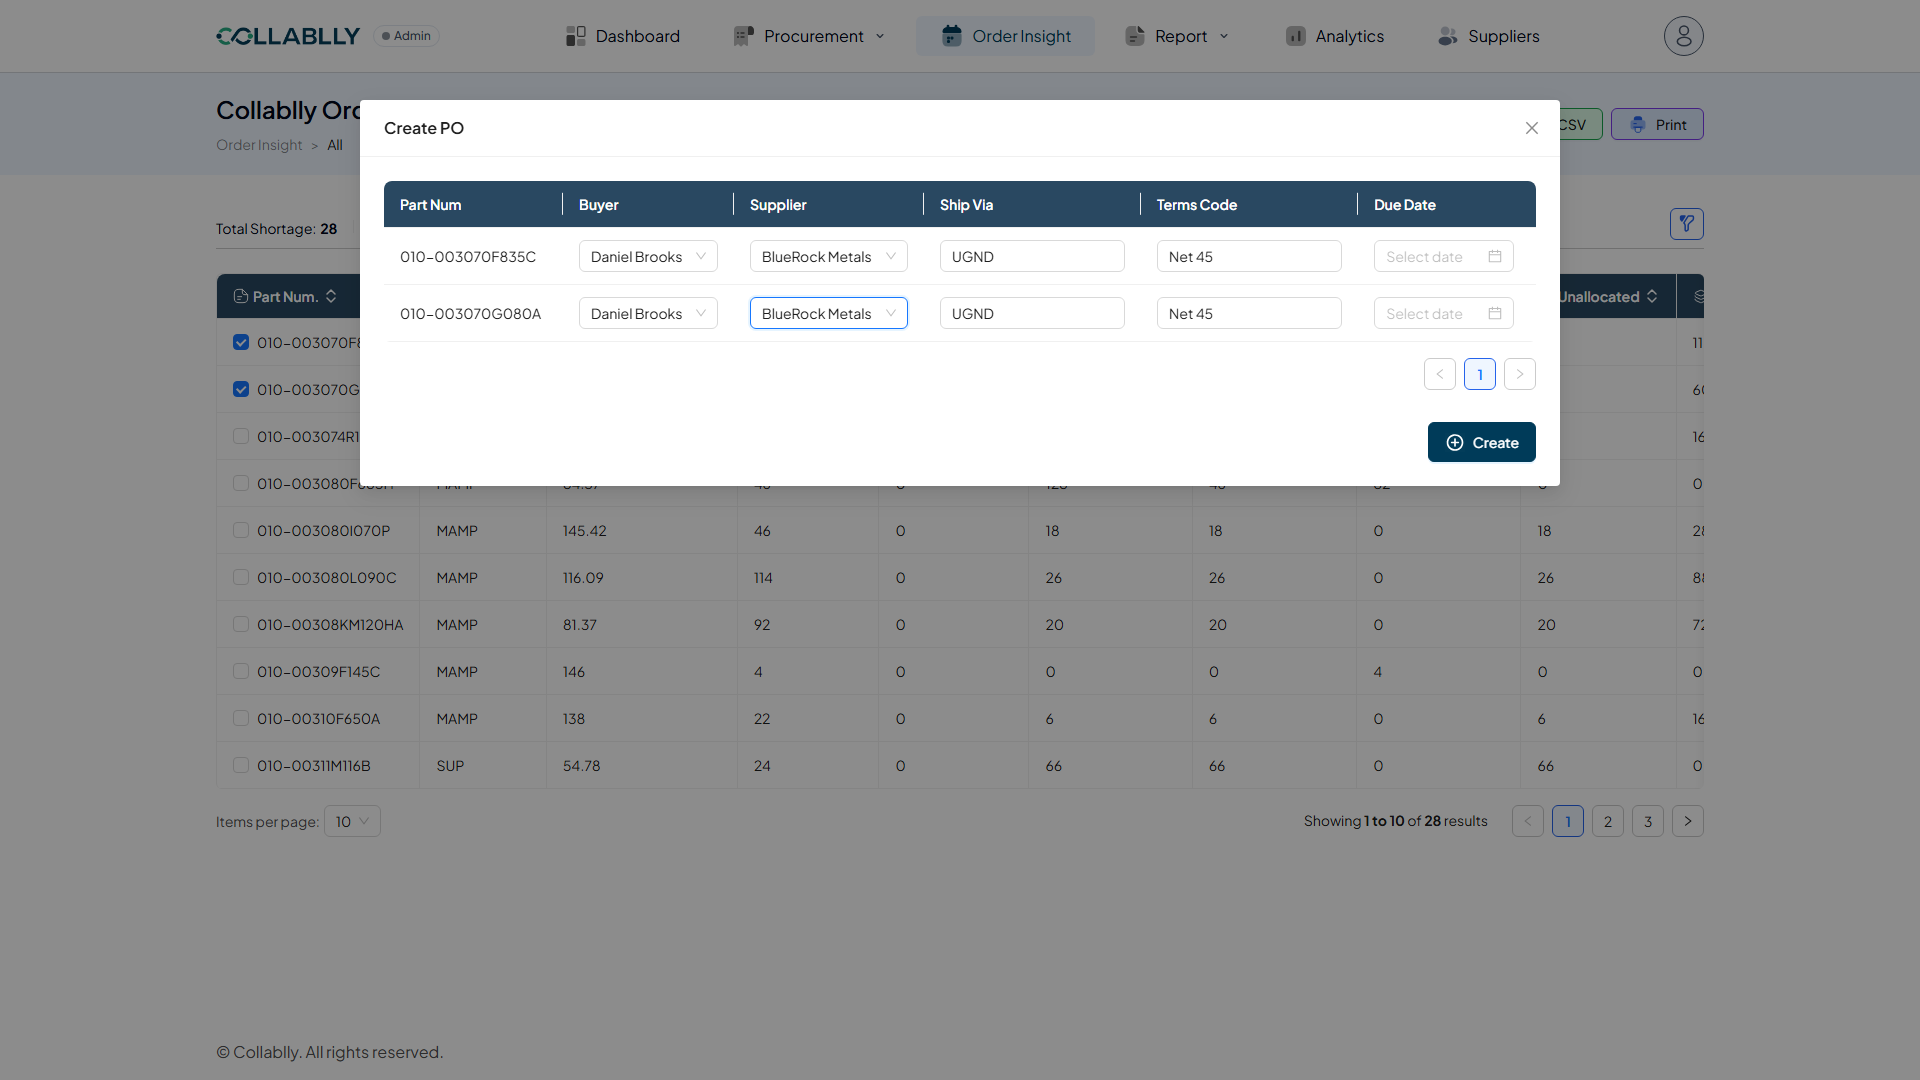
- Step 7 of 14
Set a due date for each line
Due Date is required per row, there's no bulk-fill across rows, each part gets its own date picker.
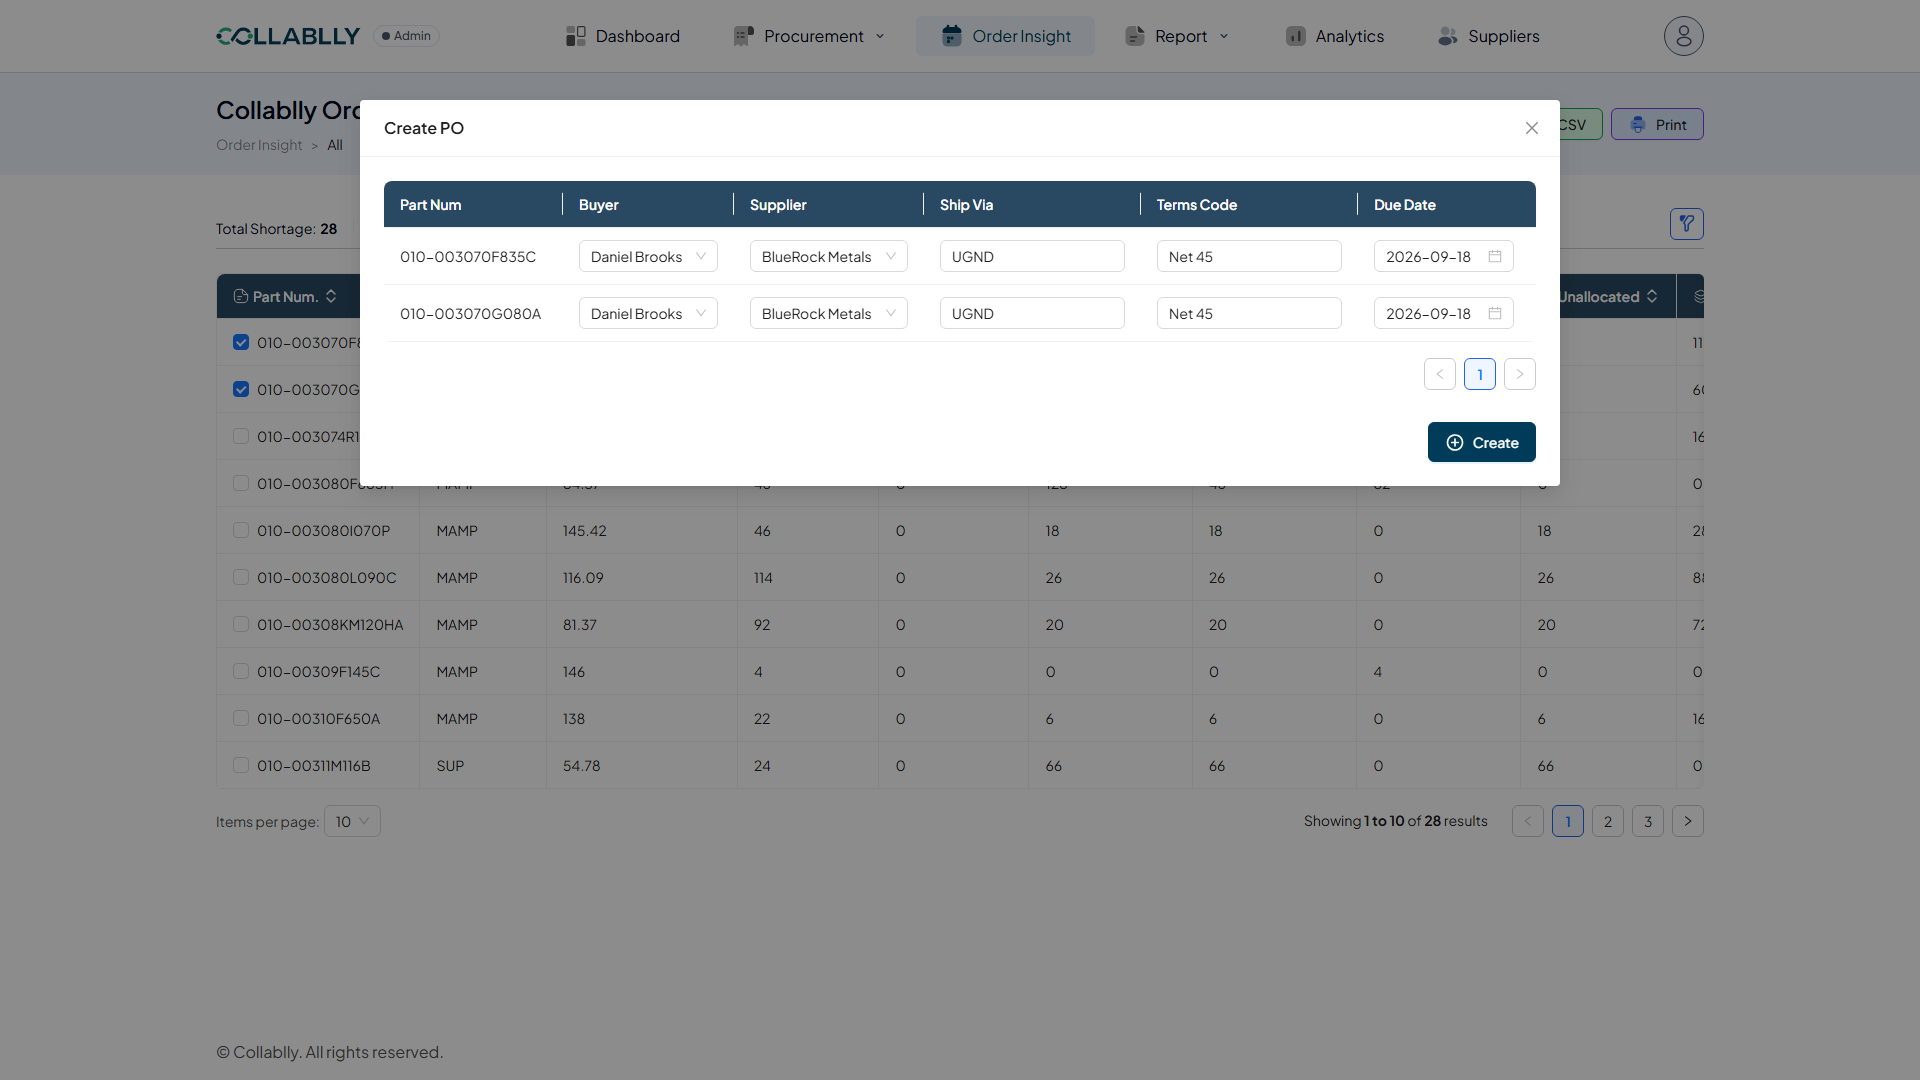
- Step 8 of 14
Click Create
With every row filled in, Create moves to a confirmation step rather than submitting immediately.
- Step 9 of 14
Confirm & Create PO
Confirm PO Creation lists exactly what's about to happen, each part with its Buyer and Supplier ID, and warns this can't be undone. Worth reading closely: even though both lines here share the same Buyer and Supplier, this creates two separate single-line POs, not one PO with two lines. Order Insight always creates one PO per part.
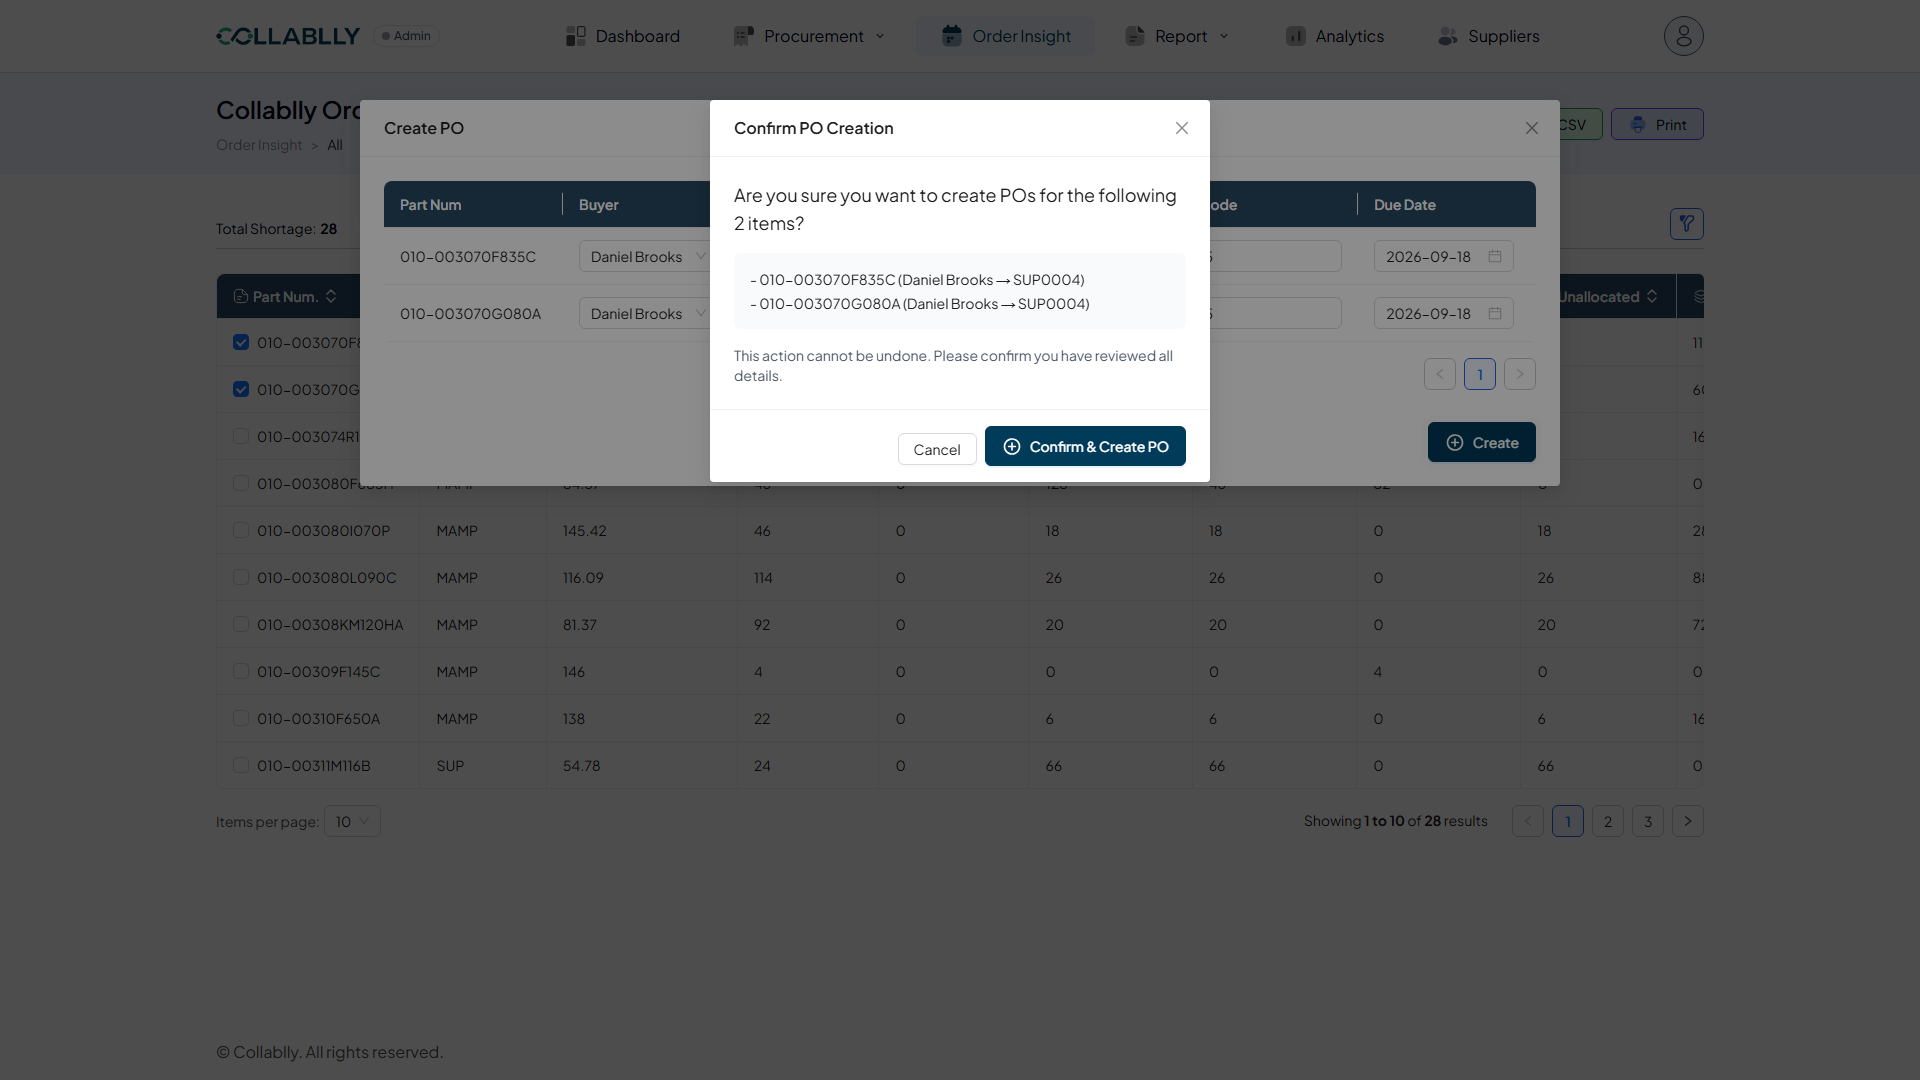
- Step 10 of 14
Two new POs, right away
The confirmation toast names both: PO 4500161 for one part, PO 4500162 for the other. The backend created them the instant Confirm was clicked.
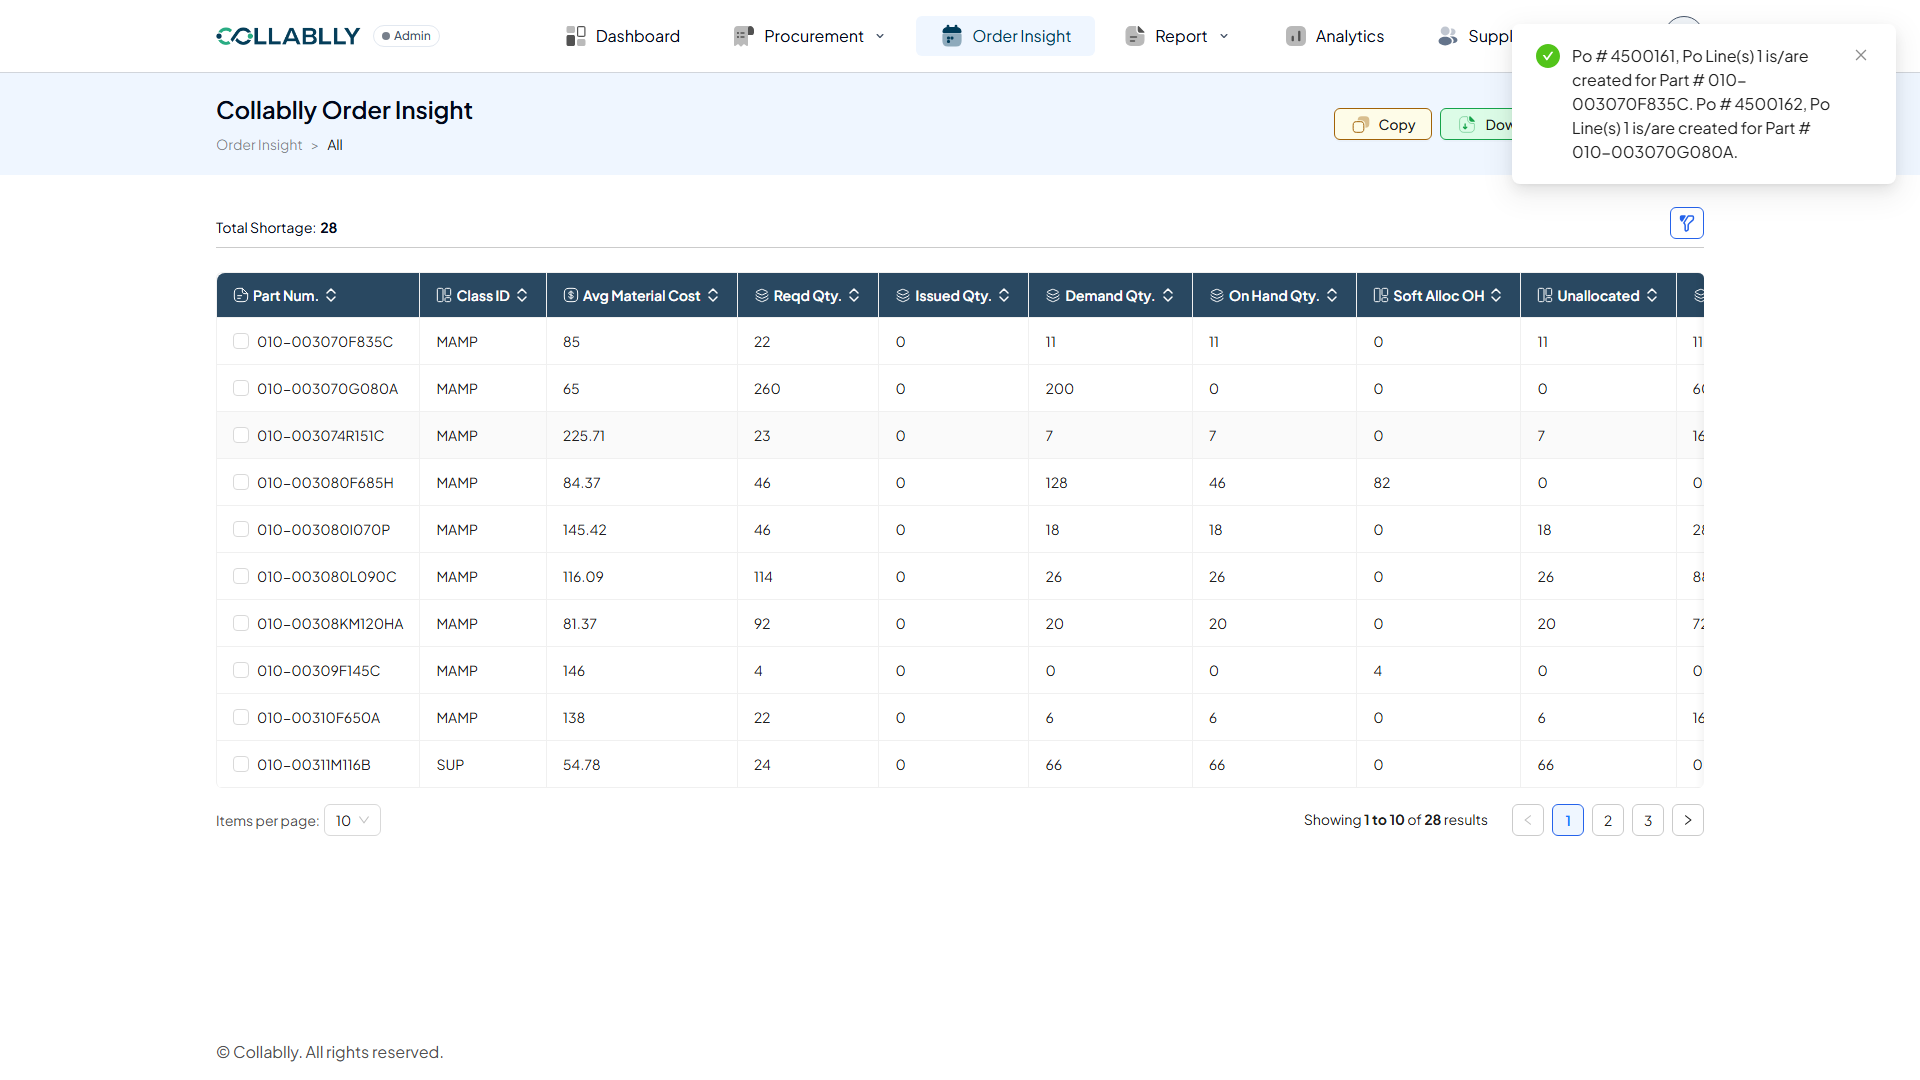
- Step 11 of 14
Not visible yet, the familiar ERP round trip
Switch to Purchase Order's Summary View and neither new PO is there. This is the same ERP round trip seen when creating a PO from scratch or editing a PO line: the write lands in the ERP system first, not Collablly's own database, so the SRM view is stale until it's told to catch up. Last synced still reads from hours ago.
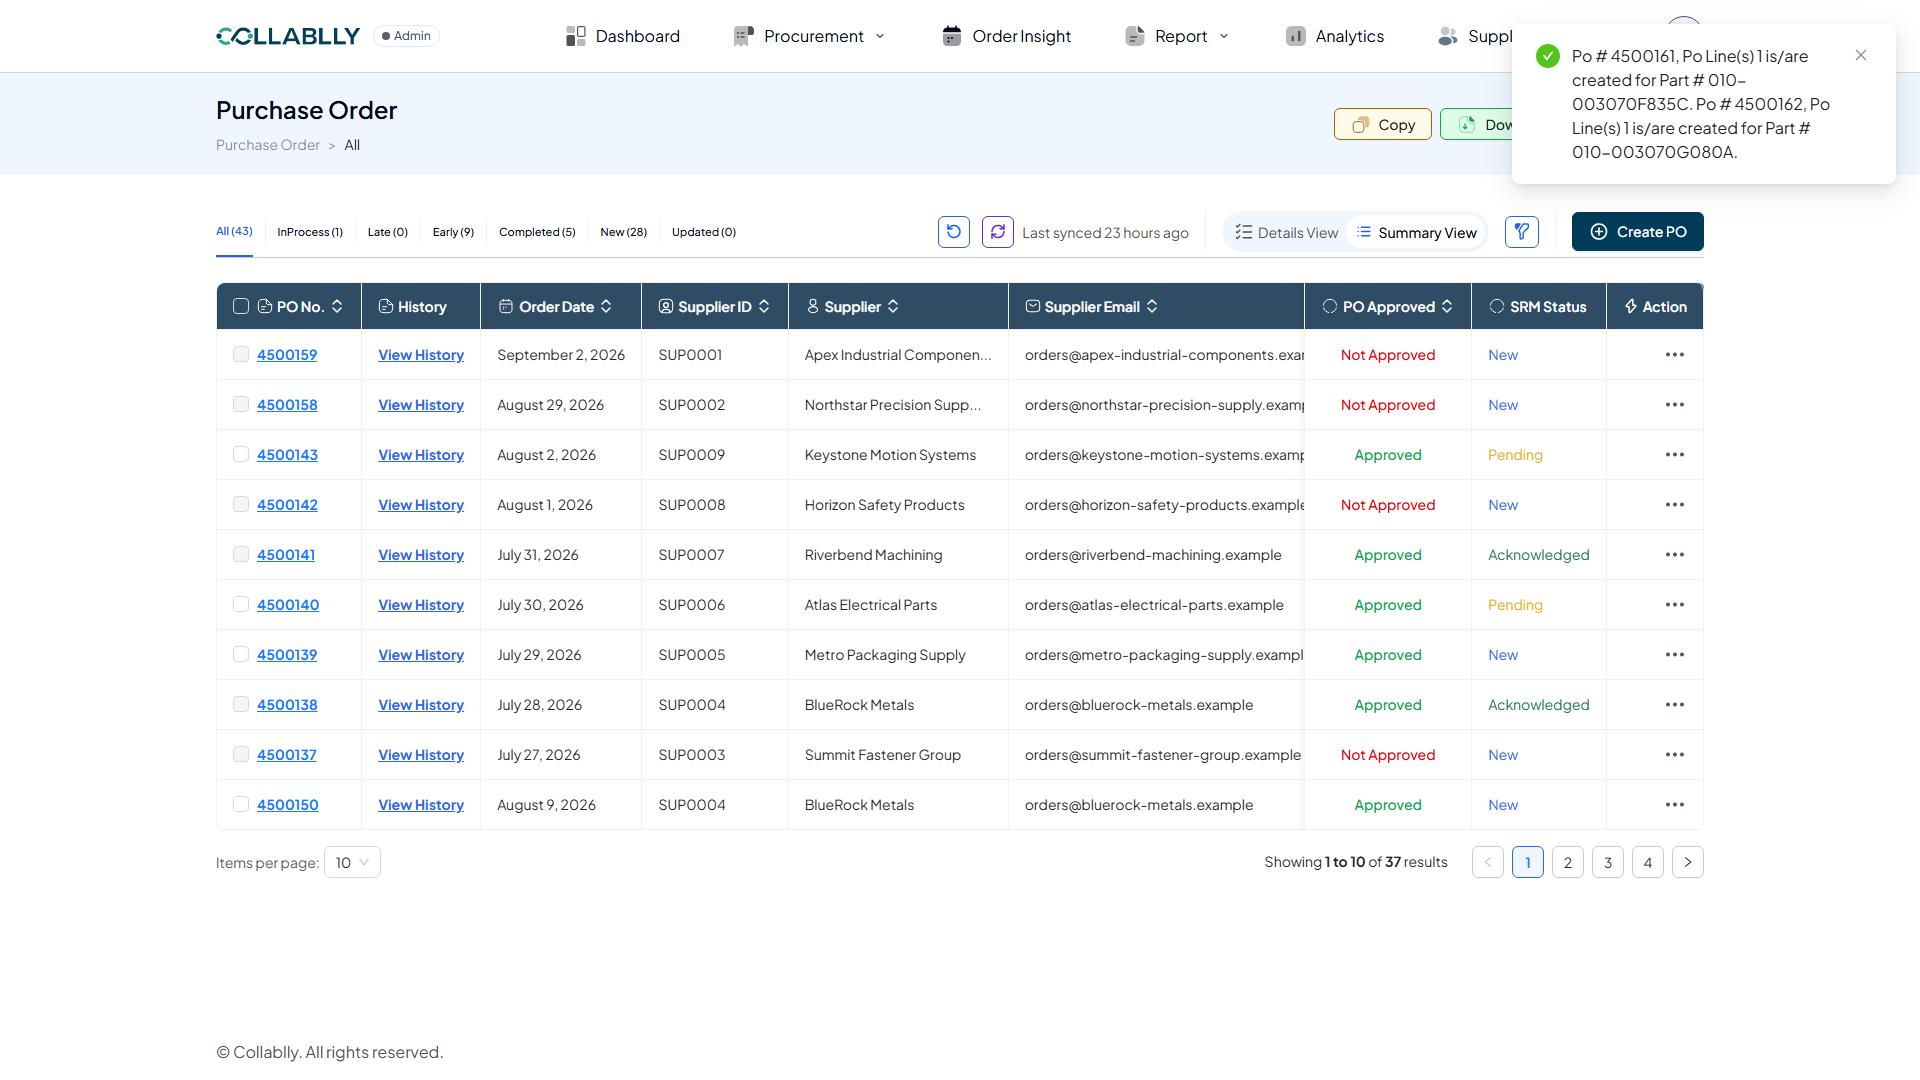
- Step 12 of 14
Sync, then wait for "Last synced now"
Click Sync and wait for the timestamp to flip to Last synced now before expecting anything to change.
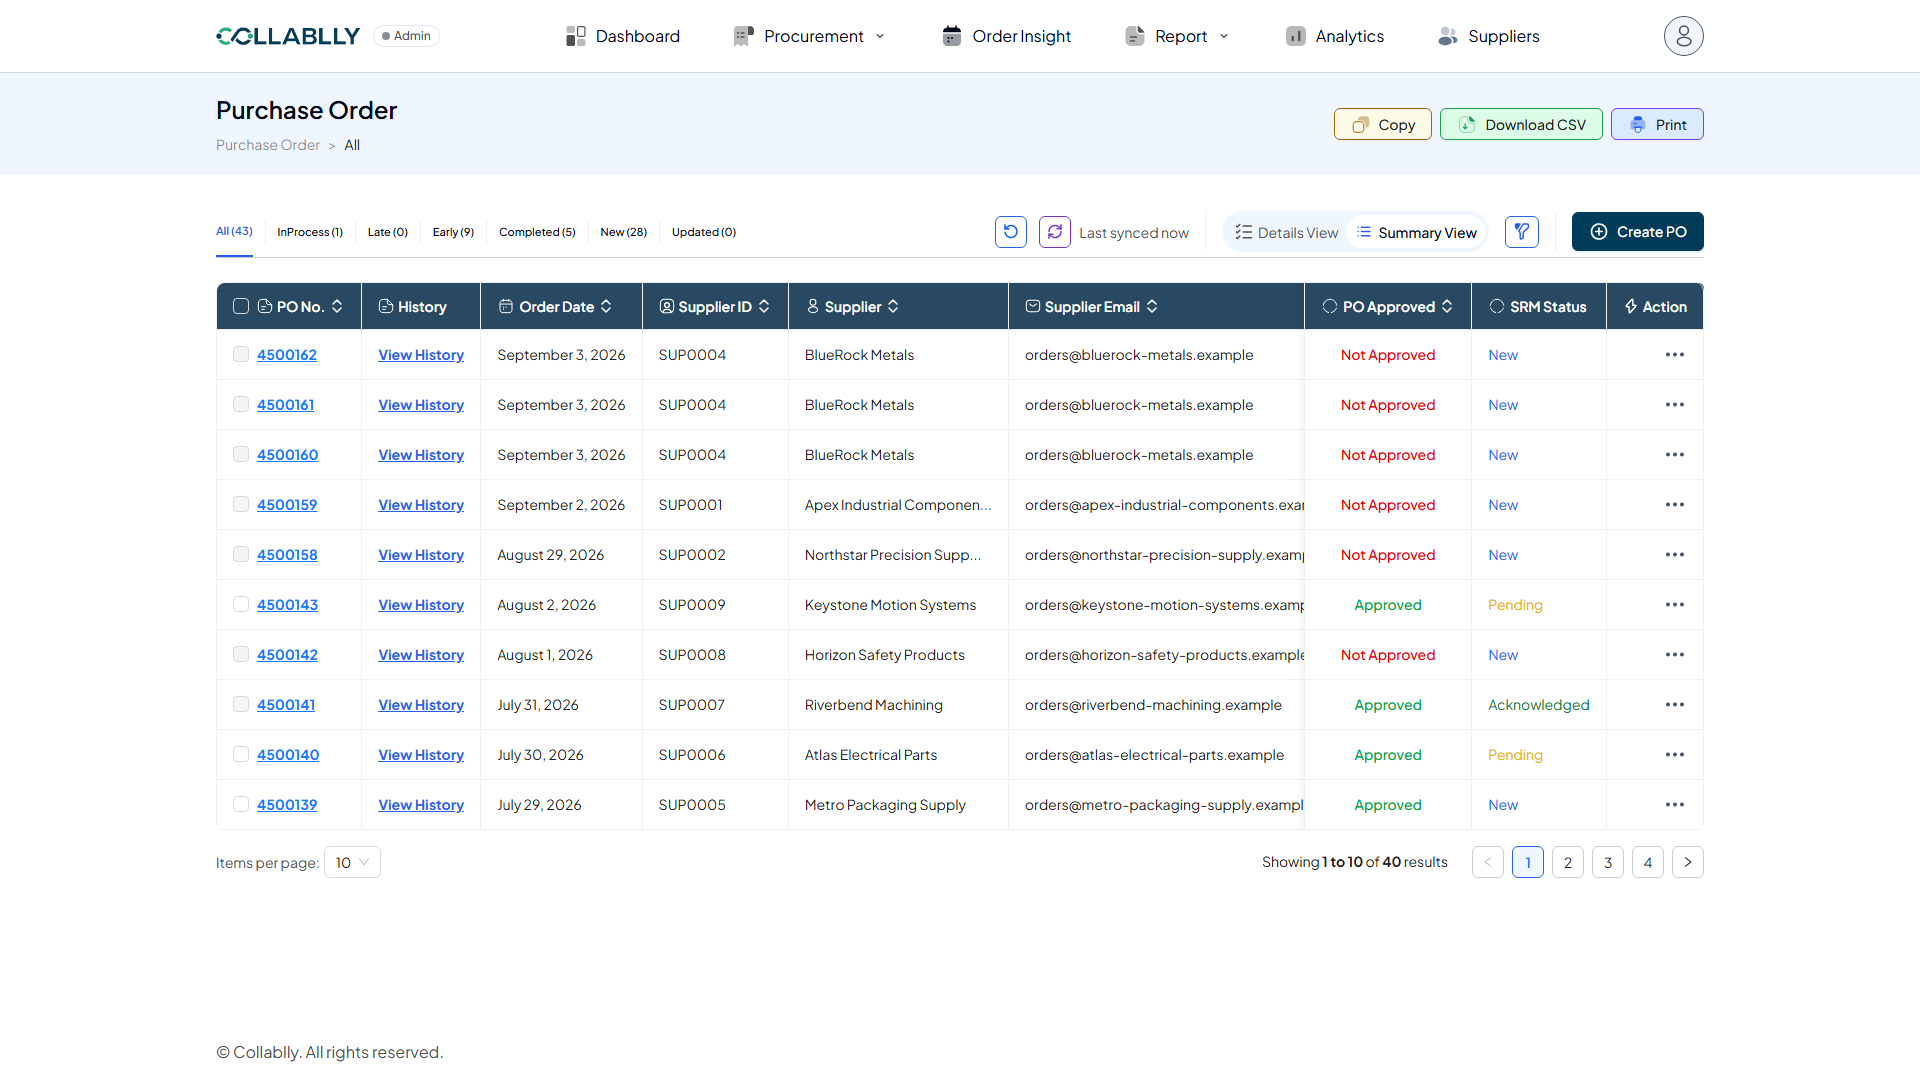
- Step 13 of 14
Reload Data if they still don't show
Here both new POs appeared the moment Sync finished. If they don't, Reload Data, just left of Sync, pulls the freshly synced data into the current view without a full page refresh.
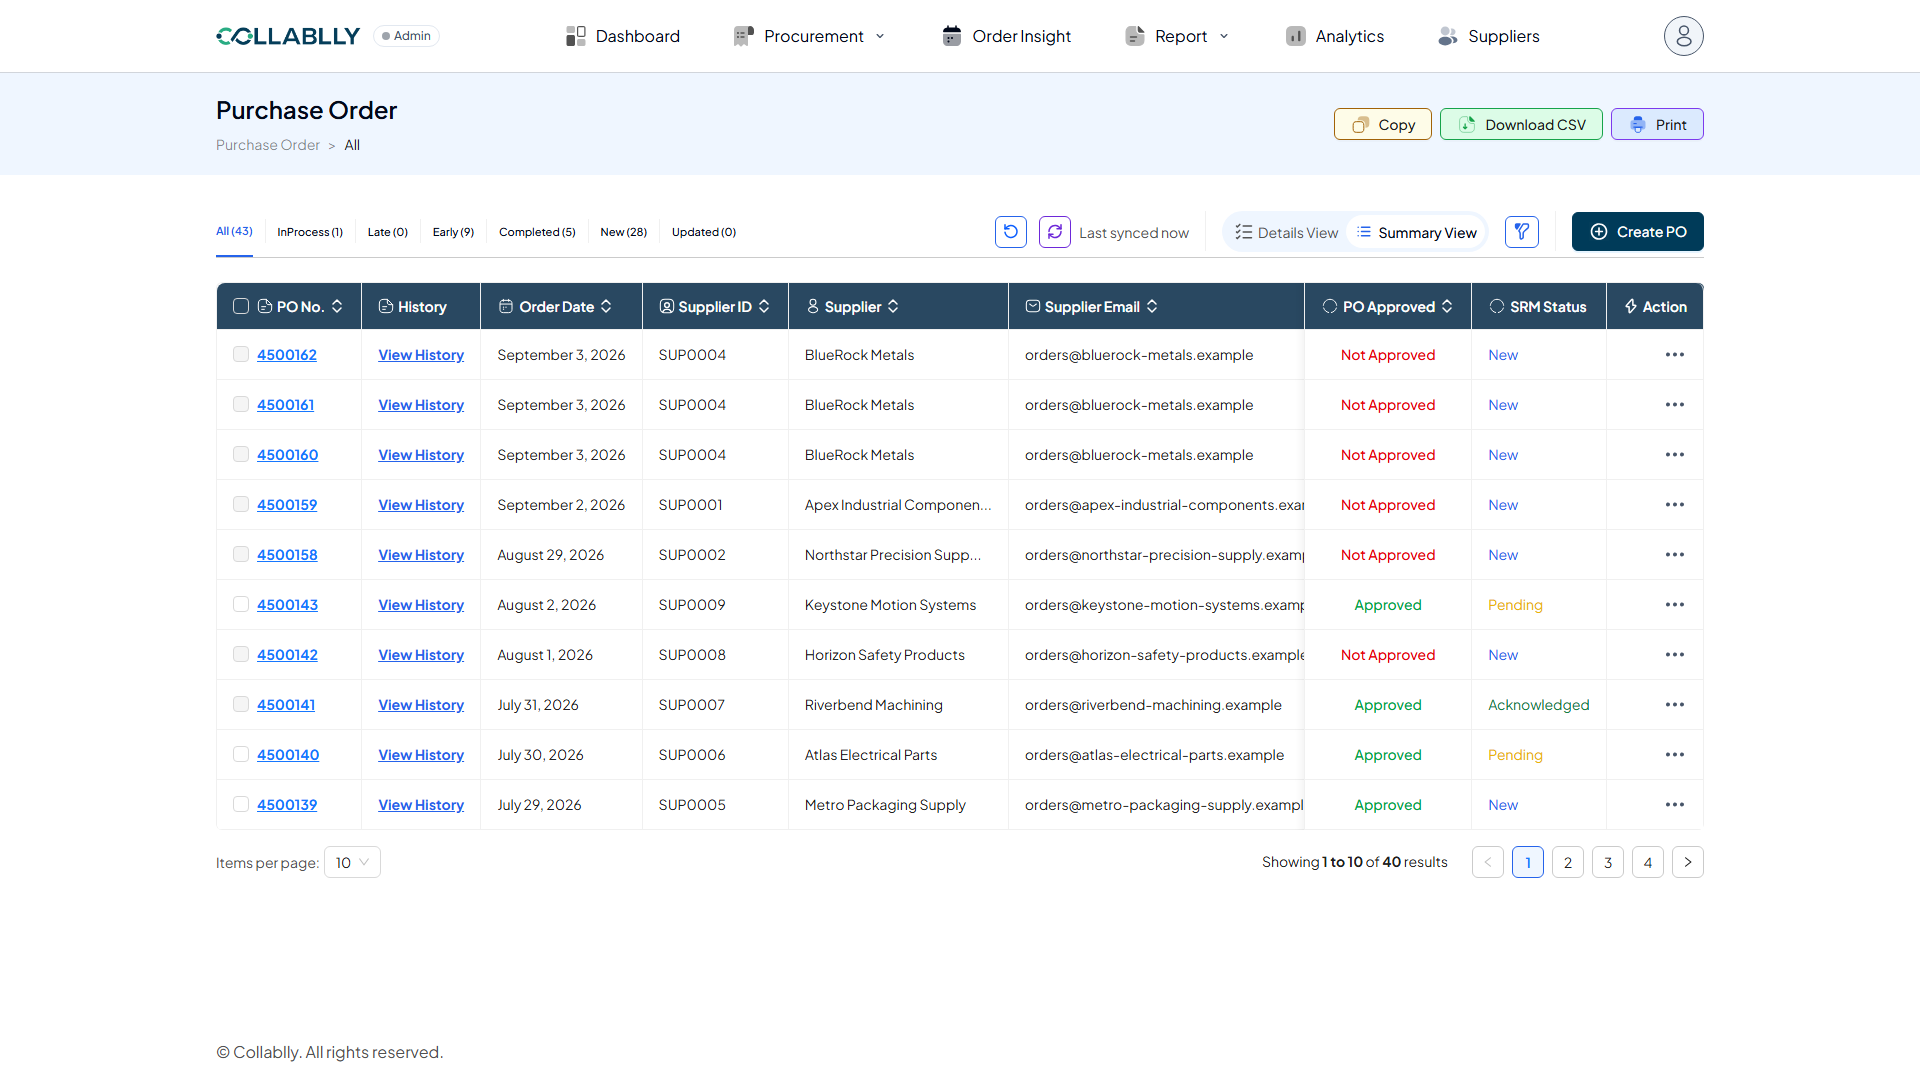
- Step 14 of 14
Both POs, side by side in Summary View
4500161 and 4500162 now sit at the top of Summary View, same Supplier, same Order Date, each its own PO. Like any freshly created PO, both start PO Approved: Not Approved and SRM Status: New, ready to go through the normal approval and Initial Communication flow from here.
