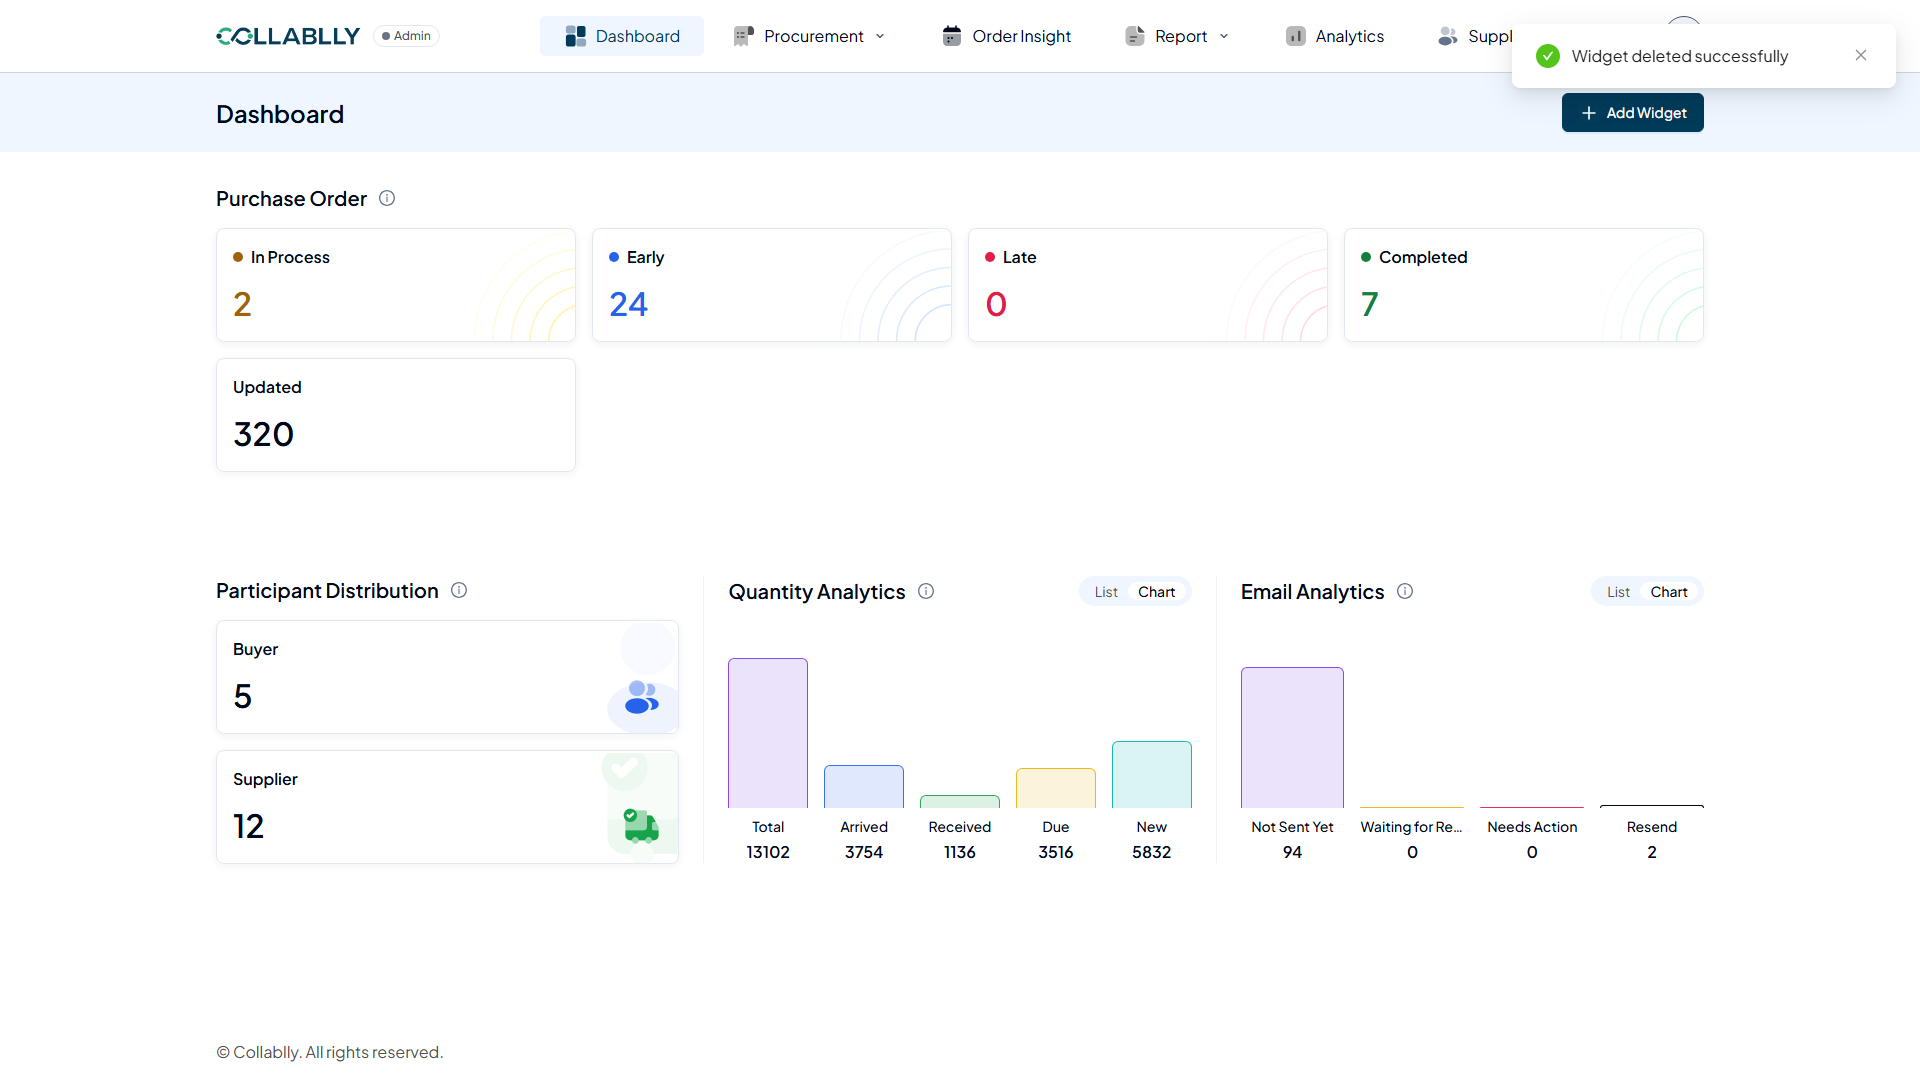
- Step 1 of 17
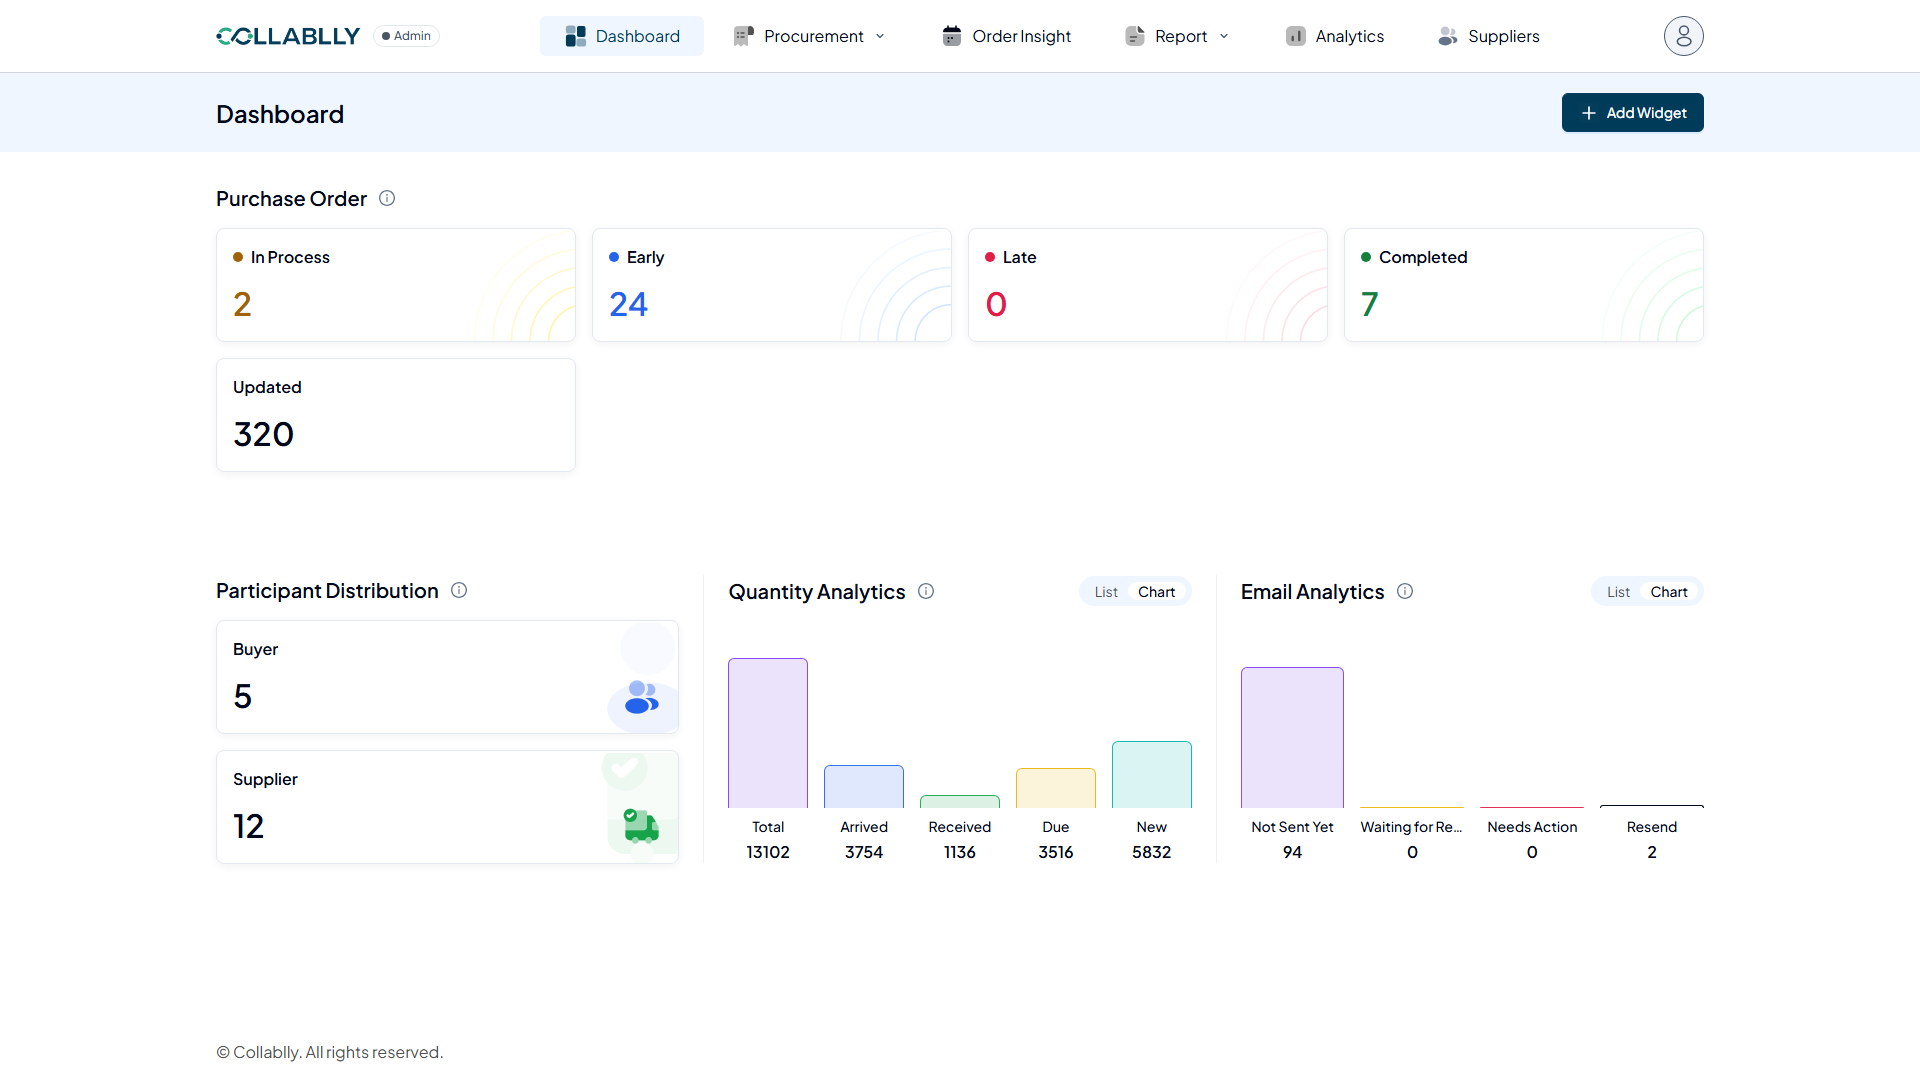
Widgets live on the Dashboard
A widget is a small custom card you add to your Dashboard, it watches something specific (like Purchase Order lines coming due) and sits alongside the built-in cards like Purchase Order and Quantity Analytics. Every widget starts from the same place: the Add Widget button, top right of the Dashboard.
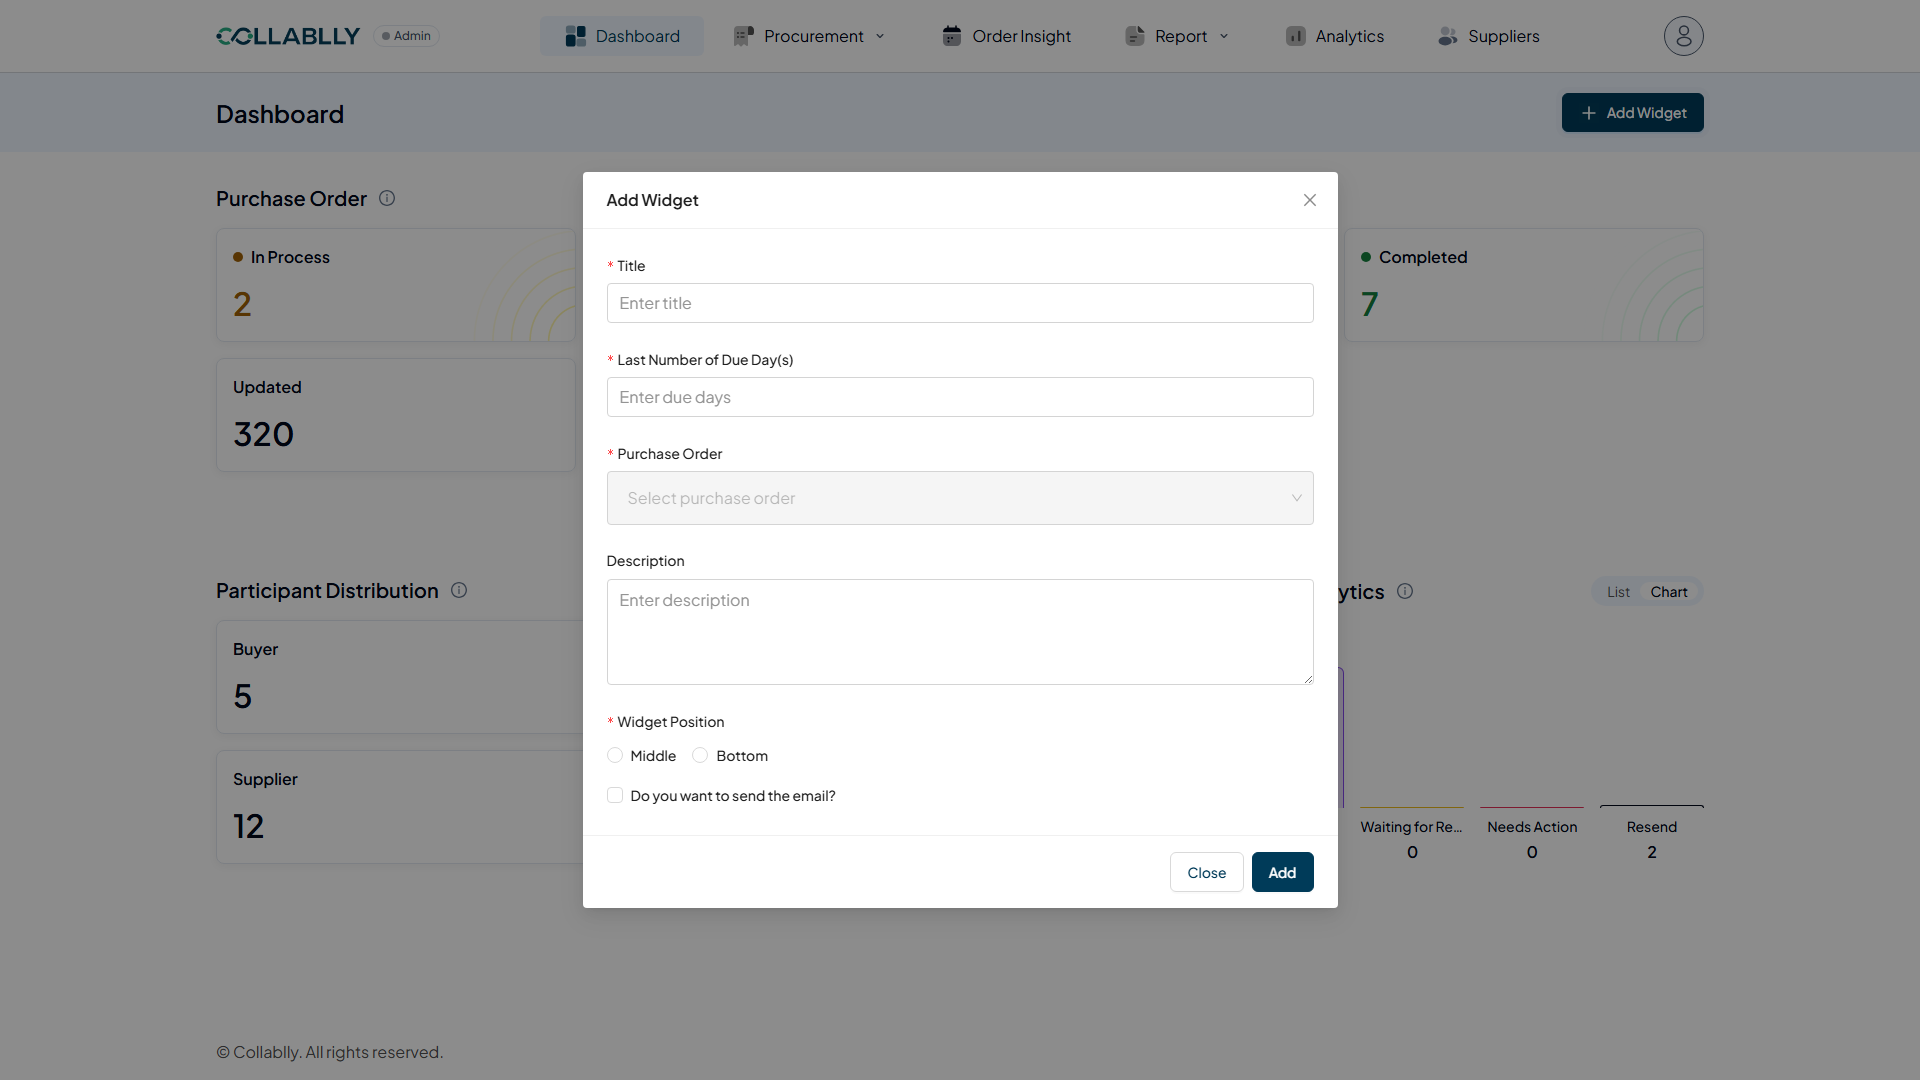
- Step 2 of 17
Six fields, one card
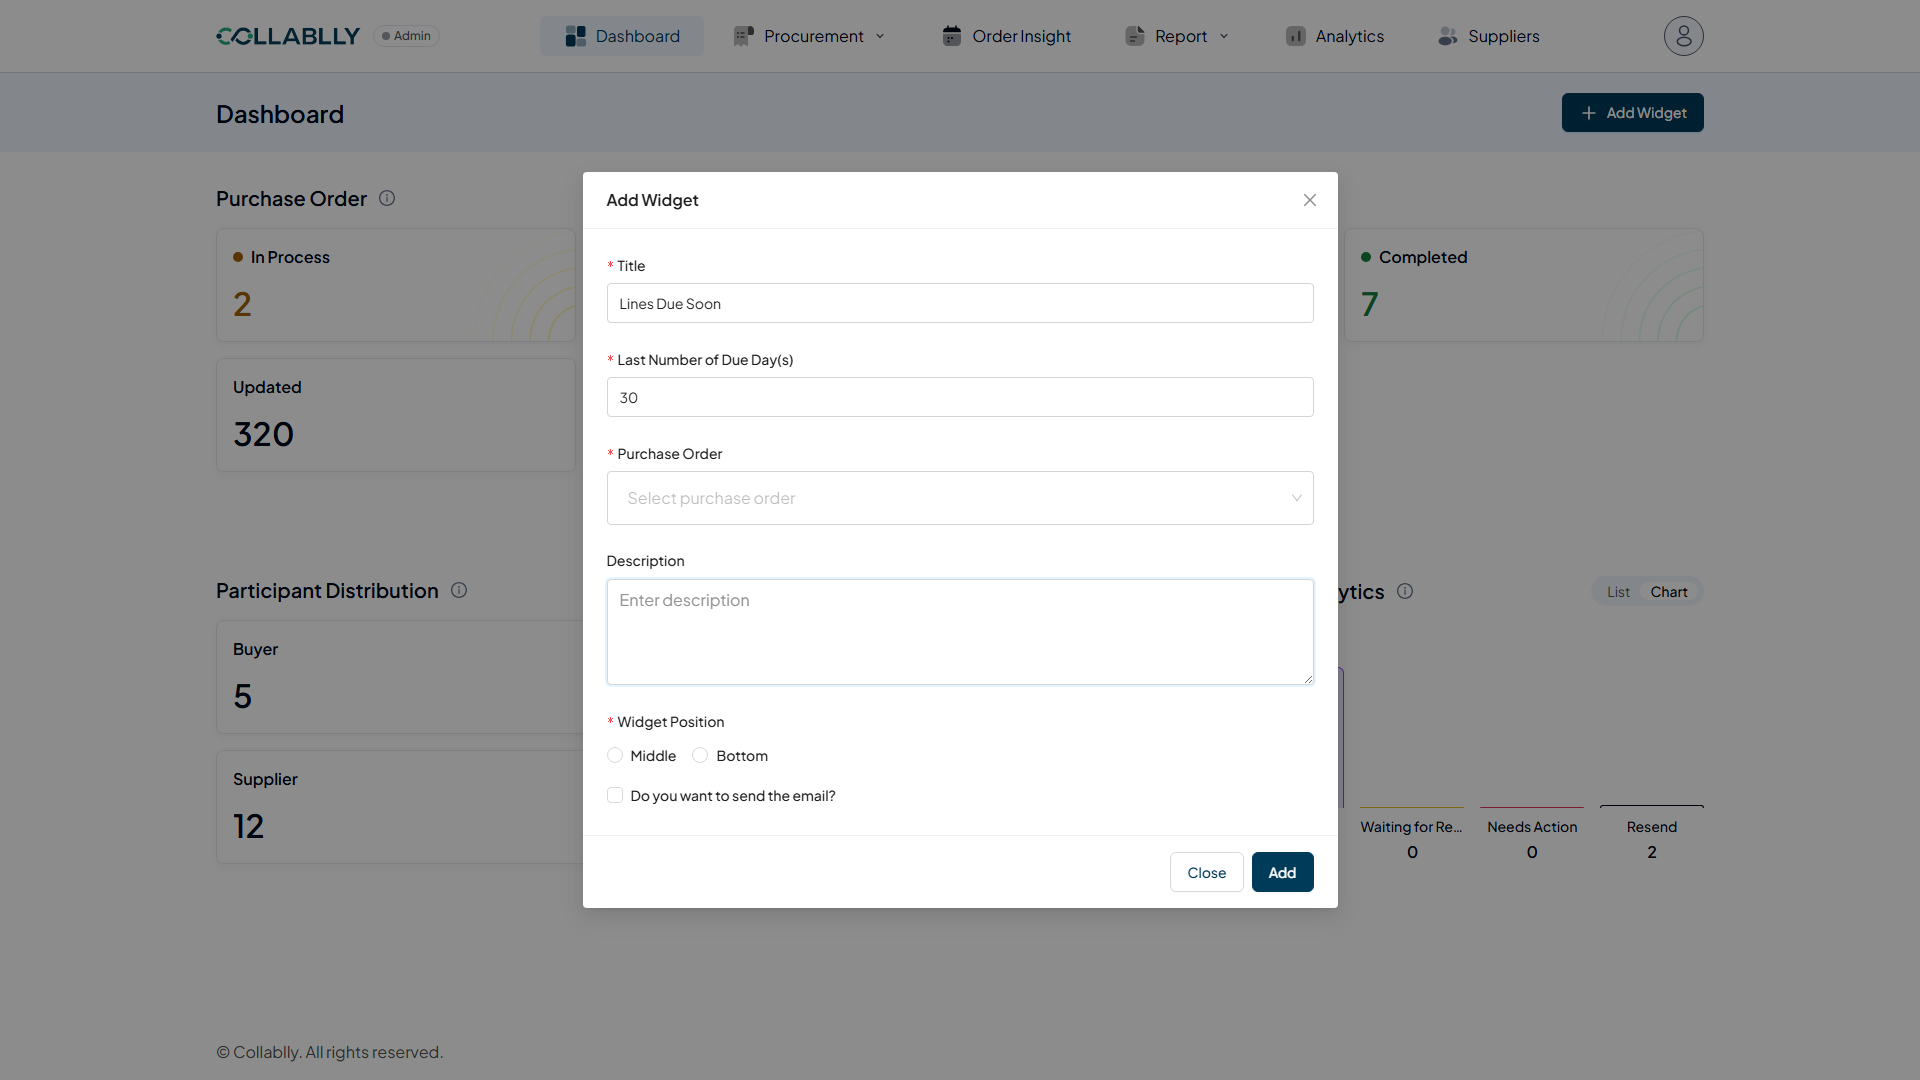
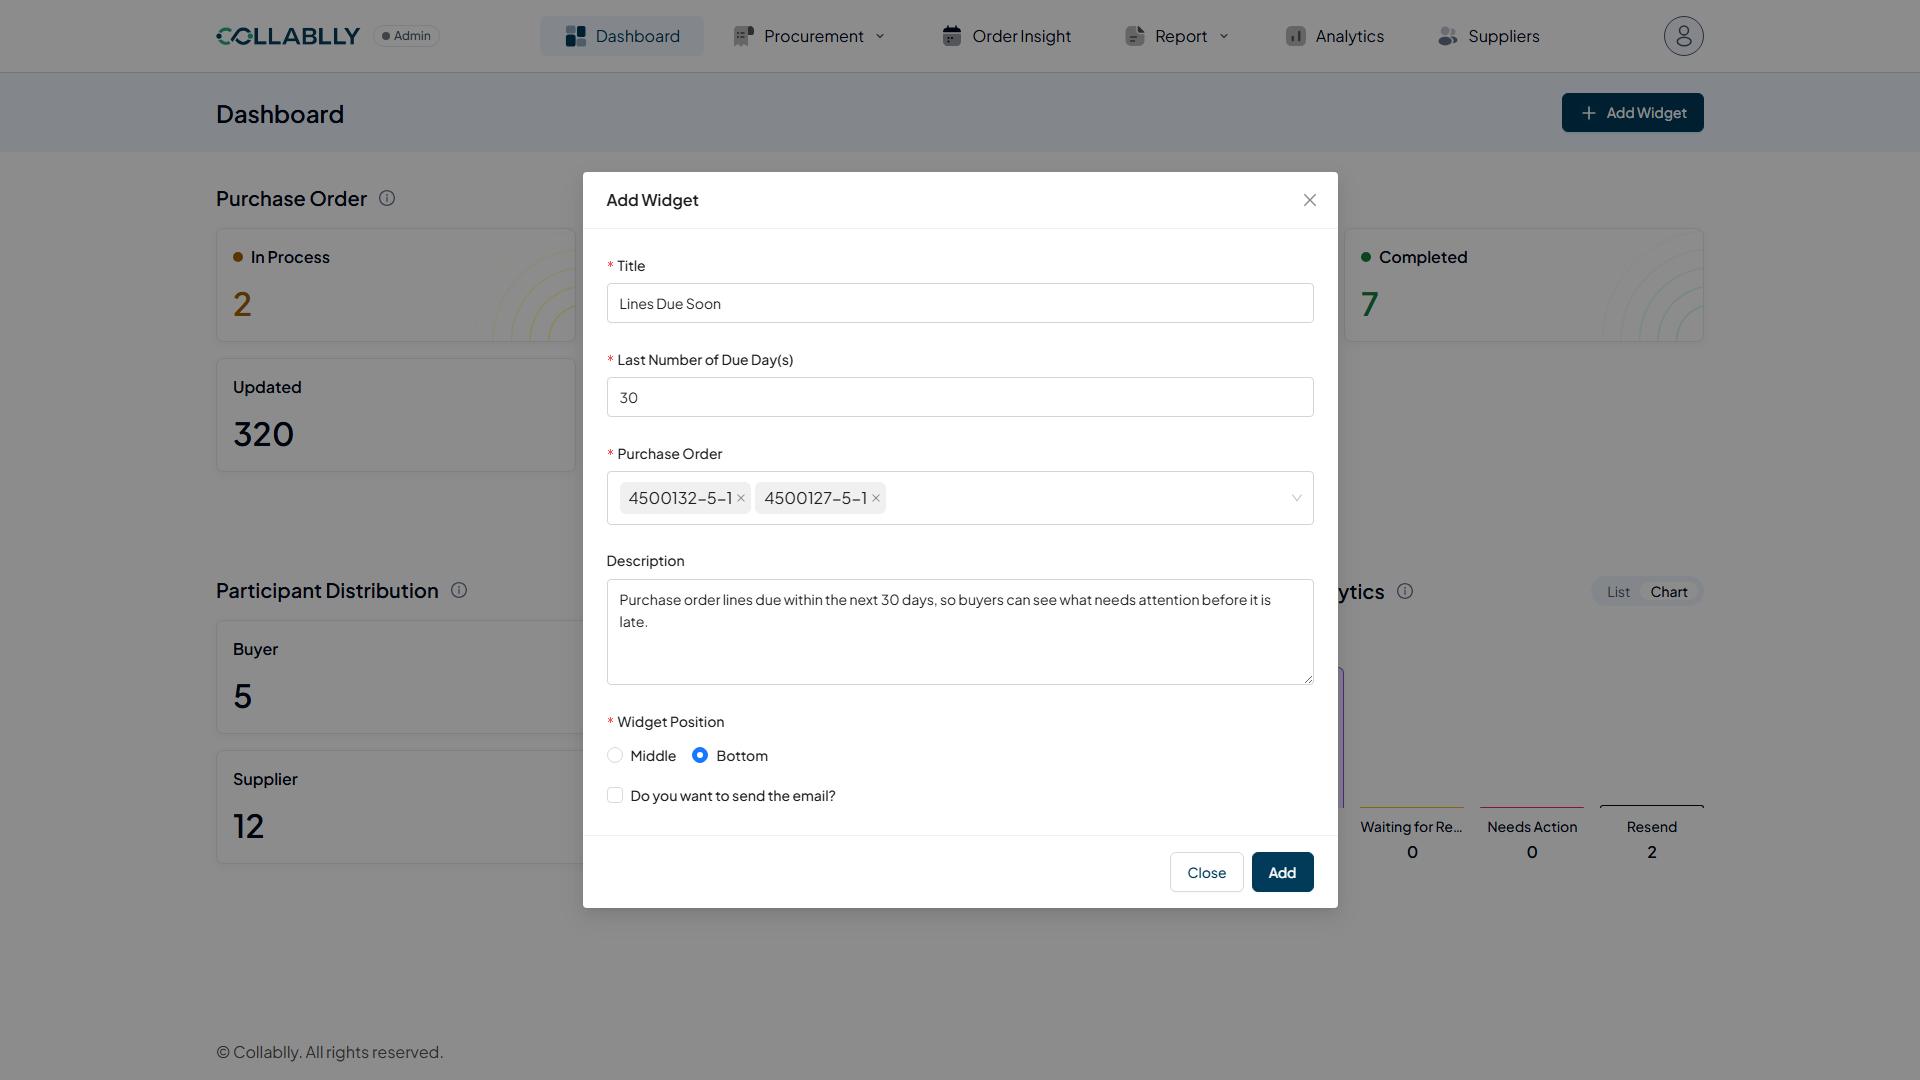
The Add Widget form has six fields: Title, Last Number of Due Day(s), Purchase Order, Description, Widget Position, and a checkbox asking if you want to send an email. Fill them out top to bottom, each one shapes what the finished widget looks like and does.
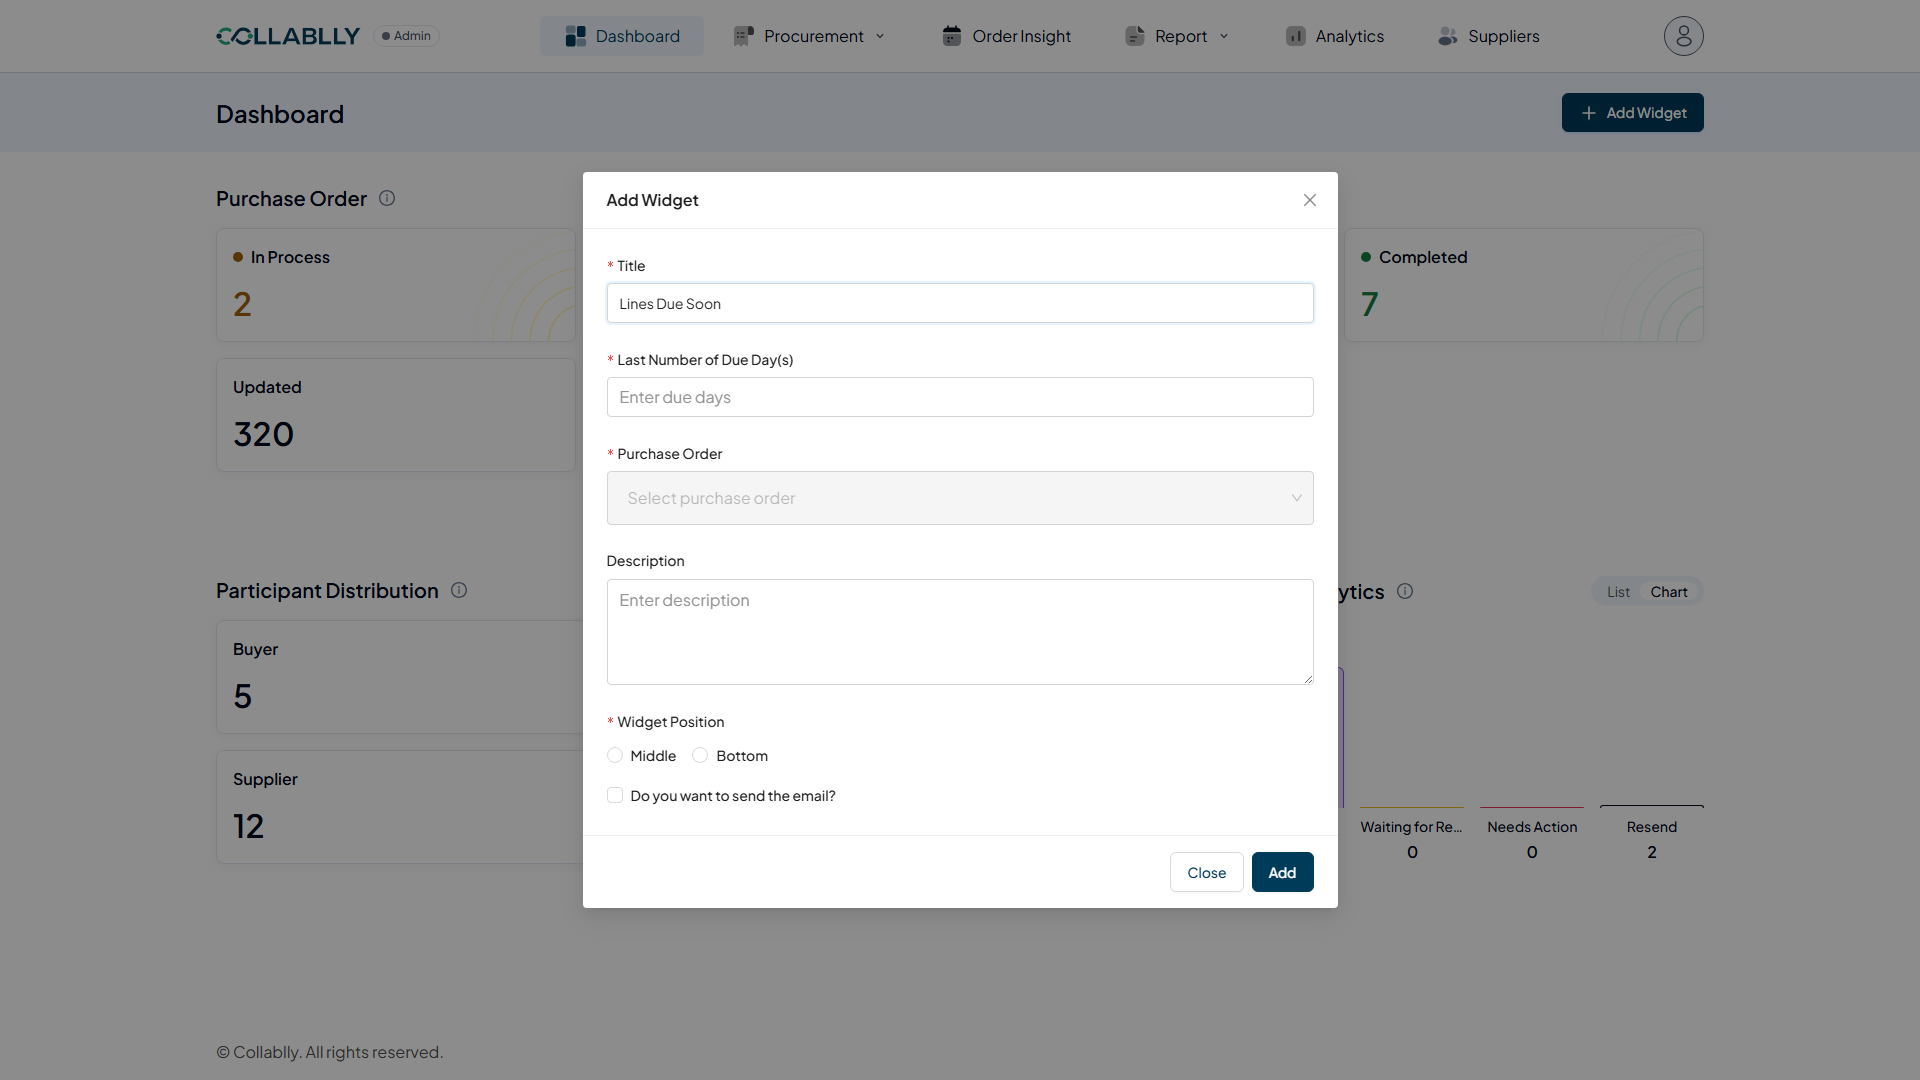
- Step 3 of 17
Title: the widget's name
This is the label that appears on the widget card itself once it's created, so make it something a buyer would recognize at a glance. Here it's Lines Due Soon.
- Step 4 of 17
Due Days is the real engine of the widget
Enter a number of days here, and the widget quietly searches for every approved Purchase Order line due within that window, starting from today. Type 30, and it looks at everything due in the next 30 days. This one number is what makes the widget actually useful, everything after this just narrows or labels the result.
- Step 5 of 17
Purchase Order: pick which lines to track
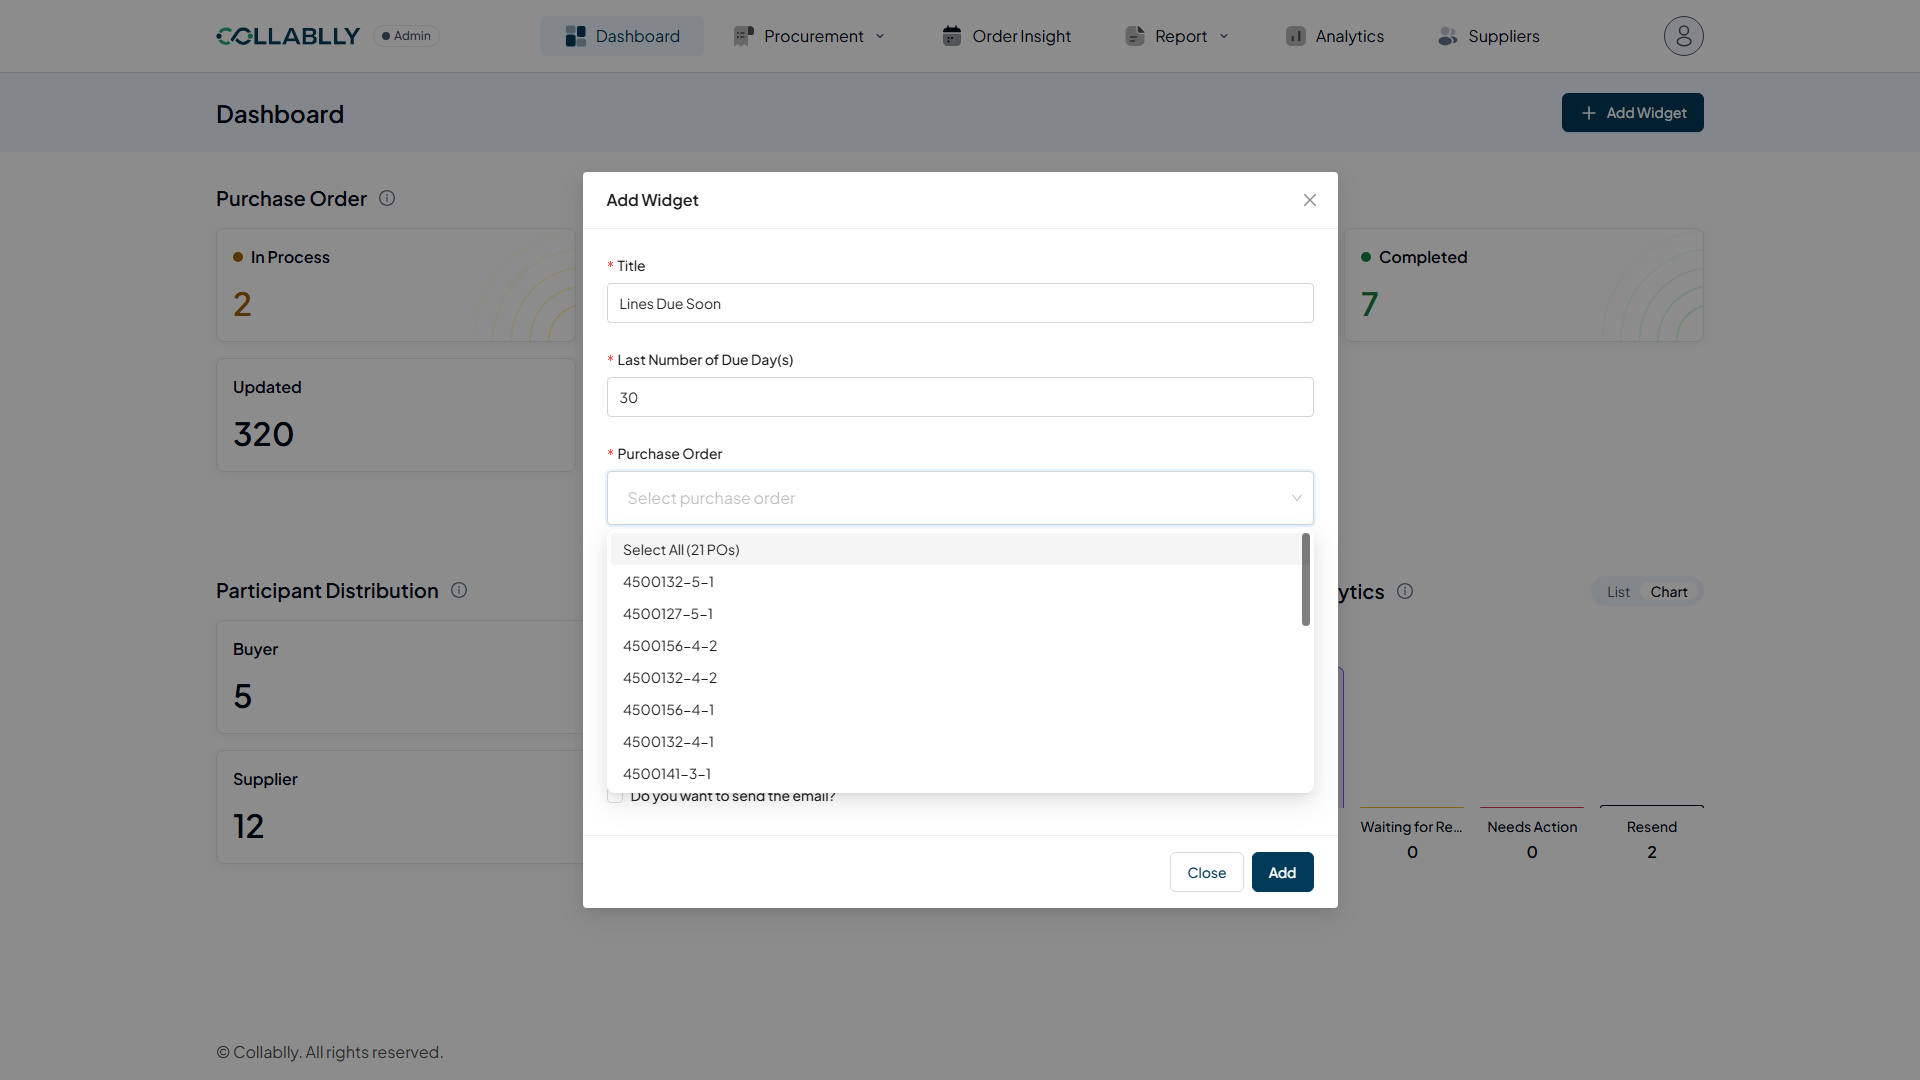
This list is empty until you fill in Due Days, then it fills in with the real lines that match. Click Select All to track every matching line, 21 in this case, or check individual PO lines one at a time if you only want to watch a few.
- Step 6 of 17
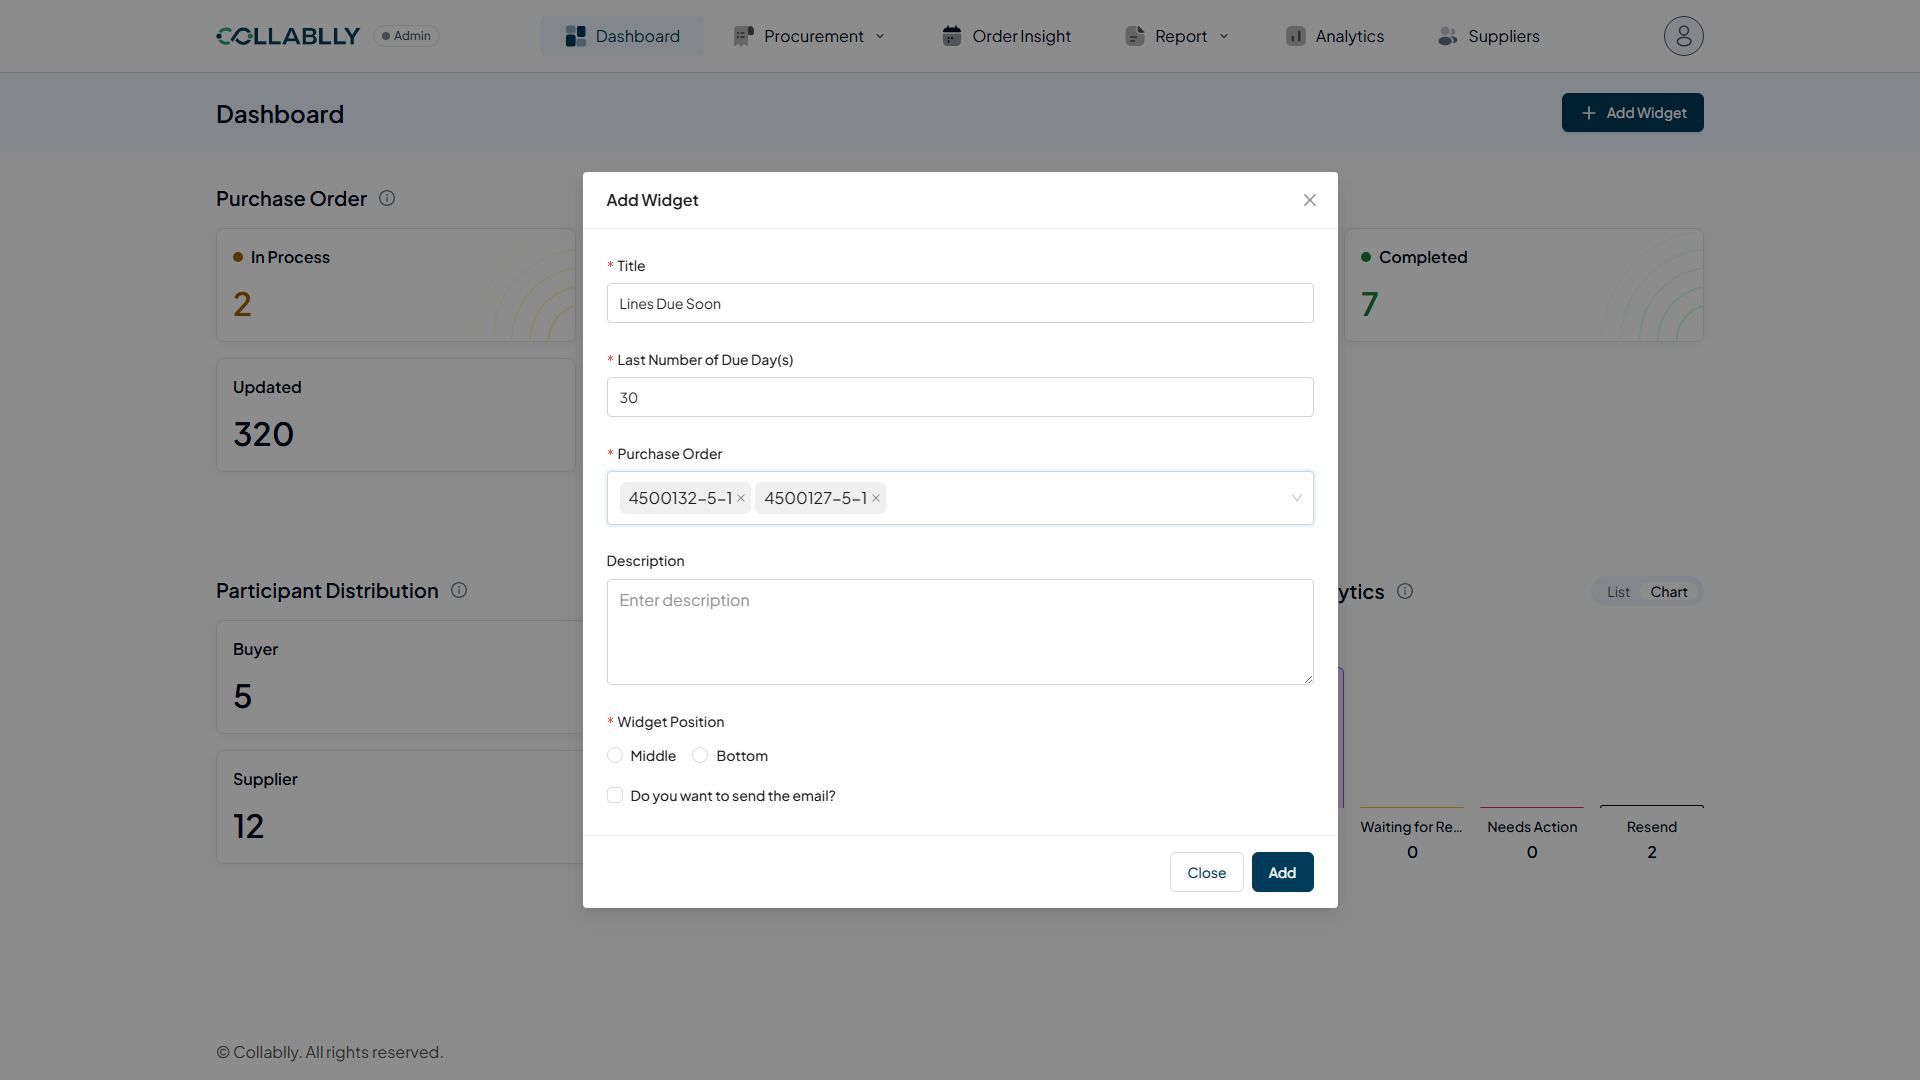
Two lines chosen
Each selected line becomes its own removable chip. The widget will count and track exactly these lines, click the little x on a chip any time to drop it.
- Step 7 of 17
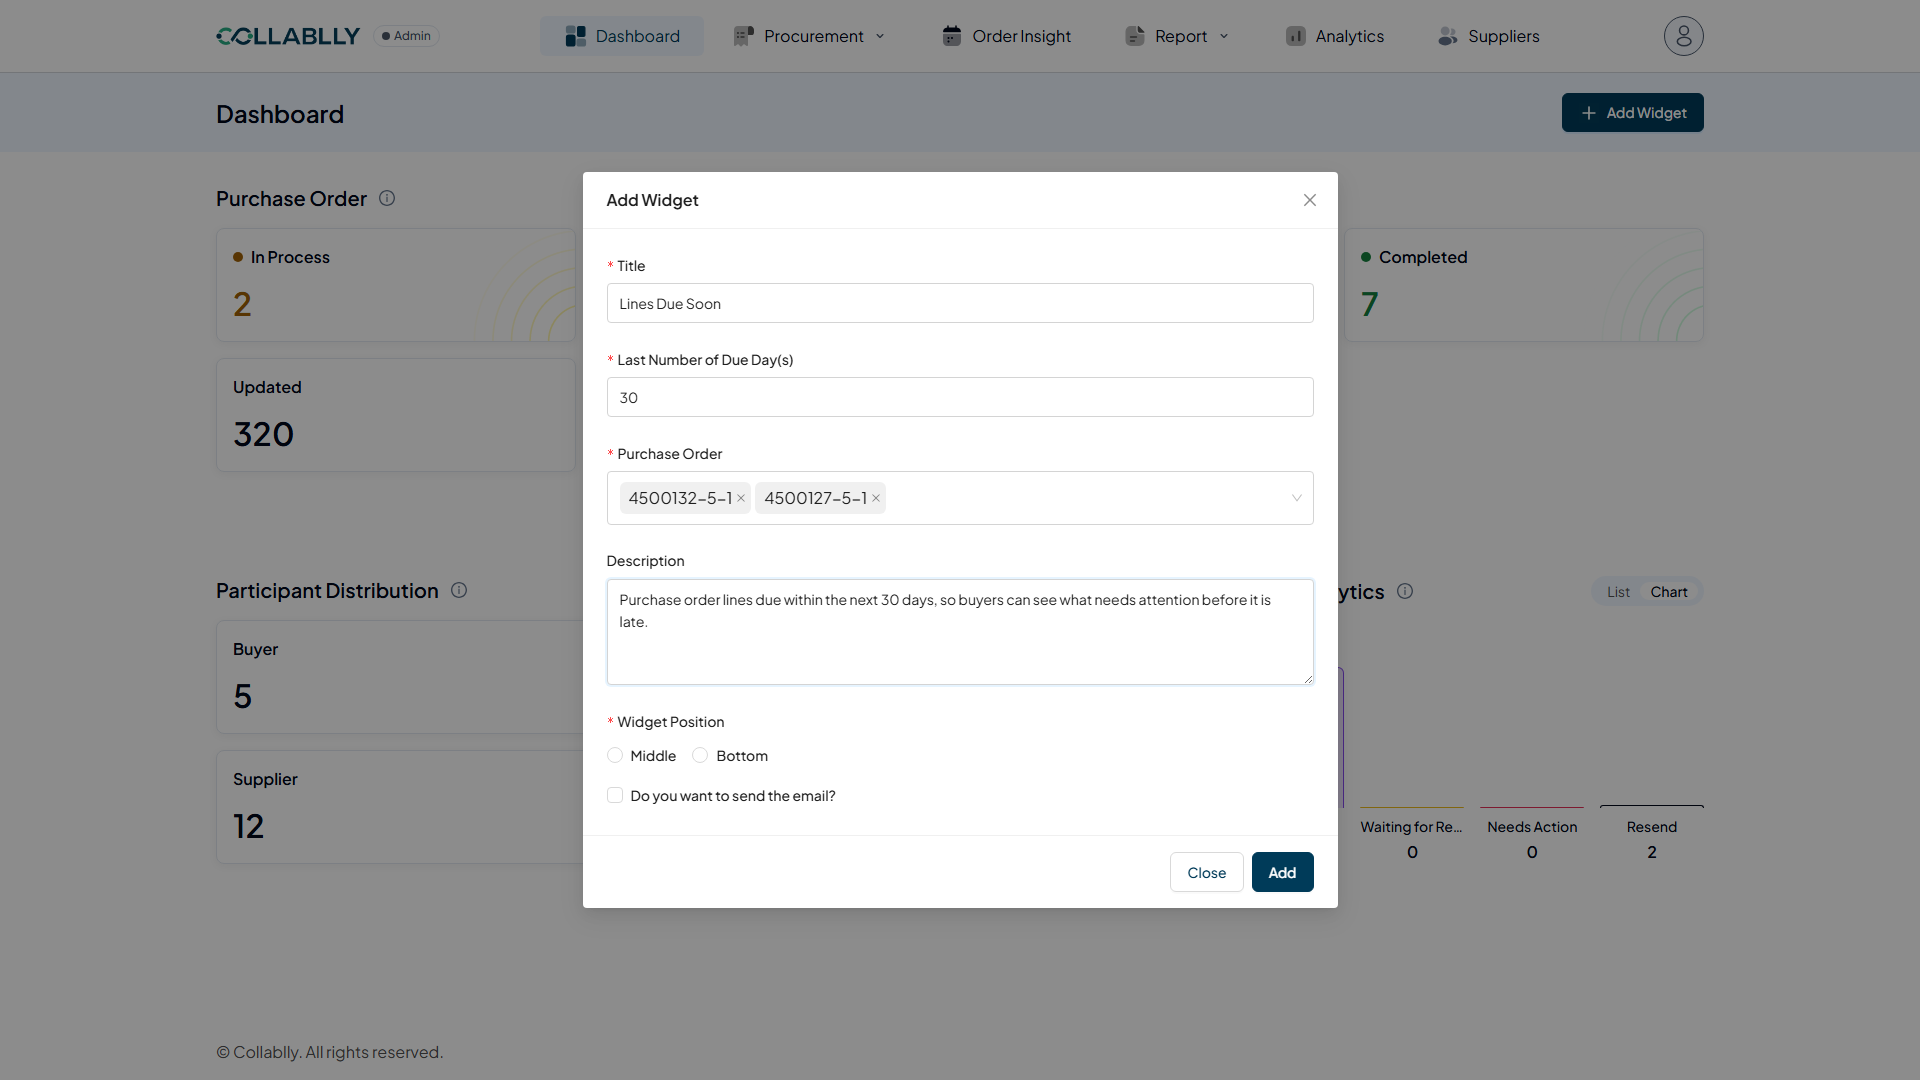
Description: a short note for anyone reading the card
Optional, but worth using, this is the explanatory text that shows under the widget's number once it's built, so other buyers looking at the Dashboard understand what they're seeing without having to ask.
- Step 8 of 17
Widget Position, and a checkbox worth understanding before you use it
Widget Position (Middle or Bottom) decides which column of the Dashboard the finished card lands in. Below it sits Do you want to send the email?, checking this would email a summary of the matching lines out on a schedule. It's a real, useful option for a widget meant to alert a team automatically, but it sends real email, so this guide leaves it unchecked and simply builds the widget as an on-screen card instead.
- Step 9 of 17
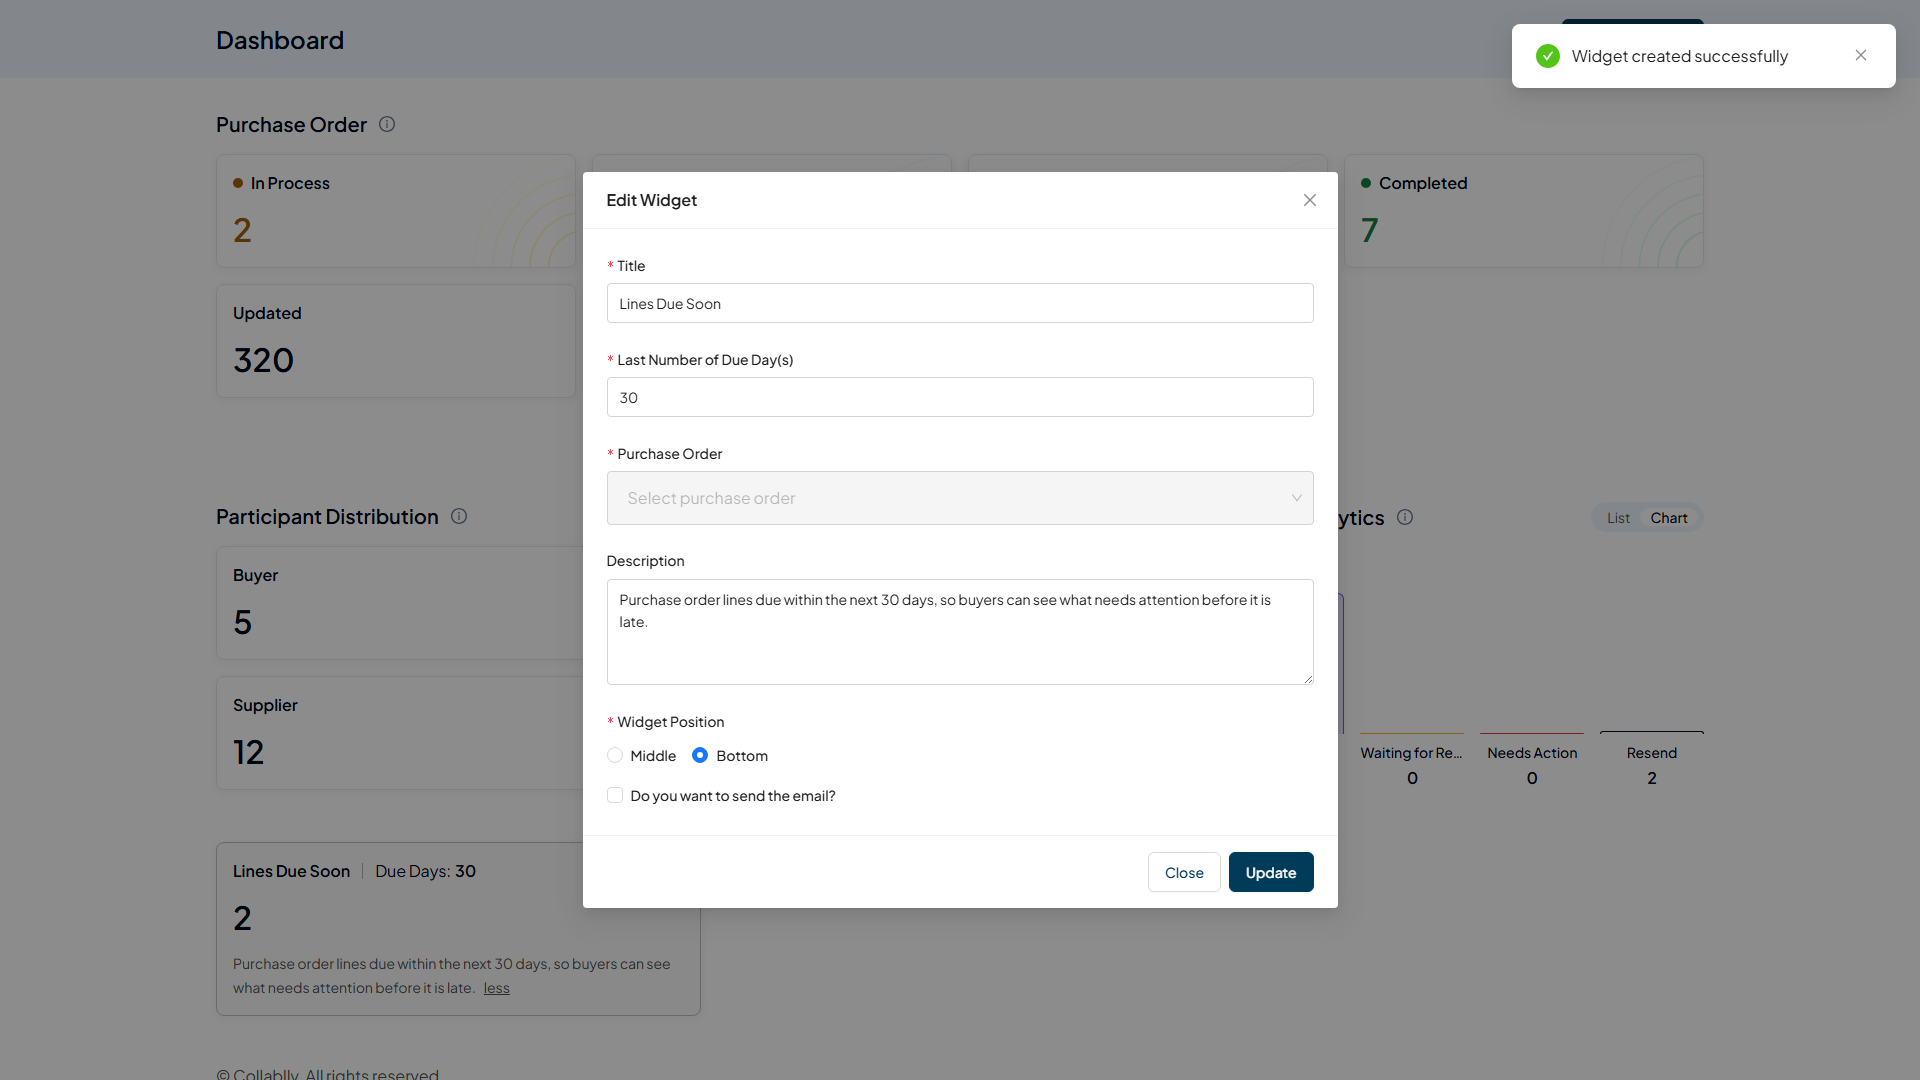
Widget created successfully
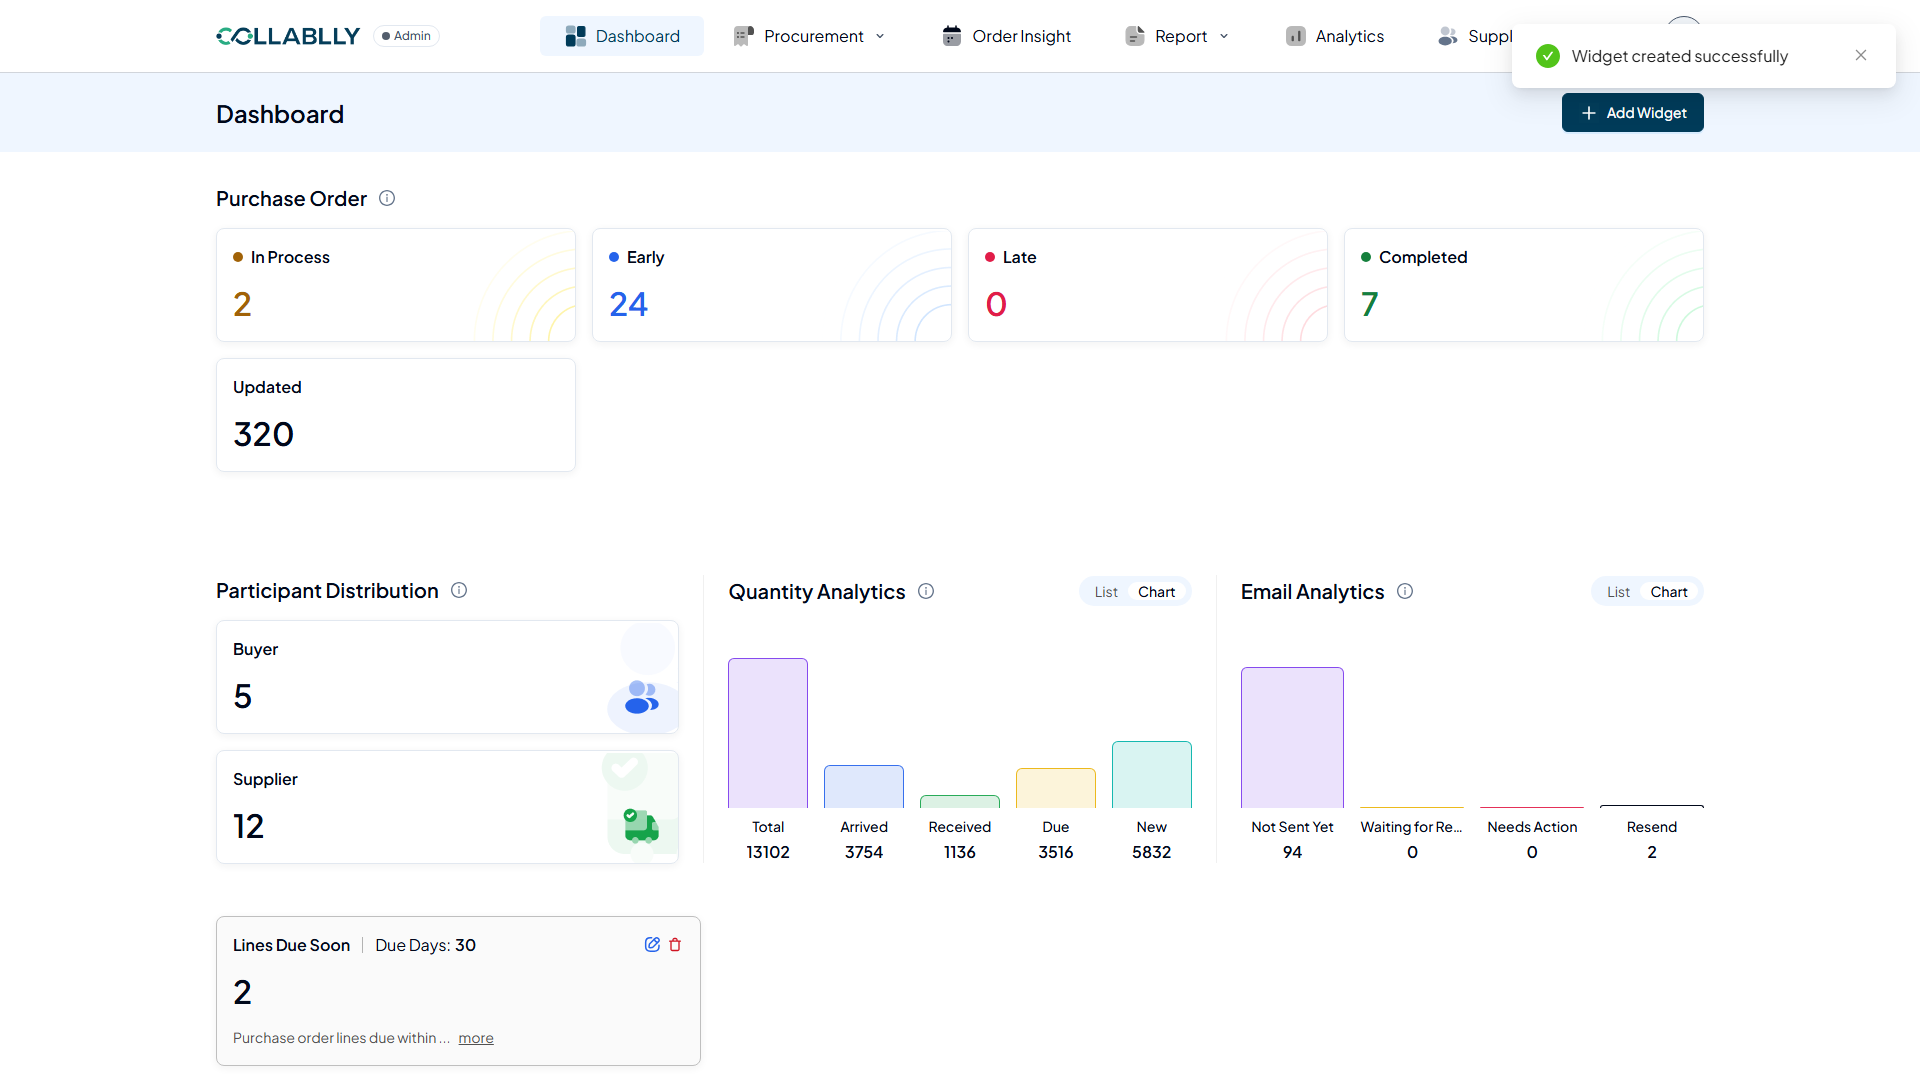
Click Add and the widget is live immediately, no separate publish step. A confirmation toast appears in the top right the moment it's saved.
- Step 10 of 17
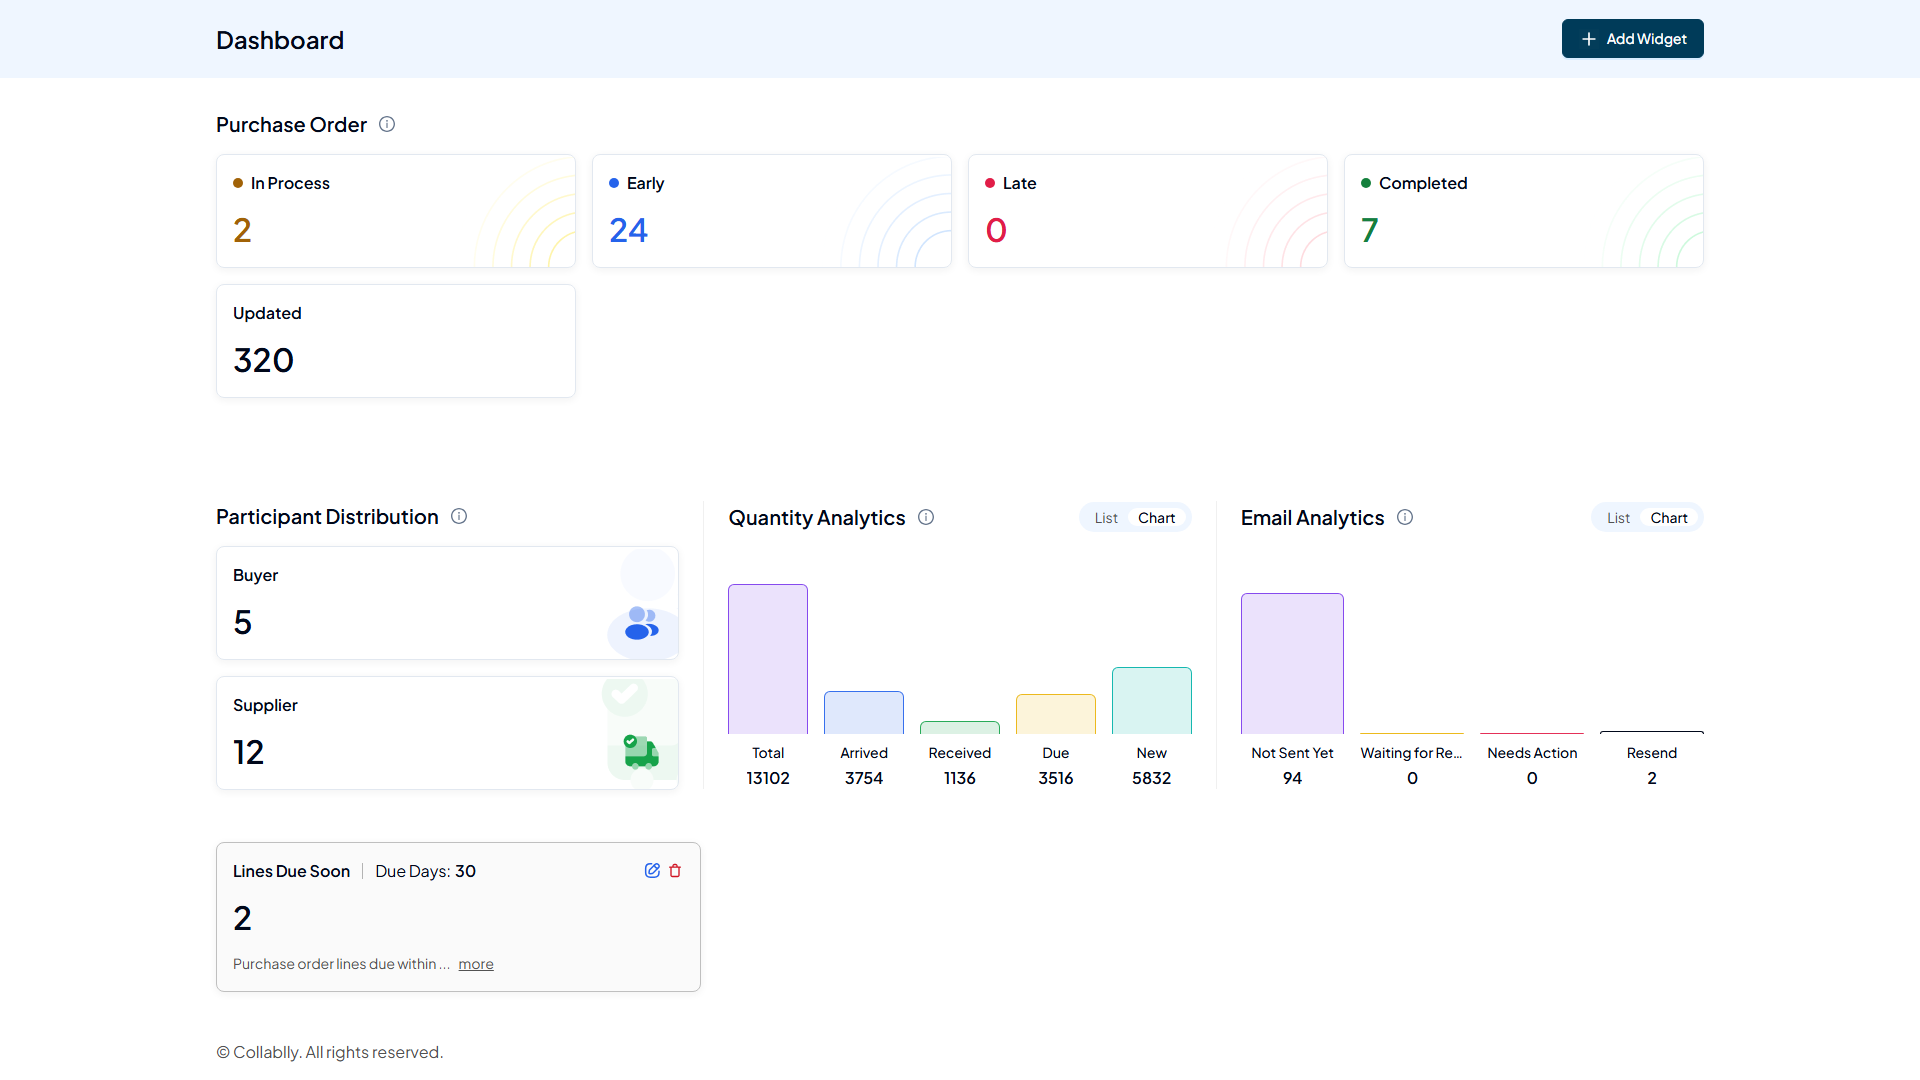
The finished widget
The new card shows the Title and Due Days right at the top, a large number (how many of the selected lines currently match), and the description underneath. This one reads 2, matching the two lines chosen a moment ago. Every widget card gets its own edit (pencil) and delete (trash can) icon in the corner.
- Step 11 of 17
Long descriptions collapse by default
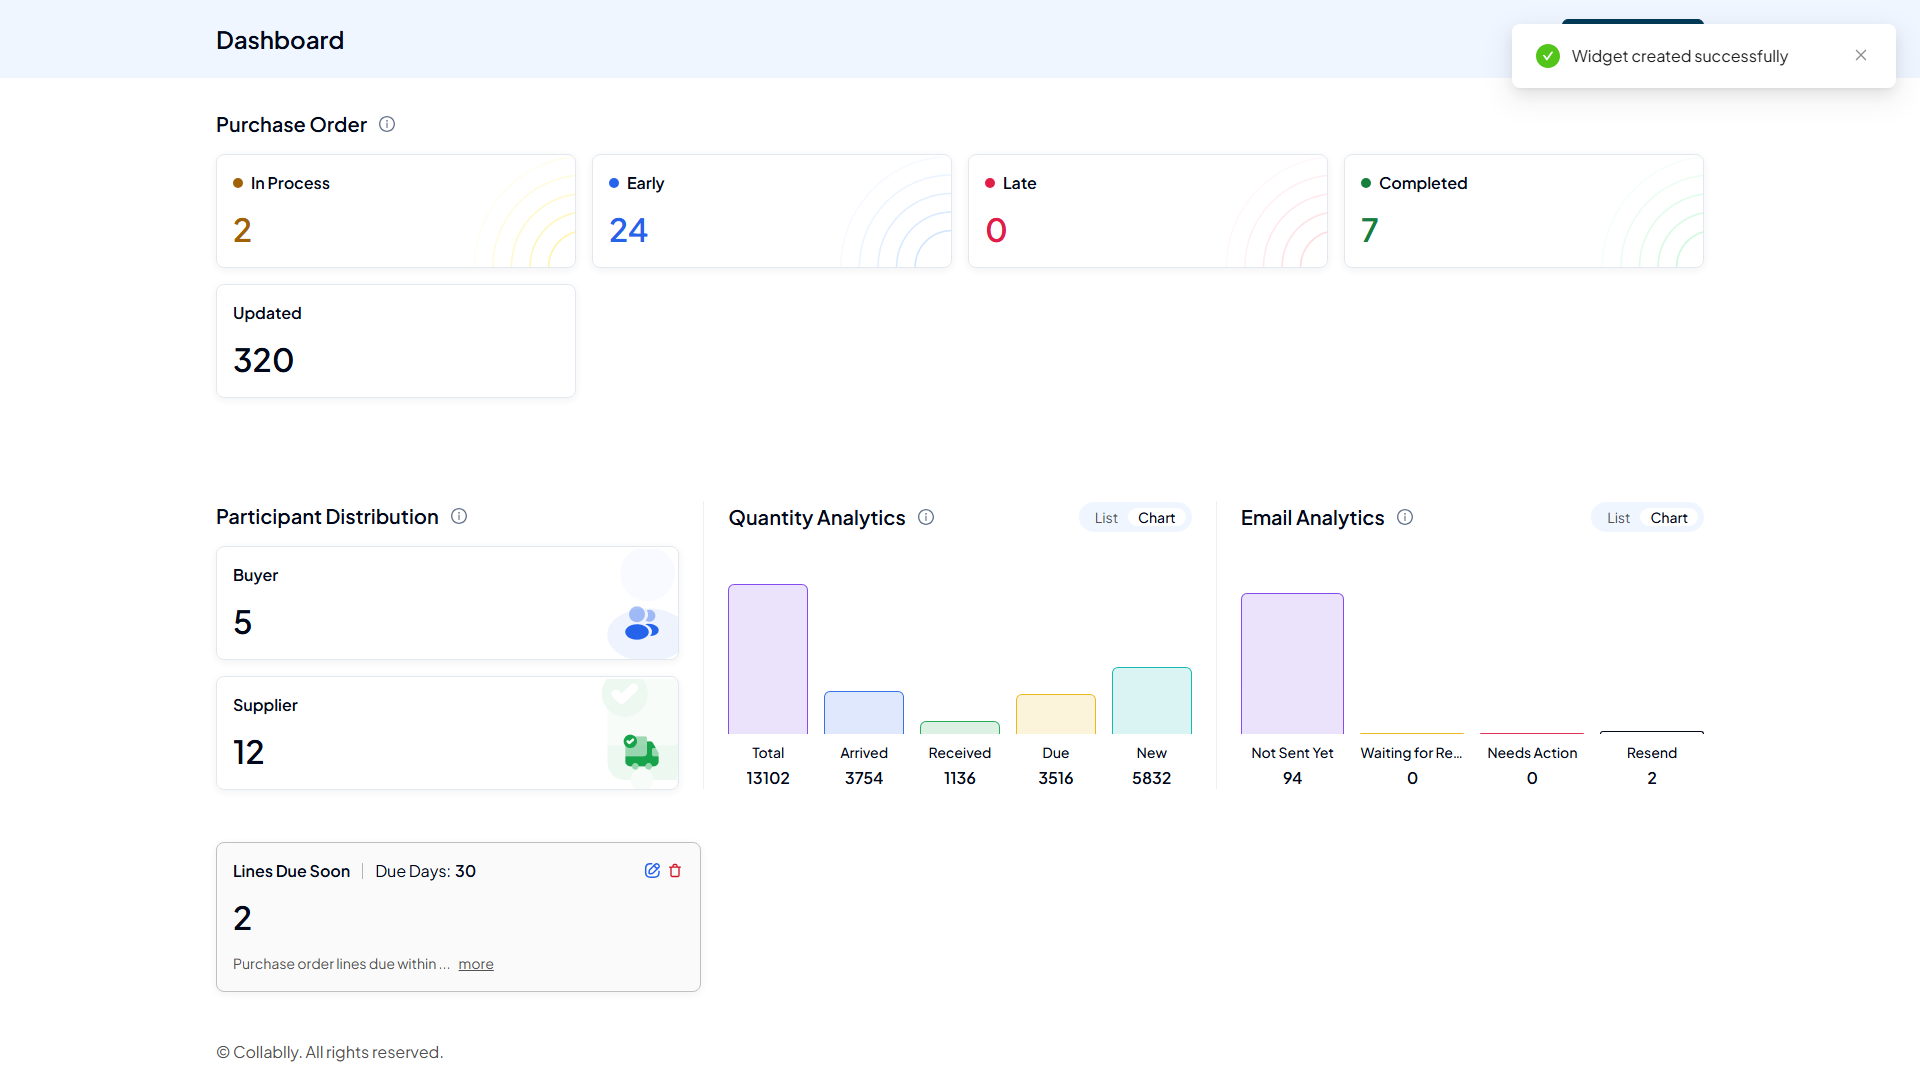
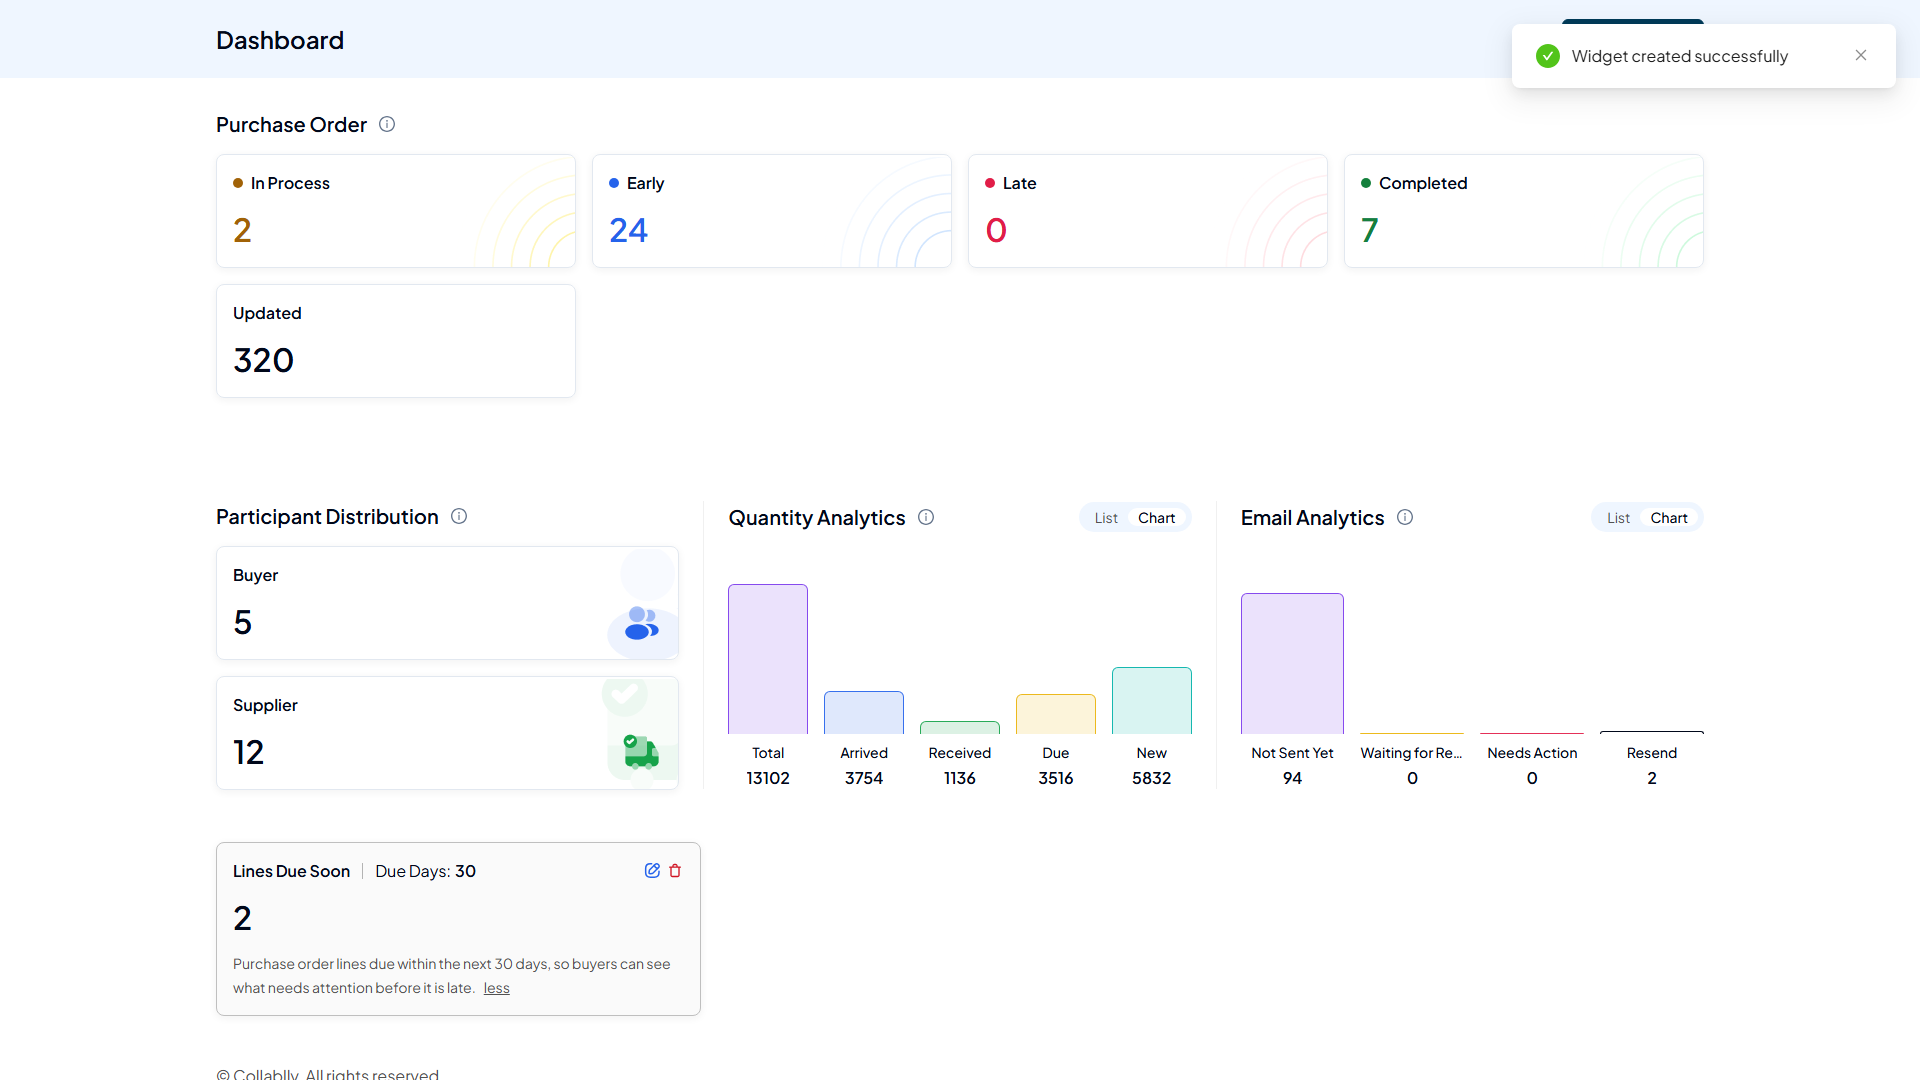
If a description is long, the card truncates it and adds a more link, click it to read the whole thing in place, then less to collapse it again. Nothing else on the card moves.
- Step 12 of 17
Editing reopens the same form, with one catch
The pencil icon opens Edit Widget, pre-filled with the Title, Due Days, Description, and Position already saved. One real quirk worth knowing: the Purchase Order field comes back empty even though the widget still shows its original 2 lines, it does not preload the previous selection. If you click Update without reselecting lines, be sure that's actually what you want, reselect them first if you're just changing something else, like the title or the due-day window.
- Step 13 of 17
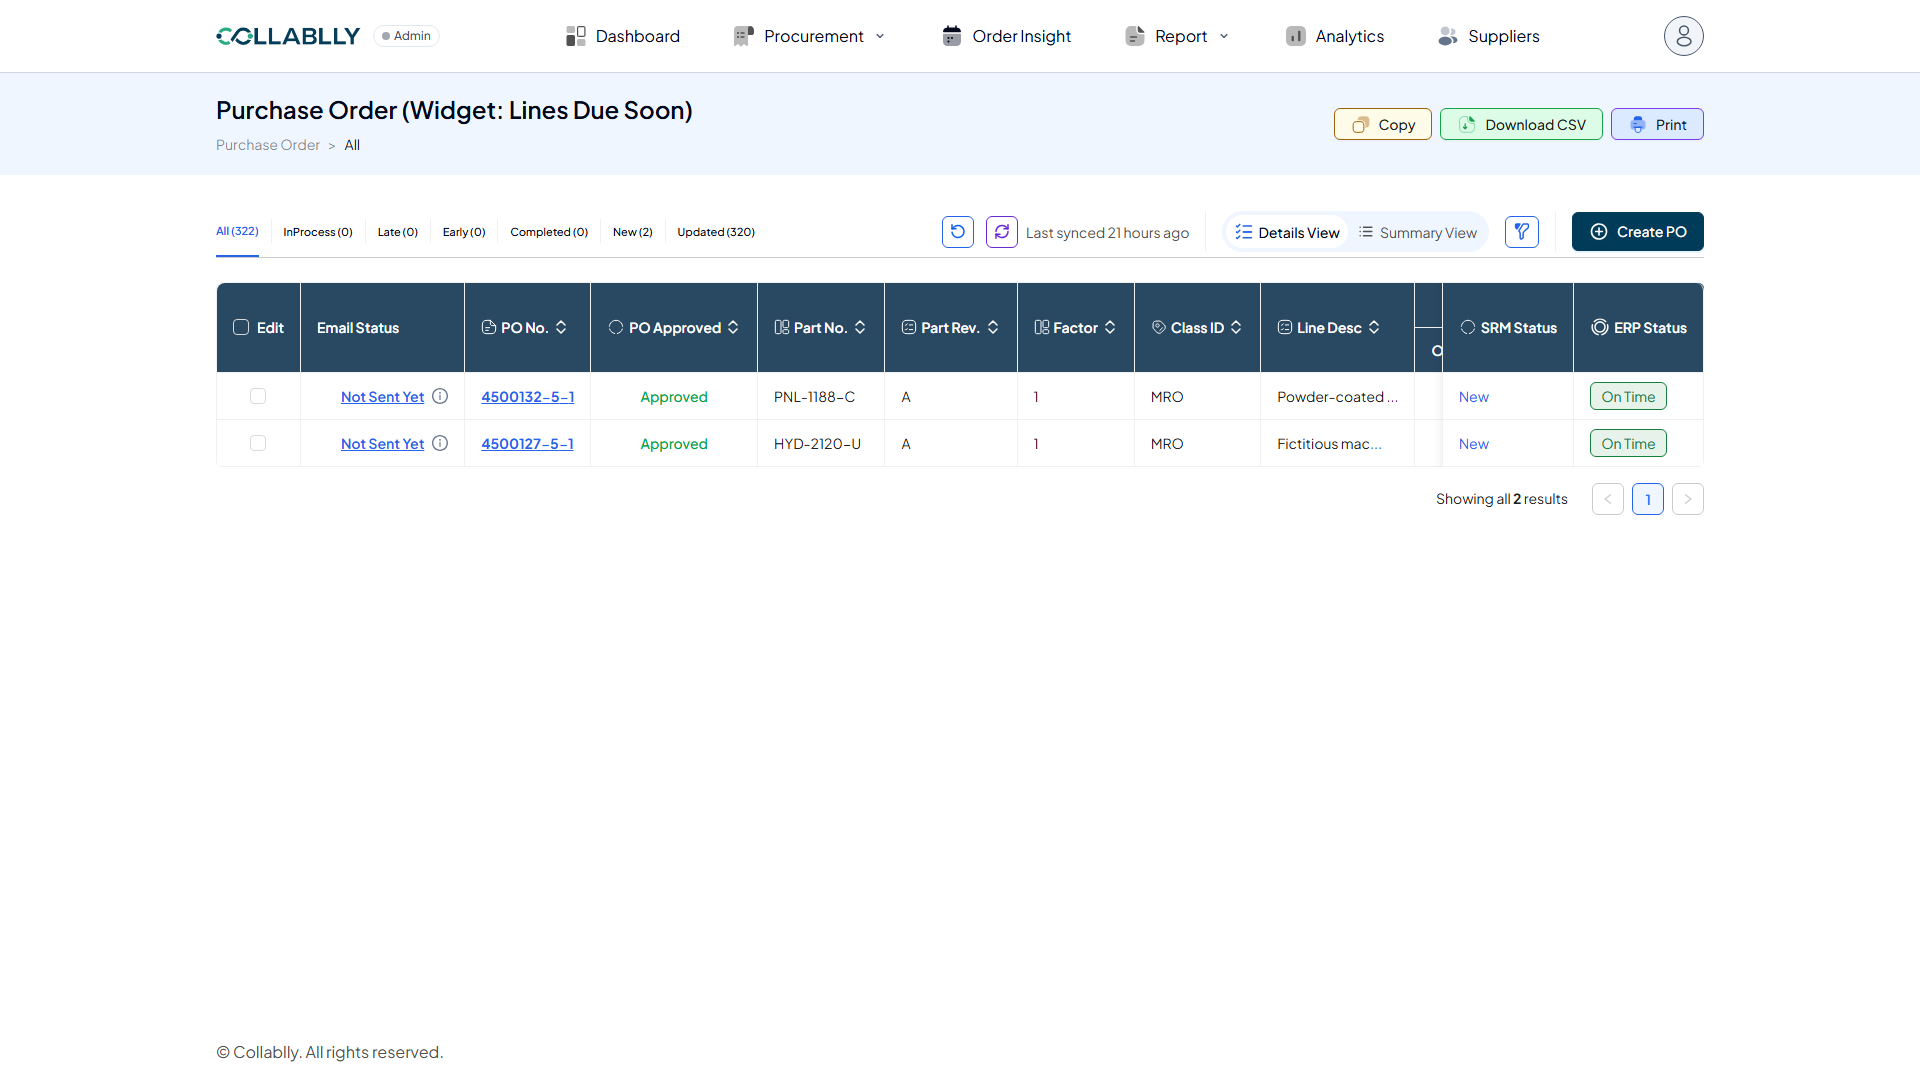
The big number is a link
Click the count on any widget card and it jumps straight to Purchase Order, Details View, filtered down to only the lines that widget is tracking. It's a fast way to go from a Dashboard summary to the real lines behind it.
- Step 14 of 17
The exact lines the widget is watching
The page title changes to Purchase Order (Widget: Lines Due Soon) and the table shows exactly the lines this widget tracks, both approved, both due soon, nothing else mixed in. This is a real, live filtered view, not a snapshot, the New (2) tab confirms it matches the widget's own count.
- Step 15 of 17
Don't need it anymore? Delete it
Back on the Dashboard, every widget card carries its own edit (pencil) and delete (trash can) icons in the corner. Click the trash can once you're done with a widget, it doesn't affect the real Purchase Orders it was tracking, only the card itself goes away.
- Step 16 of 17
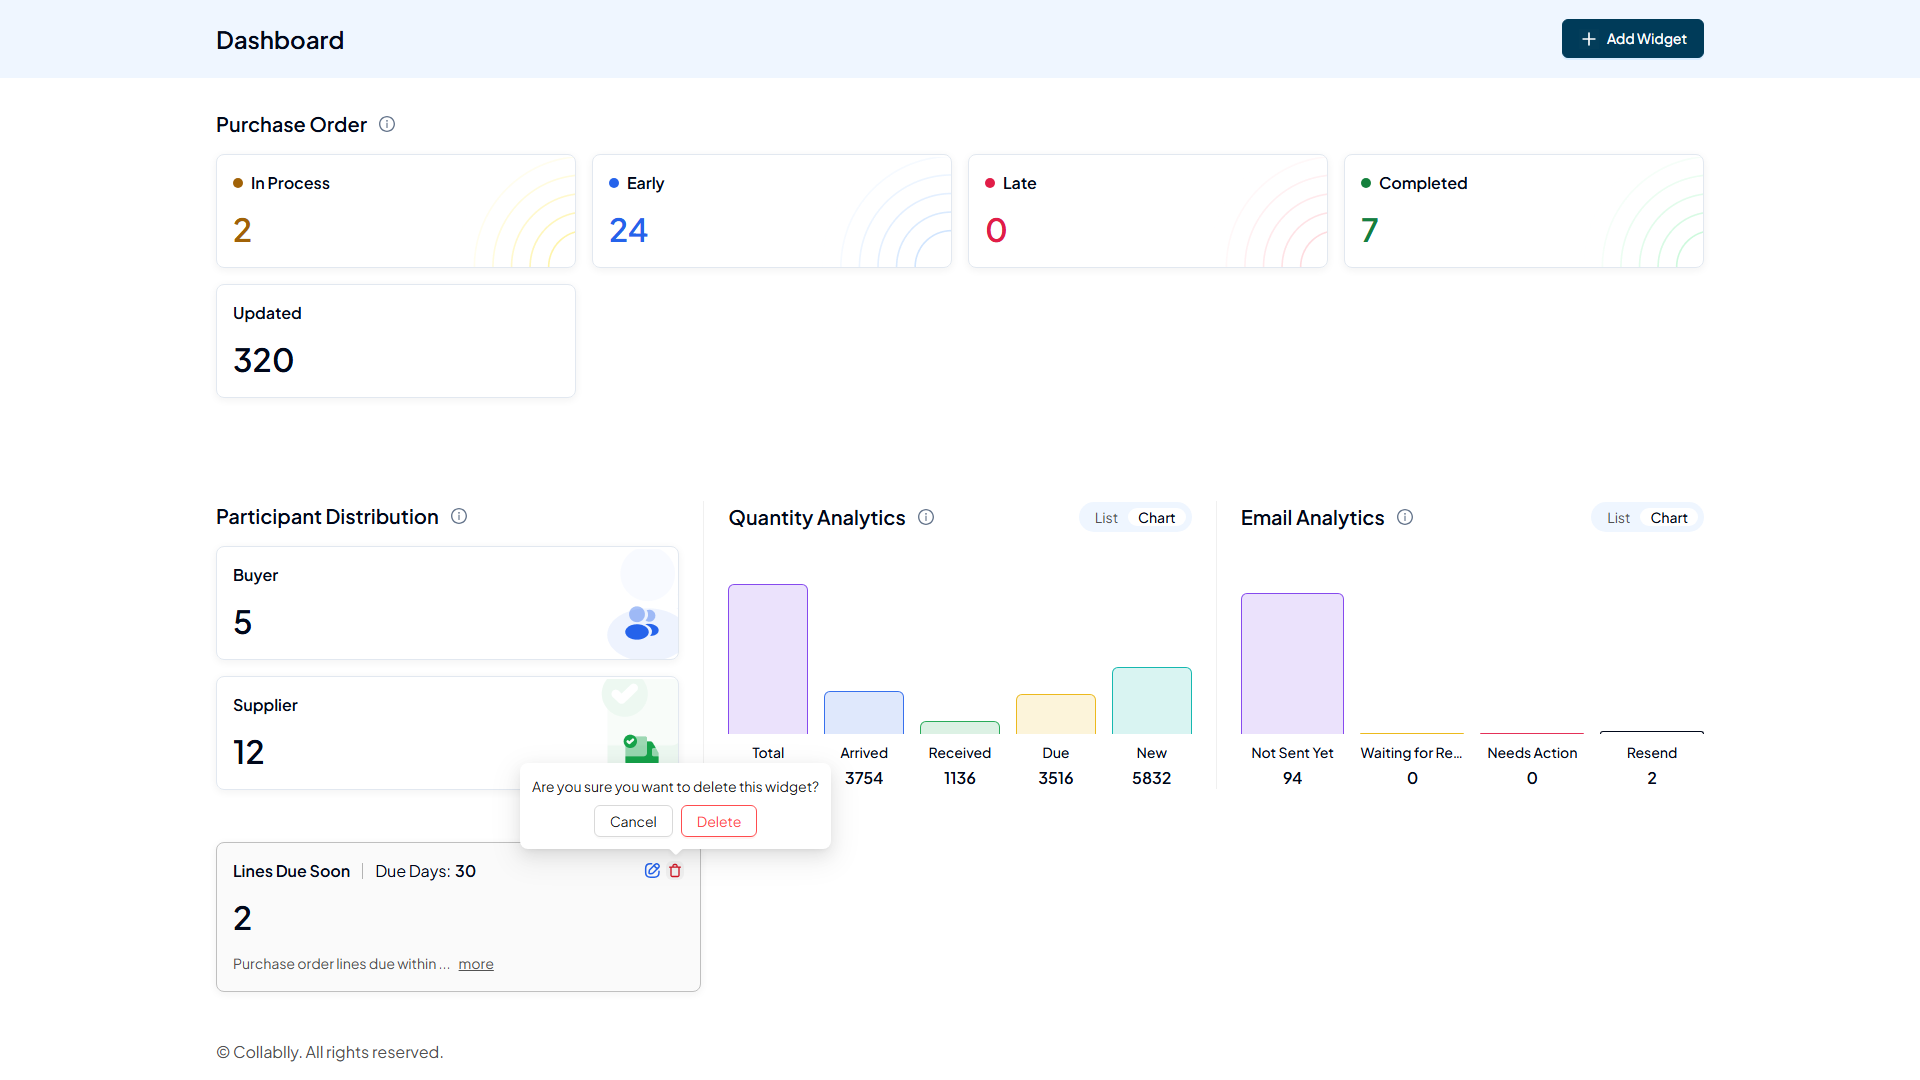
A real confirmation, not a silent delete
Are you sure you want to delete this widget? appears before anything happens, Cancel to back out, Delete to confirm. There's no undo after this, so it's worth a second look before clicking Delete.
- Step 17 of 17
Widget deleted successfully
The card disappears immediately and the Dashboard settles back to its original layout, confirmed by the same kind of toast that appeared when the widget was created. Add Widget is right there, top right, whenever it's needed again.